Lincoln Nautilus: Climate Control System - General Information / Air Conditioning (A/C) Clutch and Air Conditioning (A/C) Clutch Field Coil. General Procedures
Special Tool(s) / General Equipment
 |
412-001
(T71P-19703-B)
Remover, Compressor Pulley |
Activation
-
Remove the A/C compressor. Refer to Air Conditioning A/C Compressor procedure in Group 412.
-
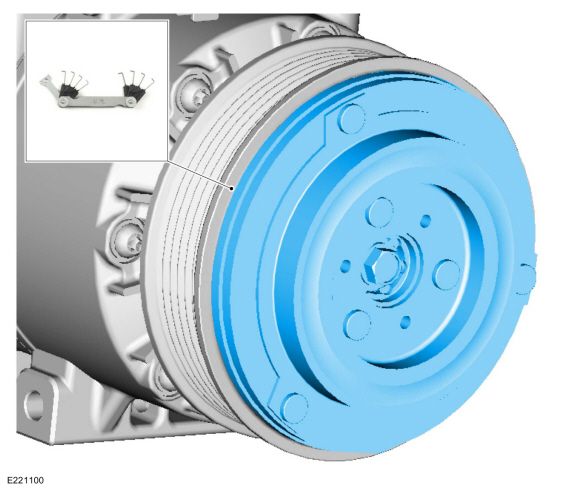
NOTE: If equipped with spring rubber clutch.
Using the universal clutch holding tool, hold the clutch and remove the A/C clutch disc and hub bolt.
-
-
For fixed compressor
Torque: 177 lb.in (20 Nm)
-
For EVDC compressor
Torque: 128 lb.in (14.5 Nm)
-
For fixed compressor
 |
-
NOTE: If equipped with spring plate clutch.
-
Hold the A/C compressor shaft.
-
Rotate the A/C clutch hub counter clockwise to remove.
-
For fixed compressor
Torque: 177 lb.in (20 Nm)
-
For EVDC compressor
Torque: 128 lb.in (14.5 Nm)
-
Hold the A/C compressor shaft.
 |
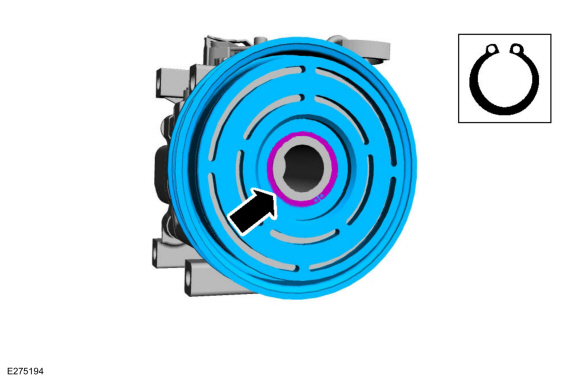
-
NOTE: Replacing the snap ring is only necessary when installing a new component.
Remove the A/C compressor pulley snap ring.
 |
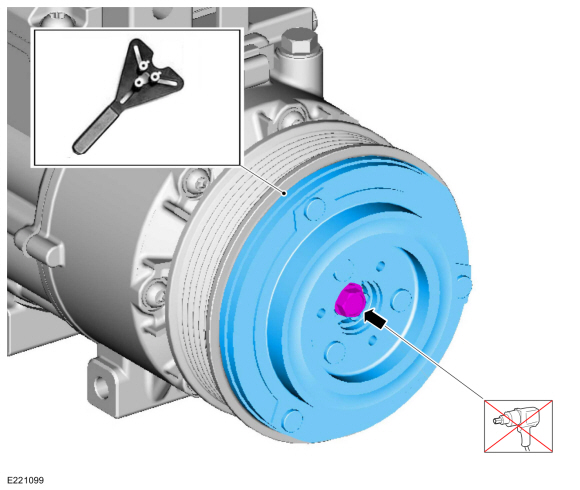
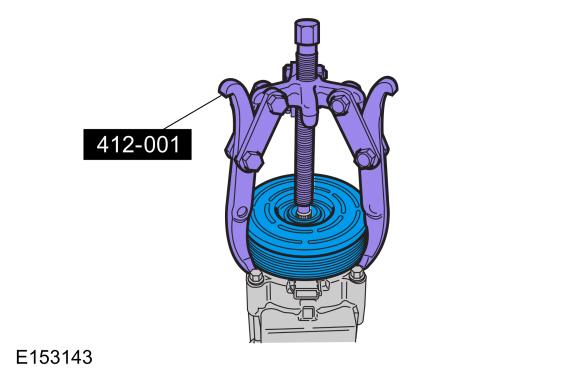
-
NOTE: Do not use air tools. Damage to the A/C clutch pulley or A/C compressor may result.
Remove the A/C compressor pulley.
Install Special Service Tool: 412-001 (T71P-19703-B) Remover, Compressor Pulley.
 |
-
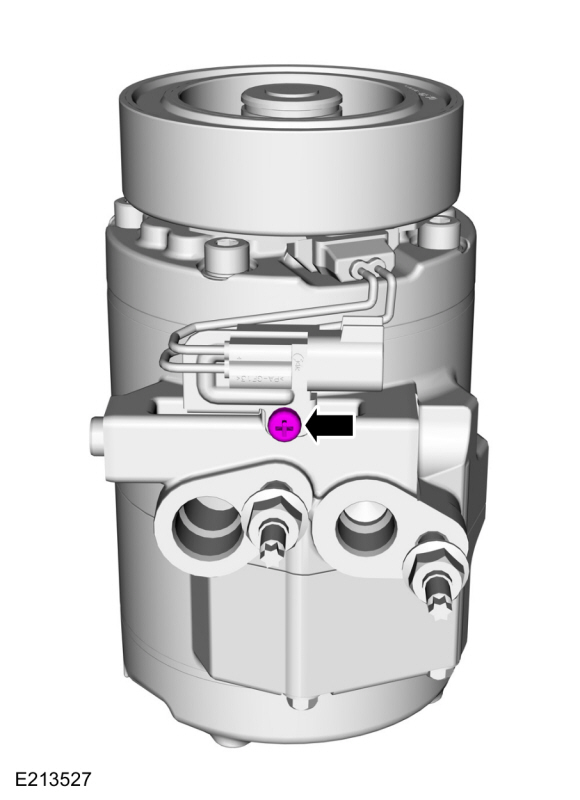
Remove the A/C clutch field coil electrical connector retainer.
Torque: 35 lb.in (4 Nm)
 |
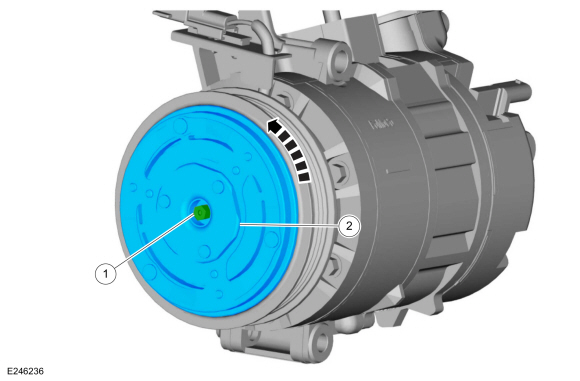
-
NOTE: Replacing the snap ring is only necessary when installing a new component.
Remove the A/C clutch field coil snap ring, and remove the clutch field coil.
.jpg) |
-
-
Visually inspect the A/C clutch disc and hub, compressor pulley and clutch field coil for damage.
-
Inspect for physical damage, including cracked or melted components or discoloration due to excessive heat.
-
Inspect for excessive wear, including grooving in the A/C clutch disc
and hub or the compressor pulley that is more than fingernail depth.
-
Inspect for roughness in the A/C compressor pulley bearing.
-
Visually inspect the A/C clutch disc and hub, compressor pulley and clutch field coil for damage.
-
To install, reverse the steps in this procedure.
-
NOTE: Spring plate clutch similar.
Measure and adjust the clutch air gap by removing or adding clutch disc and hub spacers. Refer to Air Conditioning A/C Clutch Air Gap Adjustment procedure in Group 412.
 |
 Refrigerant Oil Adding. General Procedures
Filling
Refer to the Refrigerant Oil Adding (when new components
are installed) chart below for refrigerant oil adding amounts and
methods of installation...
 Refrigerant System Tests - 2.0L EcoBoost (184kW/250PS) – MI4. General Procedures
Inspection
NOTE:
Procedure 1 — Ambient Temperature below 21 °C (70 °F).
NOTE:
Proper A/C system diagnosis on a vehicle’s
compressor is dependent on correct refrigerant system charge and tested
in ambient temperatures above 21°C (70°F)...
Other information:
Lincoln Nautilus 2018-2026 Service Manual: Overhead Console. Removal and Installation
Removal NOTE: Removal steps in this procedure may contain installation details. Insert trim tool in location(s) shown. Rotate the tool 90 degrees to release the overhead console rear retainers. Working from the rear to the front along each side release the overhead console retainers...
Lincoln Nautilus 2018-2026 Service Manual: Passive Anti-Theft System (PATS) - System Operation and Component Description. Description and Operation
System Operation System Diagram Item Description 1 IPC 2 Passive Key 3 RTM 4 GWM 5 GWM 6 PCM 7 PATS Center Antenna 8 Keyless Entry Rear Antenna 9 BJB 10 Door Handle Antennas 11 FCIM 12 Start/Stop Switch 13 Ignition Relay 14 BCM 15 PATS Enable Network Message Chart ..
Categories
- Manuals Home
- 1st Generation Nautilus Owners Manual
- 1st Generation Nautilus Service Manual
- Folding the Exterior Mirrors - Vehicles With: Manual Folding Mirrors. Folding the Exterior Mirrors - Vehicles With: Power Folding Mirrors
- Locating the Pre-Collision Assist Sensors
- Switching the Lane Keeping System On and Off. Switching the Lane Keeping System Mode
- New on site
- Most important about car
Auto-Start-Stop
What Is Auto-Start-Stop
The system is designed to help reduce fuel consumption and CO2 emissions by stopping the engine when it is idling, for example at traffic lights.
Auto-Start-Stop Precautions
WARNING: Apply the parking brake, shift into park (P), switch the ignition off and remove the key before you leave your vehicle. Failure to follow this instruction could result in personal injury or death.
WARNING: Apply the parking brake, shift into park (P), switch the ignition off and remove the key before you open the hood or have any service or repair work completed. If you do not switch the ignition off, the engine could restart at any time. Failure to follow this instruction could result in personal injury or d