Lincoln Nautilus: Information and Entertainment System - General Information - Vehicles With: SYNC 4 / Automotive Audio Bus (AAB) Cable. Removal and Installation
Removal
Instrument panel cable
NOTE: The original equipment automotive audio bus (AAB) cable is part of the instrument panel wiring harness and cannot be removed. This procedure refers to replacement of the cable only by overlaying the cable on the exisiting instrument panel harness.
-
Remove the information and entertainment display unit.
-
Remove the ACM .
Refer to: Audio Front Control Module (ACM) (415-00 Information and Entertainment System - General Information - Vehicles With: SYNC 4, Removal and Installation).
-
Remove the APIM .
Refer to: SYNC Module [APIM] (415-00 Information and Entertainment System - General Information - Vehicles With: SYNC 4, Removal and Installation).
-
Remove the instrument panel upper section.
Refer to: Instrument Panel Upper Section (501-12 Instrument Panel and Console, Removal and Installation).
-
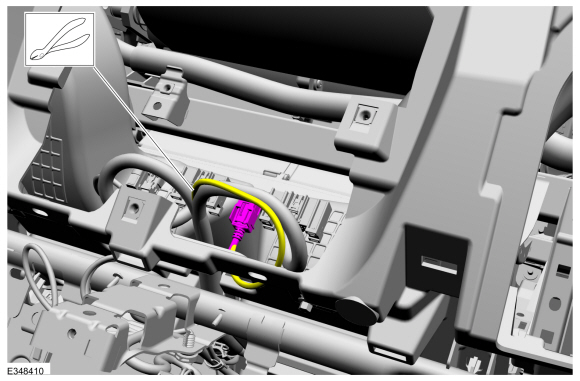
Disconnect the lower instrument panel AAB connector.
 |
Body cable
NOTE: The original equipment automotive audio bus (AAB) cable is part of the body wiring harness and cannot be removed. This procedure refers to replacement of the cable only by overlaying the cable on the exisiting body harness.
-
Remove the floor console.
Refer to: Floor Console (501-12 Instrument Panel and Console, Removal and Installation).
-
Remove the LH front seat.
Refer to: Front Seat (501-10A Front Seats, Removal and Installation).
-
Remove the LH B-pillar trim panel.
Refer to: B-Pillar Trim Panel (501-05 Interior Trim and Ornamentation, Removal and Installation).
-
Remove the rear seat backrest.
Refer to: Rear Seat Backrest (501-10B Rear Seats, Removal and Installation).
-
Remove the LH loadspace trim panel.
Refer to: Loadspace Trim Panel (501-05 Interior Trim and Ornamentation, Removal and Installation).
-
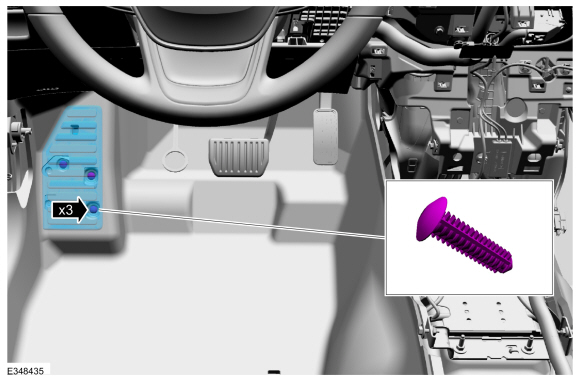
Release the pin type retainers and remove the driver foot rest.
 |
-
Remove the retainers and the LH front carpet.
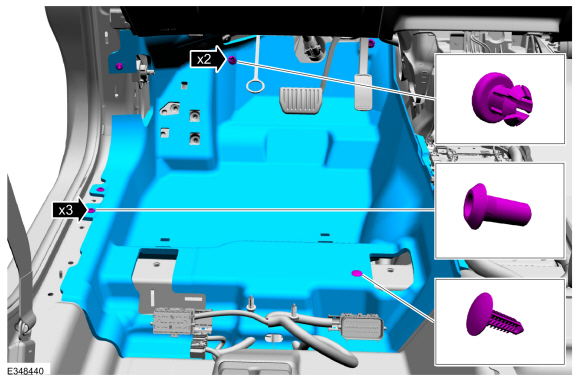 |
-
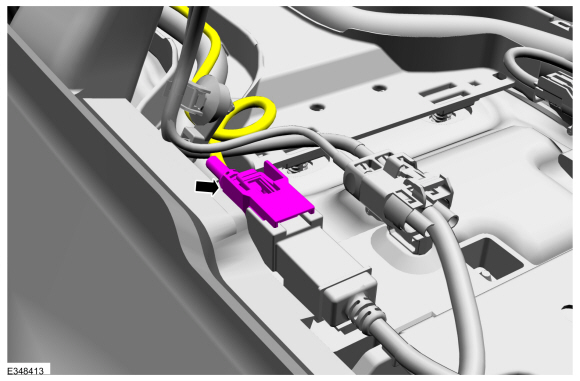
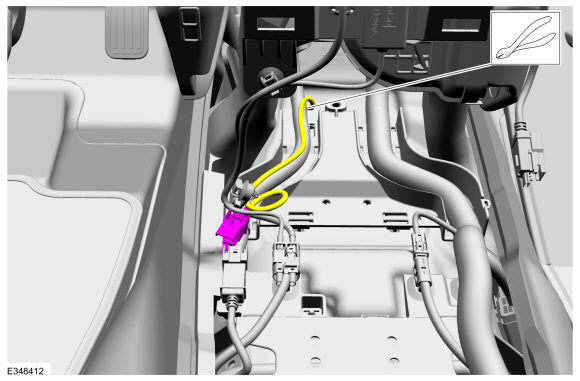
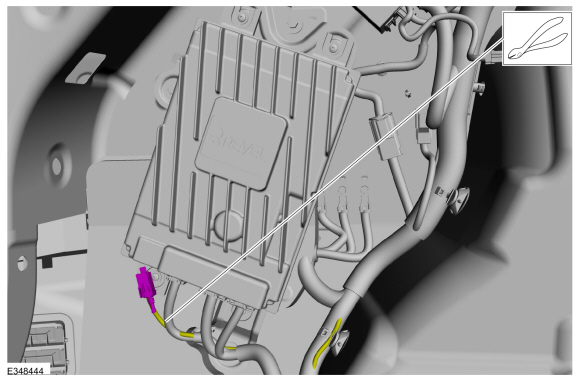
Disconnect the front body harness connector,
separate the connector retainers and postion the front body harness
connector.
.jpg) |
-
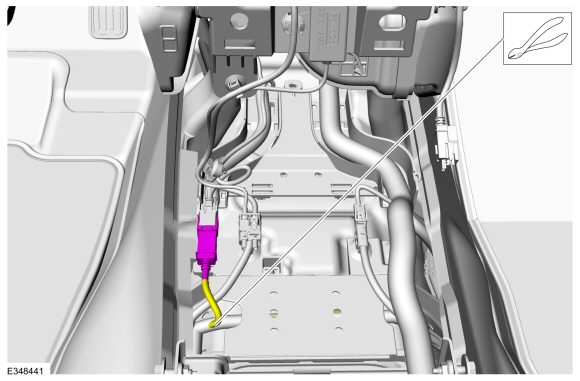
Disconnecct the rear body harness connector.
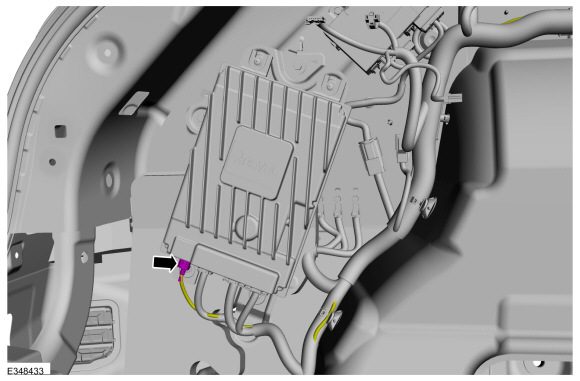 |
Installation
Instrument panel cable
NOTE: The original equipment automotive audio bus (AAB) cable is part of the body wiring harness and cannot be removed. This procedure refers to replacement of the cable only by overlaying the cable on the exisiting body harness.
-
Cut the upper connector end off the upper AAB cable where it enters the instrument panel wiring harness.
 |
-
Cut the lower connector end off the upper AAB cable where it enters the instrument panel wiring harness.
 |
-
-
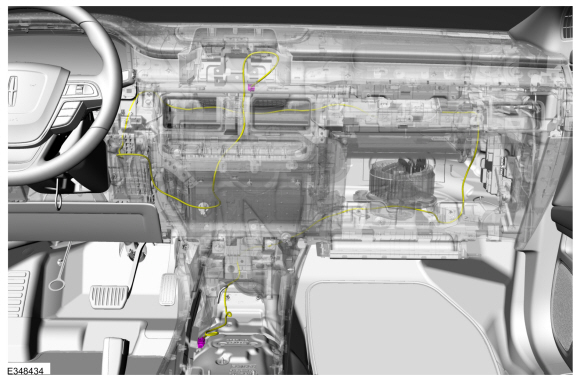
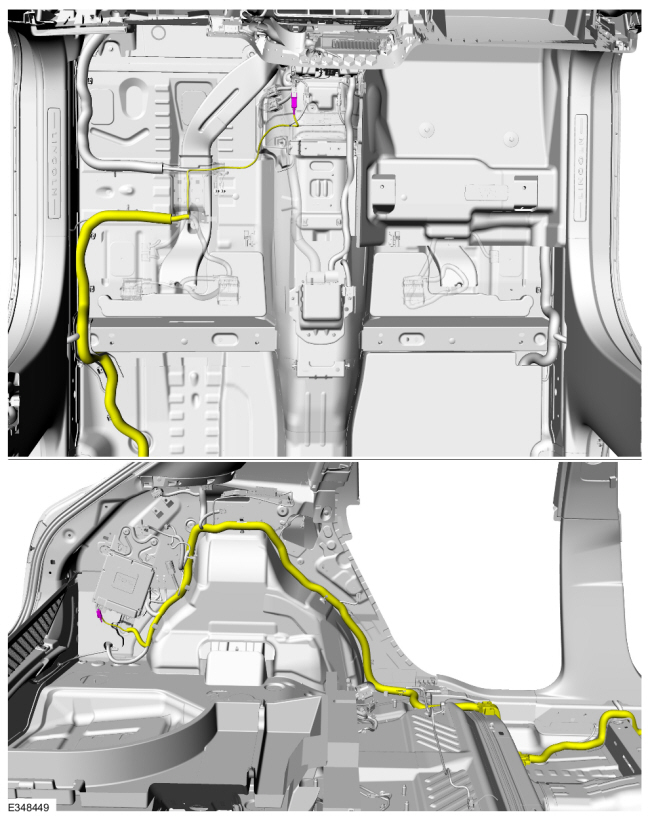
Route the new automotive audio bus AAB cable following the routing shown.
-
Secure the new automotive audio bus AAB cable, as necessary, to prevent NVH concerns.
-
Route the new automotive audio bus AAB cable following the routing shown.
 |
Body cable
NOTE: The original equipment automotive audio bus (AAB) cable is part of the body wiring harness and cannot be removed. This procedure refers to replacement of the cable only by overlaying the cable on the exisiting body harness.
-
Cut the front connector end off the AAB cable where it enters the body wiring harness.
 |
-
Cut the rear connector end off the AAB cable where it enters the body wiring harness.
 |
-
-
Route the new automotive audio bus AAB cable following the routing shown.
-
Secure the new automotive audio bus AAB cable, as necessary, to prevent NVH concerns.
-
Route the new automotive audio bus AAB cable following the routing shown.
 |
All vehicles
-
To install, reverse the removal procedure.
 Audio Unit Antenna Cable. Removal and Installation
Removal
NOTE:
The original equipment body and liftgate audio unit antenna
cable(s) are part of the wiring harness and cannot be removed. This
procedure refers to replacement of the cable(s) only by overlaying the
cable(s)...
 Cellular Antenna Cable. Removal and Installation
Removal
Right hand (RH) cellular antenna cable
Remove the RH loadspace trim panel.
Refer to: Loadspace Trim Panel (501-05 Interior Trim and Ornamentation, Removal and Installation)...
Other information:
Lincoln Nautilus 2018-2026 Service Manual: Liftgate. Removal and Installation
Removal NOTE: Removal steps in this procedure may contain installation details. Remove the liftgate upper trim panel. NOTE: Liftgate side trim panels removed for clarity. Disconnect the electrical connectors...
Lincoln Nautilus 2018-2026 Service Manual: Subwoofer and Amplifier Unit. Removal and Installation
Removal NOTE: Removal steps in this procedure may contain installation details. All vehicles Remove the RH loadspace trim panel. Refer to: Loadspace Trim Panel (501-05 Interior Trim and Ornamentation) . Subwoofer with integral amplifier Remove the bolts and the subwoofer assembly...
Categories
- Manuals Home
- 1st Generation Nautilus Owners Manual
- 1st Generation Nautilus Service Manual
- Auto Hold
- Opening and Closing the Hood
- Normal Scheduled Maintenance
- New on site
- Most important about car
Changing a Flat Tire
WARNING: If the tire pressure monitor sensor becomes damaged it may not function.
Note: The use of tire sealant may damage your tire pressure monitoring system and should only be used in roadside emergencies. If you must use a sealant, use the Tire Mobility Kit sealant. Replace the tire pressure monitoring system sensor and valve stem on the wheel by an authorized dealer after use of the sealant.
Note: The tire pressure monitoring system indicator light will illuminate when the spare tire is in use. To restore the full function of the monitoring system, all road wheels equipped with tire pressure monitoring sensors must be mounted on the vehicle.
If you get a flat tire while driving, do not apply the brake hea