Lincoln Nautilus: Body Closures / Liftgate. Removal and Installation
Removal
NOTE: Removal steps in this procedure may contain installation details.
-
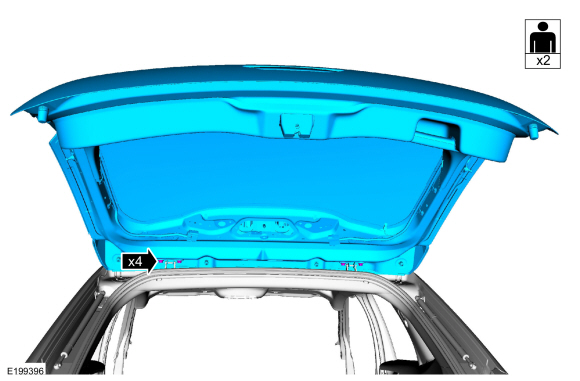
Remove the liftgate upper trim panel.
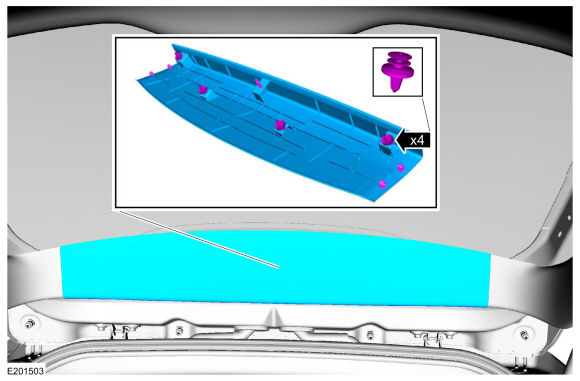 |
-
NOTE: Liftgate side trim panels removed for clarity.
-
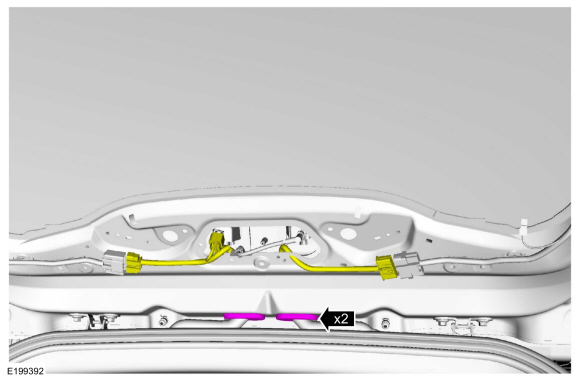
Disconnect the electrical connectors.
-
Remove the retainers.
-
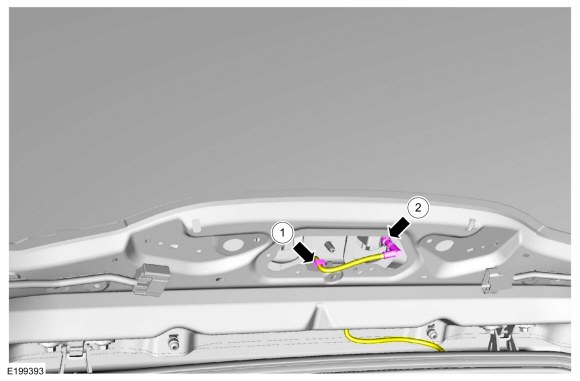
Disconnect the electrical connectors.
 |
-
Remove the grommets and route the harness out of the liftgate.
 |
-
Remove the rear washer hose.
-
Remove the retainer.
-
Disconnect the rear washer hose and route through the liftgate.
-
Remove the retainer.
 |
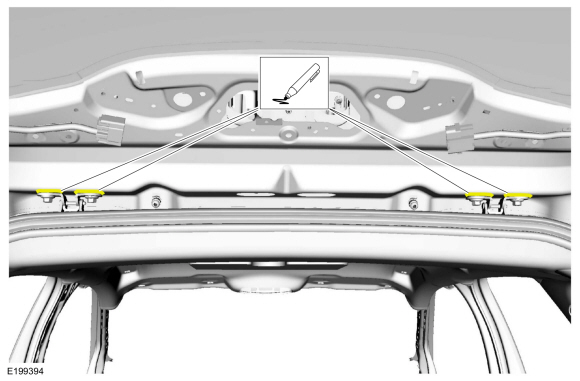
-
Mark the location of the liftgate hinge bolts.
 |
-
NOTE: This step requires the aid of another technician.
On both sides.
Remove the clips holding the liftgate struts or the power liftgate motor and position aside.
.jpg) |
-
NOTE: This step requires the aid of another technician.
Remove the liftgate bolts and remove the liftgate from the vehicle.
Torque: 22 lb.ft (30 Nm)
 |
Installation
- To install, reverse the removal procedure.
-
Align the liftgate as necessary.
Refer to: Liftgate Alignment (501-03 Body Closures, General Procedures).
 Hands-Free Liftgate Actuation Upper Sensor. Removal and Installation
Removal
NOTE:
Removal steps in this procedure may contain installation details.
Remove the rear bumper cover.
Refer to: Rear Bumper Cover (501-19 Bumpers, Removal and Installation)...
 Liftgate Anti-Pinch Switch. Removal and Installation
Removal
NOTE:
LH side shown, RH side similar.
Remove the liftgate trim panel.
Refer to: Liftgate Trim Panel (501-05 Interior Trim and Ornamentation, Removal and Installation)...
Other information:
Lincoln Nautilus 2018-2026 Owners Manual: Data Privacy
WARNING: Do not connect wireless plug-in devices to the data link connector. Unauthorized third parties could gain access to vehicle data and impair the performance of safety related systems. Only allow repair facilities that follow our service and repair instructions to connect their equipment to the data link connector...
Lincoln Nautilus 2018-2026 Service Manual: Seatbelt Tongue Rotated On Belt. General Procedures
Adjustment NOTE: Typical seatbelt tongue shown, others similar. Fold the seatbelt as indicated. Feed the folded portion of the seatbelt into the seatbelt tongue. Pull the seatbelt through the seatbelt tongue to remove the twist in the seatbelt...
Categories
- Manuals Home
- 1st Generation Nautilus Owners Manual
- 1st Generation Nautilus Service Manual
- Auto-Start-Stop
- Auto Hold
- Programming the Garage Door Opener to Your Garage Door Opener Motor
- New on site
- Most important about car
Changing a Flat Tire
WARNING: If the tire pressure monitor sensor becomes damaged it may not function.
Note: The use of tire sealant may damage your tire pressure monitoring system and should only be used in roadside emergencies. If you must use a sealant, use the Tire Mobility Kit sealant. Replace the tire pressure monitoring system sensor and valve stem on the wheel by an authorized dealer after use of the sealant.
Note: The tire pressure monitoring system indicator light will illuminate when the spare tire is in use. To restore the full function of the monitoring system, all road wheels equipped with tire pressure monitoring sensors must be mounted on the vehicle.
If you get a flat tire while driving, do not apply the brake hea