Lincoln Nautilus: Climate Control System - General Information / Air Conditioning (A/C) Compressor Inlet Line - 2.0L EcoBoost (184kW/250PS) – MI4. Removal and Installation
Lincoln Nautilus 2018-2026 Service Manual / Electrical / Climate Control System / Climate Control System - General Information / Air Conditioning (A/C) Compressor Inlet Line - 2.0L EcoBoost (184kW/250PS) – MI4. Removal and Installation
Removal
NOTICE: During the removal of components, cap, tape or otherwise appropriately protect all openings to prevent the ingress of dirt or other contamination. Remove protective materials prior to installation.
NOTE: Removal steps in this procedure may contain installation details.
-
Recover the refrigerant. Refer to the appropriate Recovery procedure in Group 412.
-
With the vehicle in NEUTRAL, position it on a hoist.
Refer to: Jacking and Lifting - Overview (100-02 Jacking and Lifting, Description and Operation).
-
Remove the bolts, the retainers and the front underbody shield.
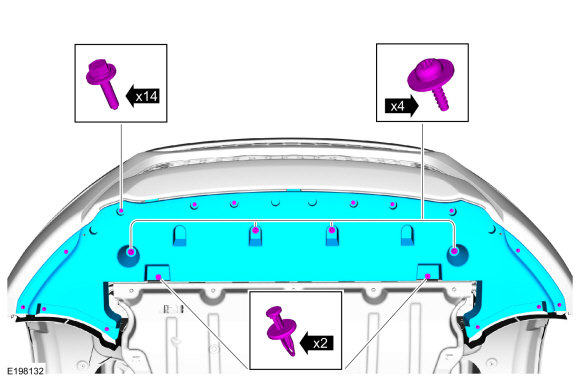 |
-
Remove the retainers and the underbody shield.
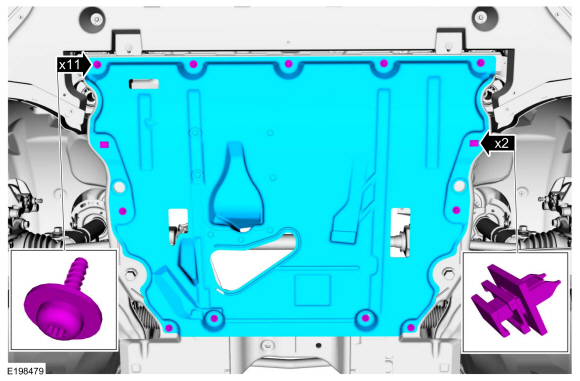 |
-
-
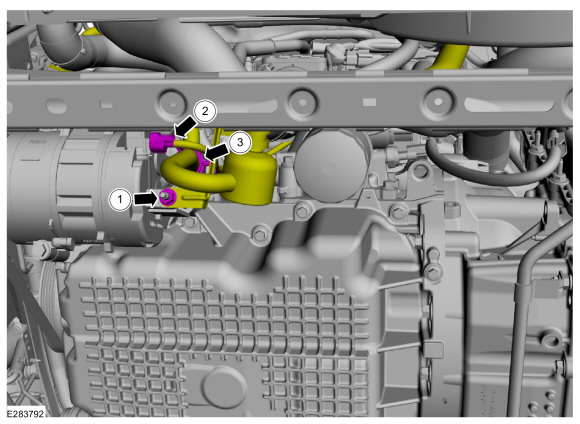
Remove the A/C compressor outlet line nut.
Torque: 159 lb.in (18 Nm)
-
Make sure to cover any open ports to prevent debris from entering the system.
-
Remove the A/C compressor outlet line nut.
 |
-
-
Remove the nut.
Torque: 18 lb.ft (25 Nm)
-
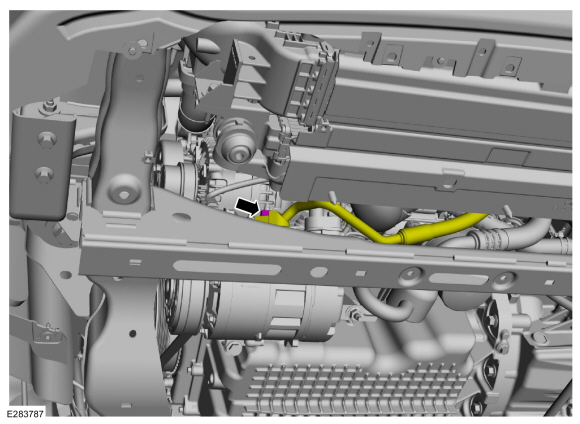
Disconnect the electrical connector.
-
Disconnect the wiring retainer.
-
Remove the nut.
 |
-
-
Remove the A/C compressor inlet line nut.
Torque: 159 lb.in (18 Nm)
-
Disconnect the wiring retainer.
-
Make sure to cover any open ports to prevent debris from entering the system.
-
Remove the A/C compressor inlet line nut.
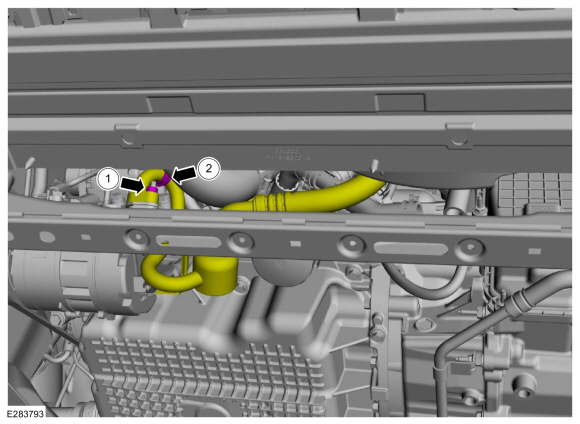 |
-
-
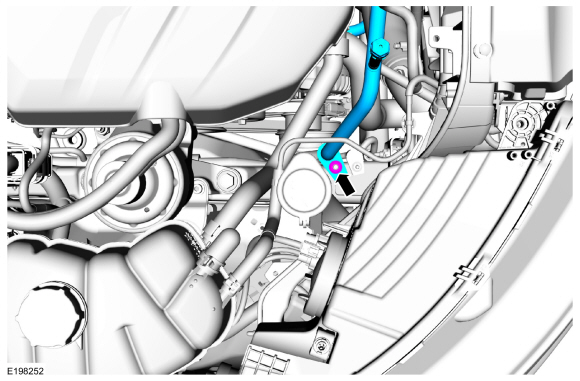
Remove the A/C compressor inlet line nut and the A/C compressor inlet line.
Torque: 159 lb.in (18 Nm)
-
Make sure to cover any open ports to prevent debris from entering the system.
-
Remove the A/C compressor inlet line nut and the A/C compressor inlet line.
 |
Installation
-
To install, reverse the removal procedure.
-
NOTICE: Only use the specified material to lubricate the seals.
Install and lubricate new O-ring seals. Refer to the appropriate Specifications in Group 412.
-
Lubricate the refrigerant system with the correct amount
of clean PAG oil. Refer to the appropriate Refrigerant Oil Adding
procedure in Group 412.
 Air Conditioning (A/C) Compressor - 2.0L EcoBoost (184kW/250PS) – MI4. Removal and Installation
Removal
NOTICE:
If installing a new A/C compressor due to an internal failure of the
old unit, carry out the following procedures to remove contamination
from the A/C system...
 Air Conditioning (A/C) Compressor Outlet Line - 2.0L EcoBoost (184kW/250PS) – MI4. Removal and Installation
Removal
NOTICE:
During the removal of components, cap, tape or otherwise
appropriately protect all openings to prevent the ingress of dirt or
other contamination...
Other information:
Lincoln Nautilus 2018-2026 Service Manual: Rear Floor Panel Crossmember. Removal and Installation
Special Tool(s) / General Equipment 8 mm Drill Bit MIG/MAG Welding Equipment Spot Weld Drill Bit Locking Pliers Materials Name Specification Seam SealerTA-2-B, 3M™ 08308, LORD Fusor® 803DTM - Removal NOTE: Factory welds may be substituted with resistance or metal inert gas (MIG) plug welds...
Lincoln Nautilus 2018-2026 Service Manual: Clockspring Adjustment. General Procedures
Special Tool(s) / General Equipment Adhesive Tape WARNING: If the clockspring is not correctly centralized, it may fail prematurely. If in doubt, repeat the centralizing procedure. Failure to follow these instructions may increase the risk of serious personal injury or death in a crash...
Categories
- Manuals Home
- 1st Generation Nautilus Owners Manual
- 1st Generation Nautilus Service Manual
- Autounlock and Autolock
- Drive Mode Control
- Engine Oil Capacity and Specification - 2.0L
- New on site
- Most important about car
Clearing the Garage Door Opener. Reprogramming the Garage Door Opener. Garage Door Opener Radio Frequencies
Clearing the Garage Door Opener

Copyright © 2026 www.linautilus.com