Lincoln Nautilus: Front End Body Panels / Fender. Removal and Installation
Removal
NOTE:
Removal steps in this procedure may contain installation details.
NOTE:
LH side shown, RH side similar.
-
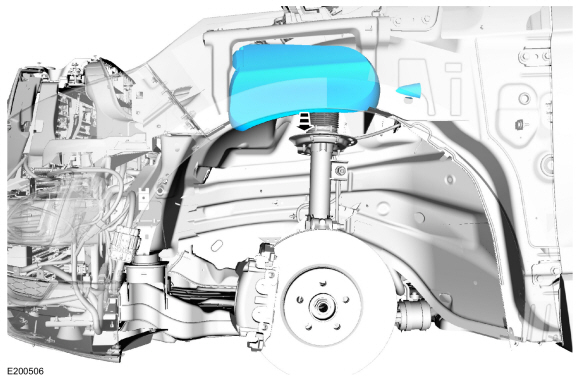
Remove the fender splash shield.
Refer to: Fender Splash Shield (501-02 Front End Body Panels, Removal and Installation).
-
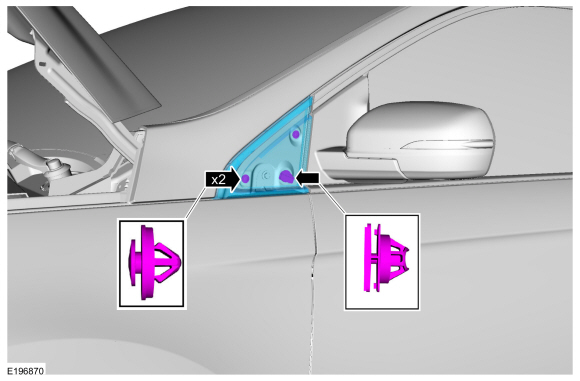
Remove the retainers and the door frame moulding.
-
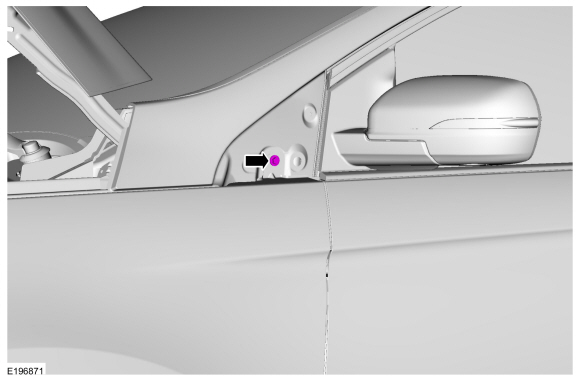
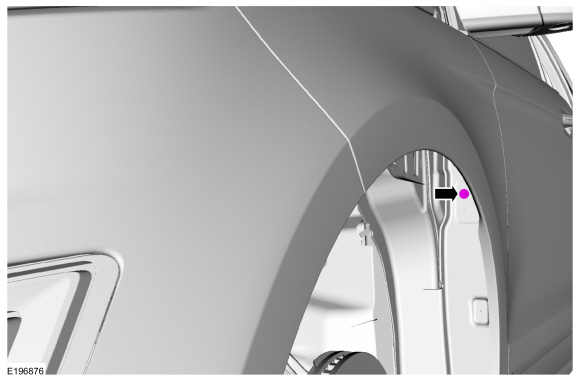
Remove the bolt.
Torque:
106 lb.in (12 Nm)
-
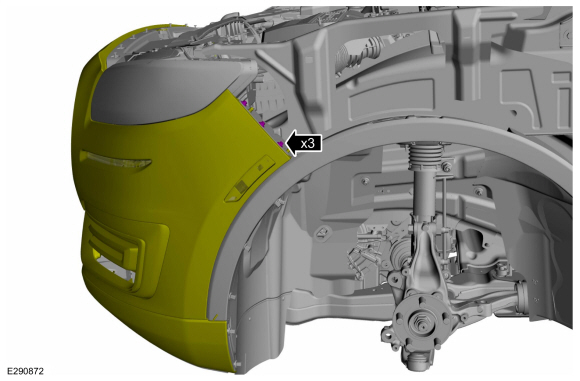
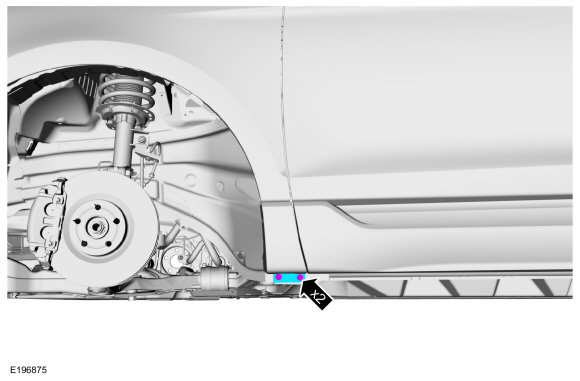
Remove the bolts.
Torque:
71 lb.in (8 Nm)
-
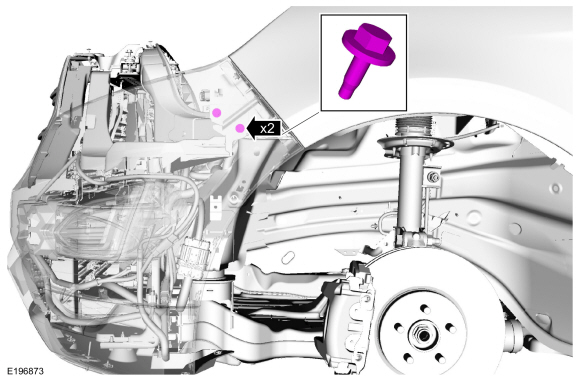
Remove the fender bolts.
Torque:
55 lb.in (6.2 Nm)
-
Remove the cowl filler panel and the RKE exterior sounder.
-
Remove the cowl filler panel retainers.
-
Remove the cowl filler panel from the fender.
-
Disconnect the RKE exterior sounder electrical harness routing clip.
-
Disconnect the RKE exterior sounder electrical connector.
-
Remove RKE exterior sounder.
-
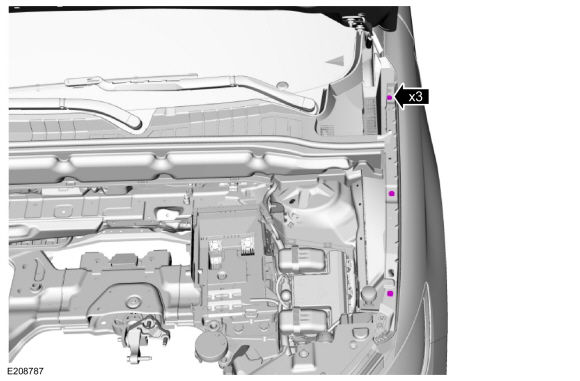
Remove the push pins and position the radiator sight shield aside.
-
Remove the bolts.
Torque:
106 lb.in (12 Nm)
-
Remove the bolts.
Torque:
106 lb.in (12 Nm)
-
Remove the bolt.
Torque:
71 lb.in (8 Nm)
-
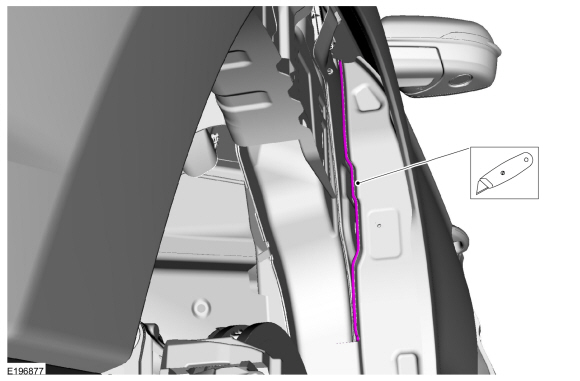
Carefully cut the foam sealant.
-
Remove the sound insulation.
-
Remove the fender.
Installation
-
To install, reverse the removal procedure.
-
After installation, check the alignment and correct if necessary.
Refer to: Body and Frame (501-26 Body Repairs - Vehicle Specific Information and Tolerance Checks, Description and Operation).
Removal
NOTE:
Removal steps in this procedure may contain installation details.
NOTE:
LH side shown, RH side similar.
Remove the wheel and tire...
Other information:
Removal
Remove the LH loadspace trim panel.
Refer to: Loadspace Trim Panel (501-05)
.
Disconnect the TCU antenna coaxial connector.
Remove the nut and the TCU antenna.
Torque:
49 lb.in (5.5 Nm)
Installation
To install, reverse the removal procedure...
WARNING: Vehicle modifications
involving braking system, aftermarket roof
racks, suspension, steering system, tire
construction and wheel and tire size may
change the handling characteristics of your
vehicle and may adversely affect the
performance of the electronic stability
control system...
Categories
WARNING: If the tire pressure
monitor sensor becomes damaged it may
not function.
Note: The use of tire sealant may damage
your tire pressure monitoring system and
should only be used in roadside
emergencies. If you must use a sealant, use
the Tire Mobility Kit sealant. Replace the tire
pressure monitoring system sensor and
valve stem on the wheel by an authorized
dealer after use of the sealant.
Note: The tire pressure monitoring system
indicator light will illuminate when the spare
tire is in use. To restore the full function of
the monitoring system, all road wheels
equipped with tire pressure monitoring
sensors must be mounted on the vehicle.
If you get a flat tire while driving, do not apply
the brake hea
read more
.jpg)
.jpg)
.jpg)
 Fender Splash Shield. Removal and Installation
