Lincoln Nautilus: Bumpers / Front Bumper Cover. Disassembly and Assembly
DISASSEMBLY
-
Remove the front bumper cover.
Refer to: Front Bumper Cover (501-19 Bumpers, Removal and Installation).
-
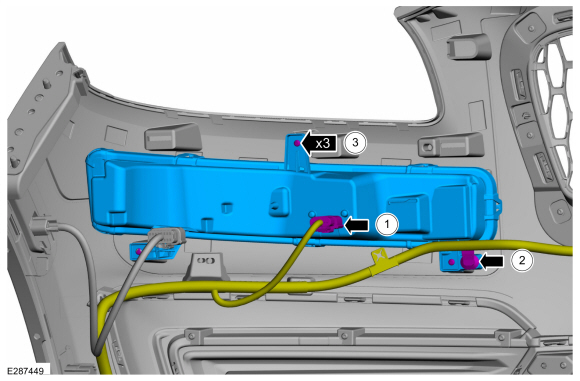
On both sides.
-
Disconnect the electrical connector.
-
Separate the wire harness retainer.
-
Remove the screws and the daytime running lamp assembly.
-
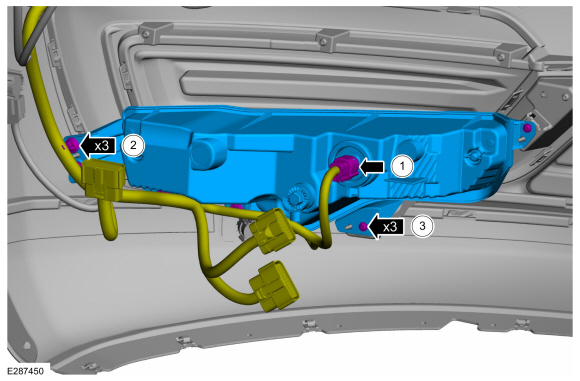
On both sides.
-
Disconnect the electrical connector.
-
Separate the wire harness retainers.
-
Remove the screws and the fog lamp assembly.
-
Remove the front parking aid and park assist sensor.
-
Disconnect the front parking aid and park assist sensor electrical connector.
-
Release the tabs.
-
Remove the front parking aid and active park assist sensor from the bracket.
-
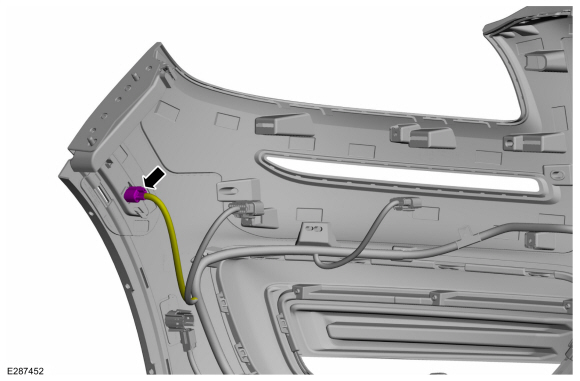
If equipped, on both sides.
Disconnect the side marker lamp electrical connector.
-
-
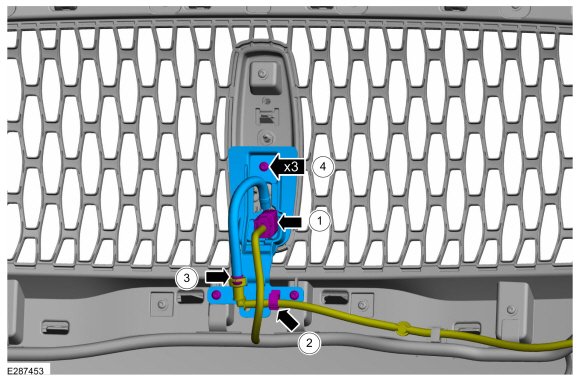
Disconnect the front camera electrical connector.
-
Separate the washer hose retainer.
-
Disconnect the front camera washer hose.
-
Remove the screws, the bracket and the front camera.
-
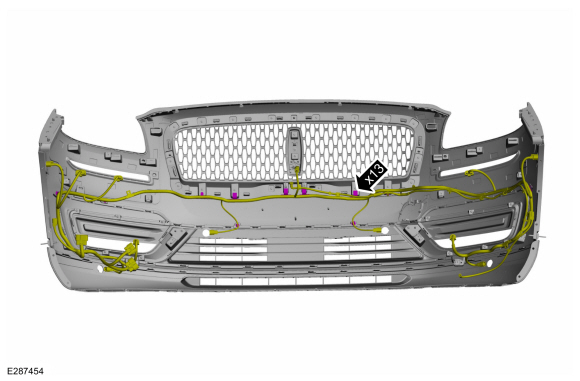
Separate the harness guides and remove the front bumper cover harness.
-
On both sides.
Remove the screws, release the tabs and remove the lower grille.
-
If equipped.
Drill the rivets and remove the license plate bracket.
-
If equipped.
Release the tabs and remove the tow hook cover.
-
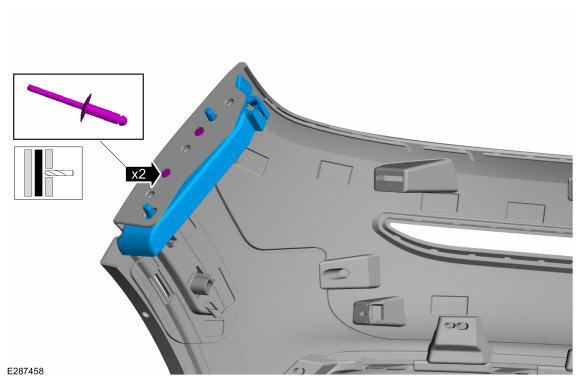
On both sides.
Drill the rivets and remove the front bumper cover to fender bracket.
-
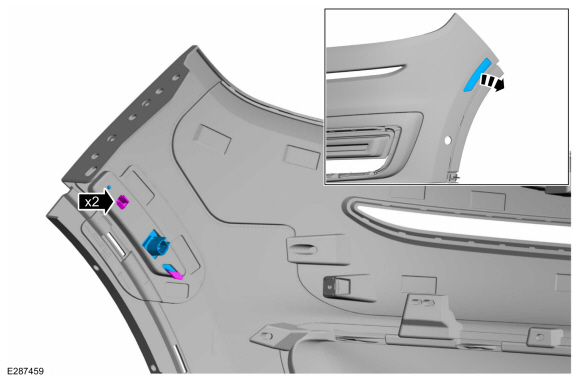
If equipped, on both sides.
Release the tabs and remove the side marker lamp.
-
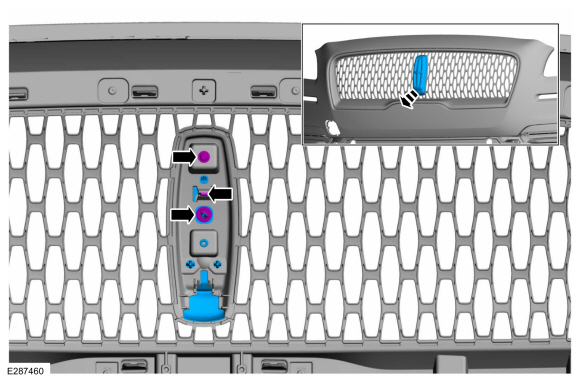
Remove the screw, the push nut, release the tab and remove the front bumper cover emblem.
-
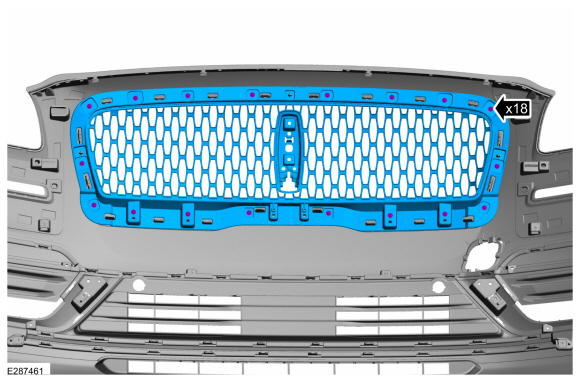
Remove the screws and the radiator grille.
-
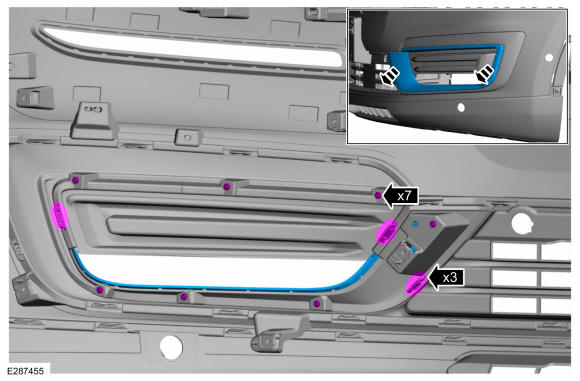
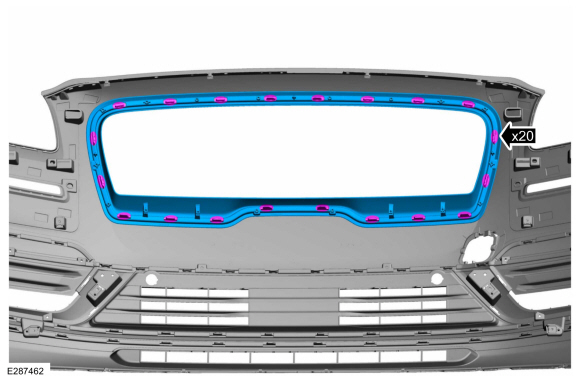
Release the tabs and remove the radiator grille frame.
-
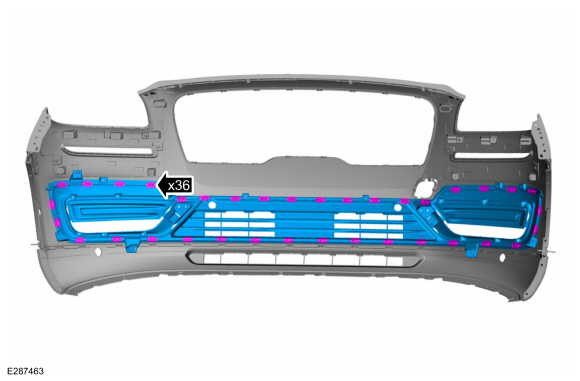
Release the tabs and remove the lower radiator grille.
-
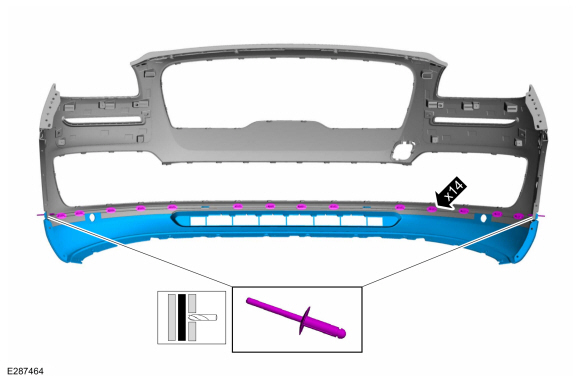
Drill the rivets, release the tabs and remove the front bumper lower cover.
ASSEMBLY
-
To assemble, reverse the disassembly procedure.
Special Tool(s) /
General Equipment
Interior Trim Remover
Removal
NOTE:
Removal steps in this procedure may contain installation details...
DISASSEMBLY
Remove the rear bumper cover.
Refer to: Rear Bumper Cover (501-19 Bumpers, Removal and Installation).
Vehicles equipped with foot operated liftgate
Disconnect the liftgate module electrical connectors...
Other information:
Use a belt-positioning booster seat for
children who have outgrown or no longer
properly fit in a child restraint and meet the
following criteria.
Generally children who are less than
57 in (1.45 m) tall.
Are greater than age four (4) and less
than age twelve (12)...
Removal
NOTE:
If installing a new PAM
, it is necessary to upload the module configuration information to the
scan tool prior to removing the module. This information must be
downloaded into the new PAM after installation.
Using a diagnostic scan tool, begin the PMI process for the PAM following the onscreen instructions...
Categories
What Is Auto-Start-Stop
The system is designed to help reduce fuel
consumption and CO2 emissions by stopping
the engine when it is idling, for example at
traffic lights.
Auto-Start-Stop Precautions
WARNING: Apply the parking brake,
shift into park (P), switch the ignition off
and remove the key before you leave your
vehicle. Failure to follow this instruction
could result in personal injury or death.
WARNING: Apply the parking brake,
shift into park (P), switch the ignition off
and remove the key before you open the
hood or have any service or repair work
completed. If you do not switch the ignition
off, the engine could restart at any time.
Failure to follow this instruction could result
in personal injury or d
read more

.jpg)
.jpg)
.jpg)
 Rear Bumper Cover. Removal and Installation
 Rear Bumper Cover. Disassembly and Assembly