Lincoln Nautilus: Bumpers / Rear Bumper Cover. Disassembly and Assembly
DISASSEMBLY
-
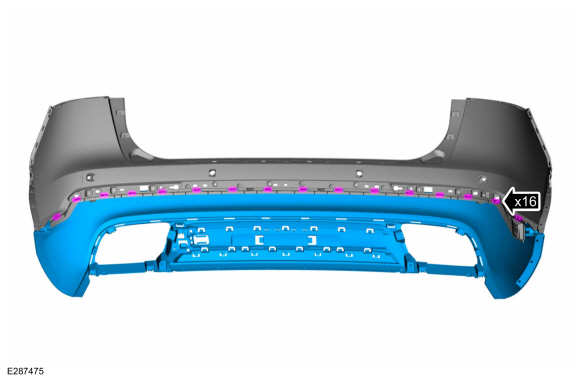
Remove the rear bumper cover.
Refer to: Rear Bumper Cover (501-19 Bumpers, Removal and Installation).
Vehicles equipped with foot operated liftgate
-
Disconnect the liftgate module electrical connectors.
-
Remove the screw and the liftgate module.
All vehicles
-
If equipped.
Disconnect the rear fog lamp electrical connector.
-
If equipped.
Release the tabs and remove the rear fog lamp.
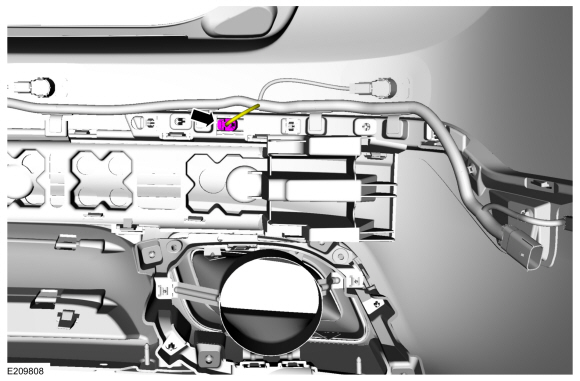
-
Remove the rear parking aid and active park assist sensor.
-
Disconnect the rear park aid and active park assist sensor electrical connector.
-
Release the tabs.
-
Remove the park aid and active park assist sensor from the bracket.
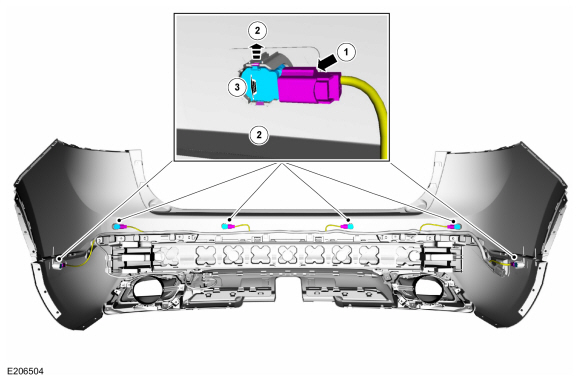
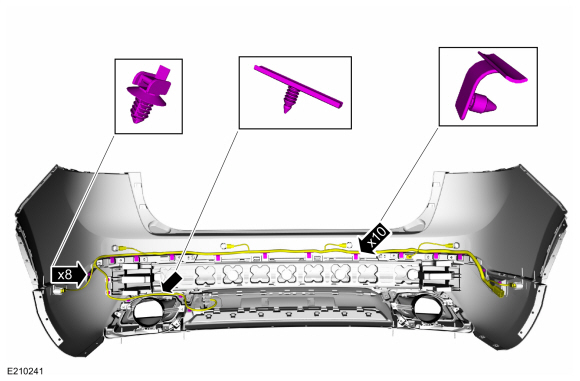
-
Separate the harness guides and remove the rear bumper cover harness.
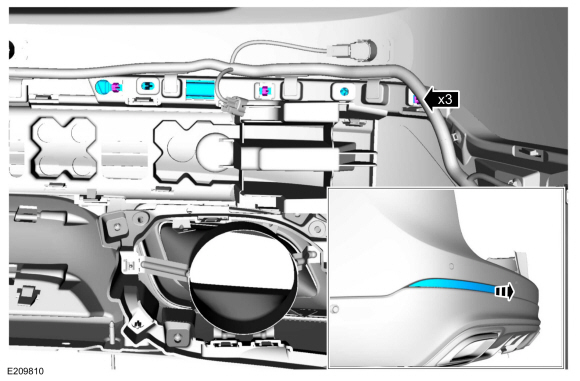
-
Release tabs and remove the rear bumper cover reinforcement.
-
On both sides.
Remove the screws and the exhaust tube bezel assembly.
-
Remove the lower rear bumper cover.
-
Remove the rivets.
-
Release the tabs.
-
Separate the lower rear bumper cover from the center rear bumper cover.
Vehicles equipped with foot operated liftgate
-
Remove the foot operated liftgate antennas.
All vehicles
-
Remove the rear reflectors.
-
Release the tabs.
-
Separate the rear reflectors from the rear bumper cover.
-
Release the tabs and remove the rear bumper reflector bezel assembly.
-
On both sides.
Drill the rivets and remove the 4G cellular phone antenna bracket assembly.
-
If required.
Remove the push pin, release the tabs and remove the 4G cellular phone antenna.
-
Release the tabs and remove the center rear bumper cover.
ASSEMBLY
-
To assemble, reverse the disassembly procedure.
-
Carry out the azimuth and elevation system checks.
Refer to: Azimuth System Check (413-13C Parking Aid - Vehicles With: Active Park Assist, General Procedures).
Refer to: Azimuth System Check (413-13A Parking Aid - Vehicles With: Rear Parking Aid, General Procedures).
Refer to: Elevation System Check (413-13A Parking Aid - Vehicles With: Rear Parking Aid, General Procedures).
-
If any sensor fails the check, diagnose the sensor fault.
Refer to: Parking Aid (413-13C)
.
Refer to: Parking Aid (413-13A)
.
DISASSEMBLY
Remove the front bumper cover.
Refer to: Front Bumper Cover (501-19 Bumpers, Removal and Installation).
On both sides...
Other information:
Activation
WARNING:
Service actions on vehicles equipped with electronic parking
brakes may cause unexpected parking brake application, which could
result in injury to hands or fingers. Put the electronic parking brake
system into service mode prior to servicing or removing rear brake
components. Failure to follow this instruction may result in serious
personal injury.
NOTE:
..
Check
NOTE:
Wheel-to-hub optimization is important. Clearance between
the wheel and hub can be used to offset or neutralize the Road Force® or
run-out of the wheel and tire assembly. For every 0.001 inch of
wheel-to-hub clearance, the Road Force® can be affected between 1 and 3
pounds depending on the tire stiffness.
NOTE:
The example below illustrates how the clearance
betw..
Categories
WARNING: If the tire pressure
monitor sensor becomes damaged it may
not function.
Note: The use of tire sealant may damage
your tire pressure monitoring system and
should only be used in roadside
emergencies. If you must use a sealant, use
the Tire Mobility Kit sealant. Replace the tire
pressure monitoring system sensor and
valve stem on the wheel by an authorized
dealer after use of the sealant.
Note: The tire pressure monitoring system
indicator light will illuminate when the spare
tire is in use. To restore the full function of
the monitoring system, all road wheels
equipped with tire pressure monitoring
sensors must be mounted on the vehicle.
If you get a flat tire while driving, do not apply
the brake hea
read more
.jpg)
.jpg)
.jpg)
.jpg)
.jpg)
.jpg)
.jpg)
.jpg)

 Front Bumper Cover. Disassembly and Assembly