Lincoln Nautilus: Front Seats / Front Seat Track Motor. Removal and Installation
Special Tool(s) / General Equipment
| Electric Drill |
Removal
NOTE: Driver seat shown, passenger seat similar.
-
NOTE: Positioning the seat fully upward provides access to service the seat track motor with the seat in the vehicle.
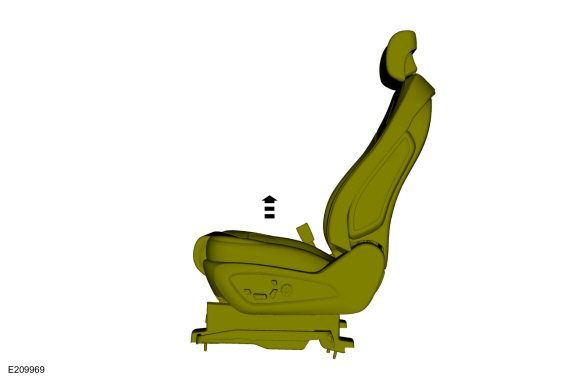
Move the front seat to the full upward position.
 |
-
Depower the SRS .
Refer to: Supplemental Restraint System (SRS) Depowering (501-20B) .
-
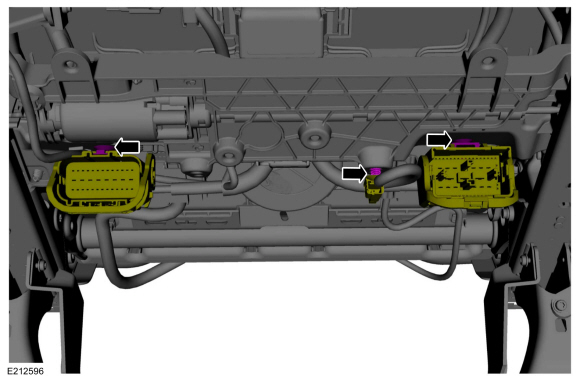
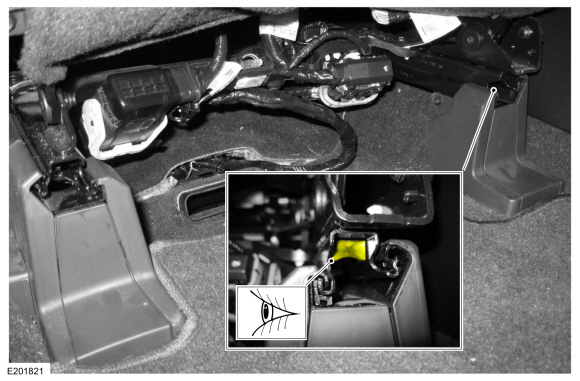
Disconnect the seat harness electrical connector(s).
-
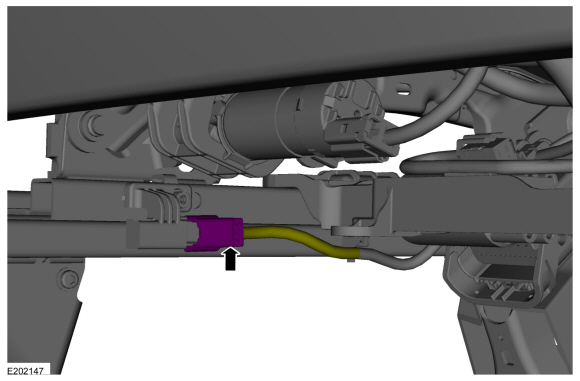
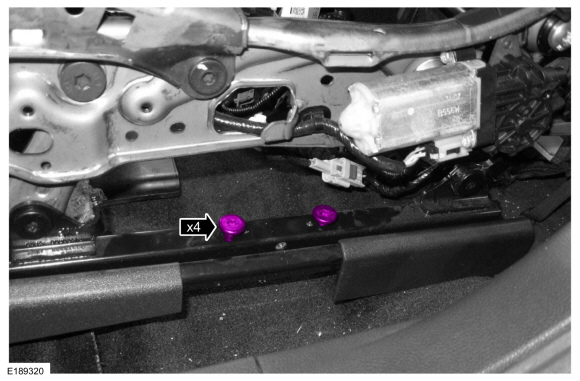
Detach the wire harness pin-type retainer(s).
-
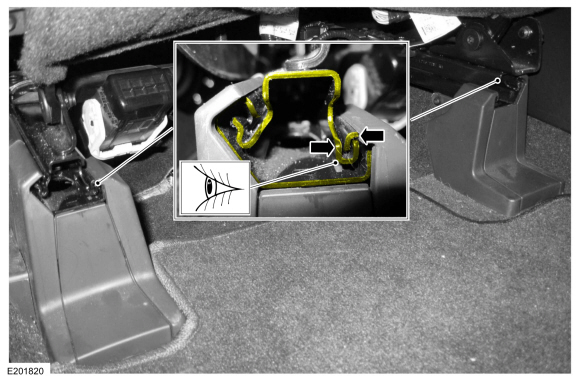
Release the locking tab(s) and rotate the position assurance lever(s).
-
Detach the wire harness pin-type retainer(s).
.jpg) |
-
Detach the seat track wire harness connector retainer(s) from the seat track motor.
 |
-
Disconnect seat position sensor electrical connector.
 |
-
NOTE: Seat components are removed for clarity.
NOTE: Seat track wire harness take-outs vary with seat option content. Note the wire harness routing, attachment points and connections to the horizontal seat motor and bracket for installation.
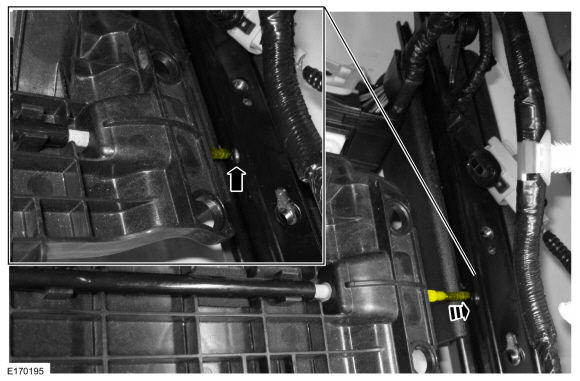
Disconnect the seat track motor electrical connector, detach the wire harness retainers and position the wire harness aside.
.jpg) |
-
NOTE: Seat components and wiring harnesses are removed for clarity.
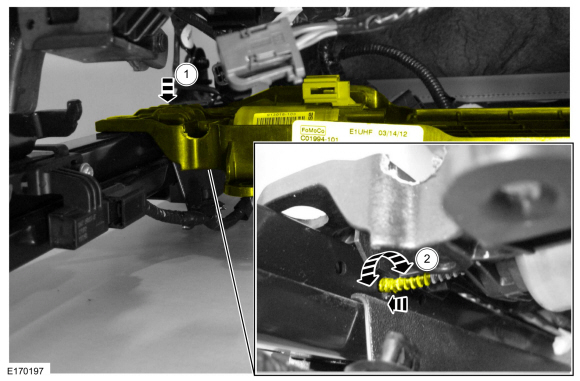
Remove the bolts and the seat track motor.
 |
Installation
All seats
-
NOTE: Typical seat track shown, other seat tracks similar.
NOTE: Use the bolts from the old seat track motor.
NOTE: Seat side shield removed for clarity.
On both sides.
Install the seat track motor bolts.
Torque: 21 lb.ft (28 Nm)
 |
-
NOTICE: When using a drill to move the seat track, do not move the seat track to its forward or rearward end of travel stops, otherwise a new seat track must be installed.
NOTE: Typical seat track shown, other seat tracks similar.
NOTE: Be sure to drive the seat track evenly or the track will bind during movement.
NOTE: Rotate the cables using 2 drills operating at similar speeds to most efficiently position the seat track.
Insert the original seat track motor drive cables and drive the gearbox and seat track uniformly until the rear edge of the upper and lower seat tracks are aligned.
Use the General Equipment: Electric Drill
.jpg) |
-
The rear edges of the upper and lower seat track rails must align with each other on both sides of the seat.
 |
-
NOTE: Typical seat track shown, other seat tracks similar.
NOTE: Seat side shield removed for clarity.
Both sides.
Remove the seat track motor bolts.
 |
-
NOTE: Install a new seat track if the block is not in place.
Verify the block is in place at the rear of the inboard seat track rail.
 |
-
To aid installation.
Pull the long drive cable on the new motor assembly out of the sheathing.
 |
-
NOTE: Typical seat track shown, other seat tracks similar.
Insert the long drive cable into the seat track gearbox.
 |
-
NOTE: Typical seat track shown, other seat tracks similar.
Rotate the long drive cable to verify engagement to seat track gearbox.
.jpg) |
-
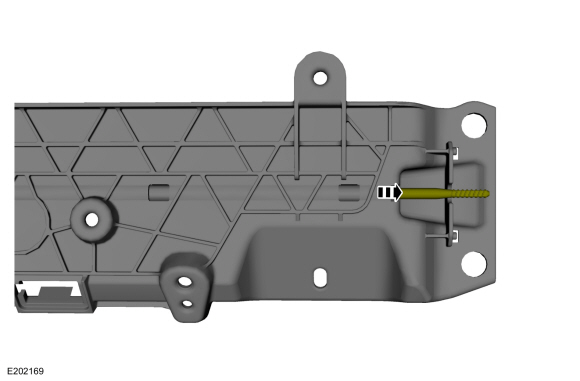
NOTICE: Do not severely bend the short drive cable during installation or damage to the cable will occur.
NOTE: Typical seat track shown, other seat tracks similar.
Insert the short drive cable into the seat track gearbox.
-
Position the seat track motor while inserting the short cable into the seat track gearbox.
-
Rotate the short drive cable to verify engagement to the seat track gearbox.
-
Position the seat track motor while inserting the short cable into the seat track gearbox.
 |
-
NOTICE: Do not cross-thread the bolts, they are load-bearing. If the bolts are cross-threaded, a new seat track must be installed.
NOTE: Seat track components and wiring harness are removed for clarity.
Install the seat track motor and install the new bolts in the sequence shown.
Torque: 21 lb.ft (28 Nm)
 |
-
NOTE: Seat track components are removed for clarity.
NOTE: Seat track wire harness take-outs vary with seat option content. Note the wire harness routing, attachment points and connections to the horizontal seat motor and bracket for installation.
Connect the seat track motor electrical connector and engage the wire harness retainers.
|
-
Attach the seat track wire harness connector retainer(s) to the seat track motor.
|
-
Connect the seat position sensor electrical connector.
|
-
Connect the seat harness electrical connector(s).
-
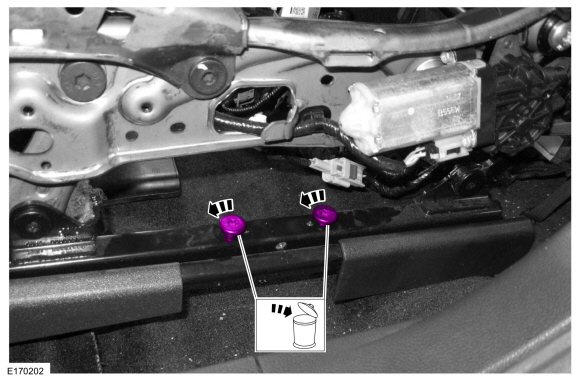
Attach the wire harness to the pin-type retainer(s).
-
Rotate the position assurance lever(s) to the locked position.
-
Attach the wire harness to the pin-type retainer(s).
|
-
Repower the SRS .
Refer to: Supplemental Restraint System (SRS) Repowering (501-20B) .
Driver seat
-
Operate the seat track horizontal motor in all
directions through the full range of travel to set soft stops and avoid a
premature stopping point occurrence after the vehicle is returned to
the customer.
 Front Seat Track. Removal and Installation
Removal
WARNING:
The following procedure describes critical repair steps
required for correct seat component installation. Follow all notes and
steps carefully...
 Rear Seats
..
Other information:
Lincoln Nautilus 2018-2026 Owners Manual: Connecting a Trailer
Trailer Towing Connector (If Equipped) When attaching the trailer wiring connector to your vehicle, only use a proper fitting connector that works with the vehicle and trailer functions. Note: Install the waterproof protection cap back onto the trailer towing connector whenever it is not in use. This helps to prevent water damage and trailer towing connector malfunction. Note: You cannot u..
Lincoln Nautilus 2018-2026 Owners Manual: Making and Receiving a Phone Call
Making Calls To call a number in your contacts, select: To call a number from your recent calls, select: To call a number from your favorites, select: To call a number that is not stored in your phone, select: Pressing the backspace button deletes the last digit you typed. Receiving Calls During an incoming call, an audible tone sounds. Caller information appears in the display if it is a..
Categories
- Manuals Home
- 1st Generation Nautilus Owners Manual
- 1st Generation Nautilus Service Manual
- Normal Scheduled Maintenance
- Massage Seats
- Anti-Theft Alarm System Settings. Security – Troubleshooting
- New on site
- Most important about car
Programming the Garage Door Opener to Your Garage Door Opener Motor