Lincoln Nautilus: Front Seats / Front Seat Track. Removal and Installation
Removal
.jpg) WARNING:
The following procedure describes critical repair steps
required for correct seat component installation. Follow all notes and
steps carefully. Do not place any objects between the seat components
and the body of the vehicle, nor any objects within a joint internal to
the seat structure. Failure to follow step instructions may result in
incorrect operation of the seat components and increases the risk of
serious personal injury.
WARNING:
The following procedure describes critical repair steps
required for correct seat component installation. Follow all notes and
steps carefully. Do not place any objects between the seat components
and the body of the vehicle, nor any objects within a joint internal to
the seat structure. Failure to follow step instructions may result in
incorrect operation of the seat components and increases the risk of
serious personal injury.
NOTE: Removal steps in this procedure may contain installation details.
All seats
-
Remove the front seat cushion cover and foam as an assembly.
Refer to: Front Seat Cushion Cover (501-10A Front Seats, Removal and Installation).
Refer to: Front Seat Cushion Cover - Vehicles With: Black Label Trim/Multi-Contour Seats (501-10A Front Seats, Removal and Installation).
Driver multi-contour seat and passenger multi-contour seat with original equipment OCS
-
Remove the front seat cushion adjuster.
Refer to: Front Seat Cushion Adjuster - Vehicles With: Multi-Contour Seats (501-10A Front Seats, Removal and Installation).
Passenger Seat
-
NOTE: This step is only necessary when the passenger seat is equipped with an original equipment OCS .
Remove the OCS .
Refer to: Occupant Classification System (OCS) Sensor (501-20B Supplemental Restraint System, Removal and Installation).
Refer to: Occupant Classification System (OCS) Sensor - Vehicles With: Multi-Contour Seats (501-20B Supplemental Restraint System, Removal and Installation).
Multi-contour seat
-
Disconnect the backrest harness electrical connector.
 |
All seats
-
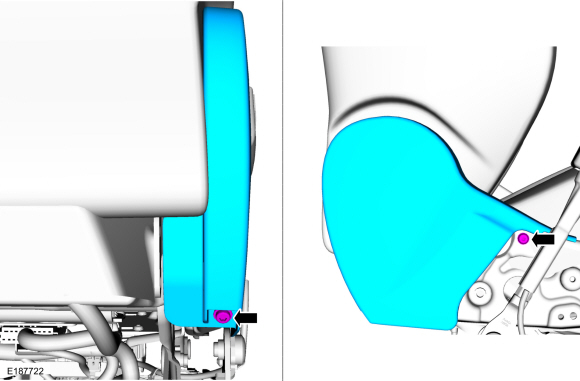
Remove the screws and the recline cover.
 |
-
Remove the bolts and the front seat backrest.
Torque: 33 lb.ft (45 Nm)
.jpg) |
Installation
All seats
-
NOTE: Transfer components to the new seat track as necessary.
To install, reverse the removal procedure.
Driver seat
-
NOTE: This step is only necessary when installing a new component.
Operate the seat in all directions through the full range of travel to set soft stops on all memory controlled functions and avoid a premature stopping point occurrence after the vehicle is returned to the customer.
 Front Seat Power Lumbar Assembly. Removal and Installation
Removal
NOTE:
Driver seat shown, passenger seat similar.
Remove the front seat.
Refer to: Front Seat (501-10A Front Seats, Removal and Installation)...
 Front Seat Track Motor. Removal and Installation
Special Tool(s) /
General Equipment
Electric Drill
Removal
NOTE:
Driver seat shown, passenger seat similar.
NOTE:
Positioning the seat fully upward provides access to
service the seat track motor with the seat in the vehicle...
Other information:
Lincoln Nautilus 2018-2026 Service Manual: Fender. Removal and Installation
Removal NOTE: Removal steps in this procedure may contain installation details. NOTE: LH side shown, RH side similar. Remove the fender splash shield. Refer to: Fender Splash Shield (501-02 Front End Body Panels, Removal and Installation)...
Lincoln Nautilus 2018-2026 Owners Manual: Installing and Removing the Luggage Compartment Cover (If Equipped)
WARNING: Do not place objects on the luggage cover. Failure to follow this instruction could result in personal injury or death in the event of a sudden stop or crash. Use the luggage cover to enclose items in the luggage compartment. Installing the Luggage Cover The luggage cover cassette attaches to the rear quarter trim panel...
Categories
- Manuals Home
- 1st Generation Nautilus Owners Manual
- 1st Generation Nautilus Service Manual
- USB Ports
- Interior Lamp Function. Adjusting the Instrument Panel Lighting Brightness. Ambient Lighting. Interior Lighting – Troubleshooting
- Replacing the Rear Wiper Blades
- New on site
- Most important about car
Clearing the Garage Door Opener. Reprogramming the Garage Door Opener. Garage Door Opener Radio Frequencies
Clearing the Garage Door Opener

