Lincoln Nautilus: Side Panel Sheet Metal Repairs / Rear Door Skin Panel. Removal and Installation
Special Tool(s) /
General Equipment
| Grinder |
| Hot Air Gun |
| Knife |
| MIG/MAG Welding Equipment |
| Locking Pliers |
Materials
| Name |
Specification |
Metal Bonding Adhesive
TA-1, TA-1-B, 3M™ 08115, LORD Fusor® 108B, Henkel Teroson EP 5055 |
-
|
Seam Sealer
TA-2-B, 3M™ 08308, LORD Fusor® 803DTM |
-
|
Flexible Foam Repair
3M™ 08463, LORD Fusor® 121 |
-
|
Removal
NOTE:
LH side shown, RH side similar.
-
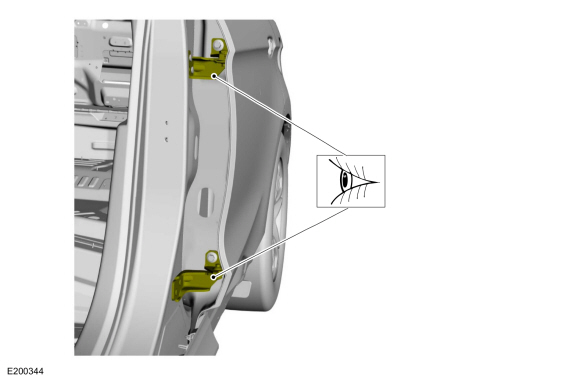
Inspect the upper and lower door hinge for wear. Rebuild or install new as necessary.
-
Remove the following items:
-
Remove the rear door window glass.
Refer to: Rear Door Window Glass (501-11 Glass, Frames and Mechanisms, Removal and Installation).
-
Remove the rear door exterior handle.
Refer to: Exterior Rear Door Handle (501-14 Handles, Locks, Latches and Entry Systems, Removal and Installation).
-
Remove the rear door upper moulding.
Refer to: Rear Door Upper Moulding (501-08 Exterior Trim and Ornamentation, Removal and Installation).
-
Remove the rear door moulding.
Refer to: Rear Door Moulding (501-08 Exterior Trim and Ornamentation, Removal and Installation).
-
Remove the rear door.
Refer to: Rear Door (501-03 Body Closures)
.
-
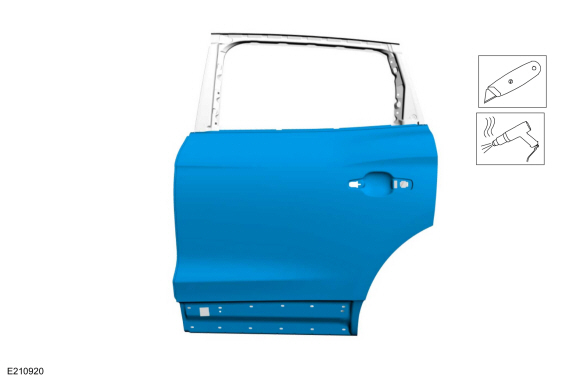
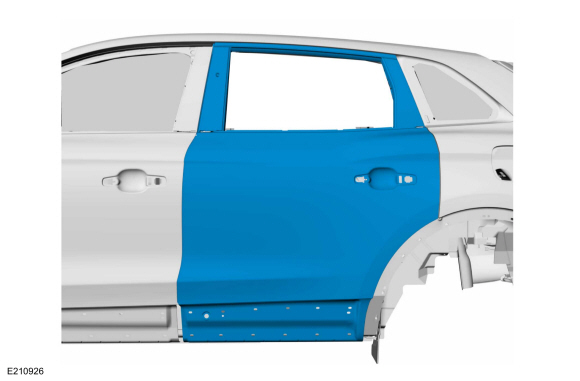
Carefully cut through the outer panel only.
Use the General Equipment: Grinder
-
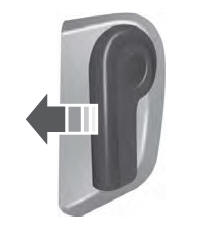
Remove the outer door panel.
Use the General Equipment: Knife
Use the General Equipment: Hot Air Gun
-
Remove the remaining portion of the door skin flange.
Use the General Equipment: Knife
Use the General Equipment: Hot Air Gun
Installation
NOTE:
LH side shown, RH side similar.
-
Make sure the door shell is clean and free of foreign materials.
-
Remove the e-coat from the mating surface.
-
Apply adhesive to the door shell mating surfaces.
Material: Metal Bonding Adhesive
/ TA-1, TA-1-B, 3M™ 08115, LORD Fusor® 108B, Henkel Teroson EP 5055
-
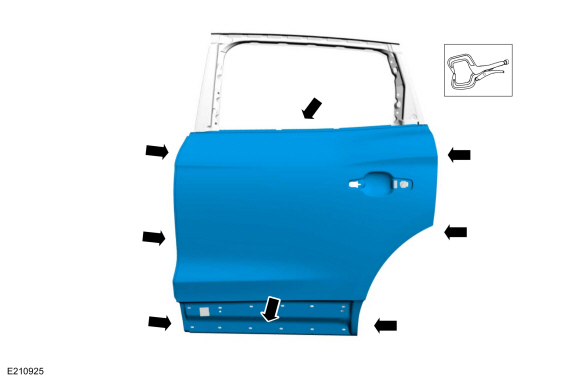
Install and partially crimp the door skin flange.
Use the General Equipment: Locking Pliers
-
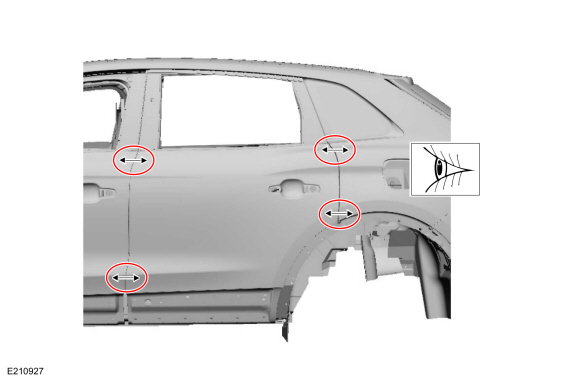
Temporarily install the door on the vehicle.
-
Check for proper alignment and adjust as necessary.
-
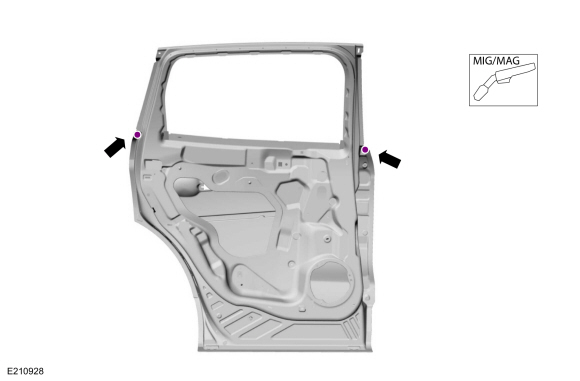
Carefully open the door and tack weld to lock panel in place.
Use the General Equipment: MIG/MAG Welding Equipment
-
Remove the door from the vehicle.
-
NOTE:
Smooth residual adhesive squeeze-out in to seam to act as a sealer.
Complete the hemming process.
-
Sand and clean the flange area.
-
Prime the area with a Ford approved paint system.
-
Sealing work: All areas must be sealed to production level.
Material: Seam Sealer
/ TA-2-B, 3M™ 08308, LORD Fusor® 803DTM
-
Apply expandable NVH foam sealant as indicated.
Material: Flexible Foam Repair
/ 3M™ 08463, LORD Fusor® 121
-
Install NVH pad as indicated.
-
Refinish the hem area using a Ford approved paint system.
-
Refinish the door exterior using a Ford approved paint system.
-
Restore corrosion protection.
Refer to: Corrosion Prevention (501-25 Body Repairs - General Information, General Procedures).
-
Install the door.
Refer to: Rear Door (501-03 Body Closures)
.
-
Install the following items:
-
Install the rear door window glass.
Refer to: Rear Door Window Glass (501-11 Glass, Frames and Mechanisms, Removal and Installation).
-
Install the rear door exterior handle.
Refer to: Exterior Rear Door Handle (501-14 Handles, Locks, Latches and Entry Systems, Removal and Installation).
-
Install the rear door upper moulding.
Refer to: Rear Door Upper Moulding (501-08 Exterior Trim and Ornamentation, Removal and Installation).
-
Install the rear door moulding.
Refer to: Rear Door Moulding (501-08 Exterior Trim and Ornamentation, Removal and Installation).
Special Tool(s) /
General Equipment
Resistance Spotwelding Equipment
Spherical Cutter
Hot Air Gun
Air Body Saw
MIG/MAG Welding Equipment
Spot Weld Drill Bit
Locking Pliers
Materials
Name
Specification
Seam SealerTA-2-B, 3M™ 08308, LORD Fusor® 803DTM
-
Flexible Foam Repair3M™ 08463, LORD Fusor® 121
-
Removal
R..
Other information:
Check
Turn the ignition ON, engine OFF.
Set the parking brake.
Place the gearshift in REVERSE (R) for rear parking aid sensors.
Place the gearshift in DRIVE (D) for front parking aid sensors.
Using a diagnostic scan tool, monitor the parking aid
sensor distance Parameter Identifications (PIDs) to verify no objects
are dete..
What is the Rear Parking Aid
Rear parking sensors detect objects behind
your vehicle when in reverse (R).
Rear Parking Aid Limitations
There is a decreased coverage area at the
outer corners.
When using a programmed MyKey, you
cannot switch the rear parking aid off.
The rear parking aid sensors are active when
your vehicle is in reverse (R) and the vehicle
speed is less than 3 mph (5 km/h).
T..
.jpg)
.jpg)

.jpg)
.jpg)
.jpg)
.jpg)
.jpg)
.jpg)
.jpg)
.jpg)

 Rocker Panel. Removal and Installation