Lincoln Nautilus: Brake System - General Information / Brake System Pressure Bleeding. General Procedures
Special Tool(s) / General Equipment
| Brake/Clutch System Pressure Bleeder/Filler | |
| Fluid Container |
Bleeding
All vehicles
NOTICE: If the fluid is spilled on the paintwork, the affected area must be immediately washed down with cold water.
NOTE: The HCU bleeding procedure and a second brake system pressure bleed must be carried out if a new HCU has been installed.
-
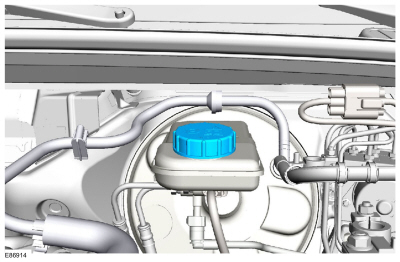
NOTE: Make sure the area around the master cylinder cap is clean and free of foreign material.
Remove the brake fluid reservoir cap.
 |
-
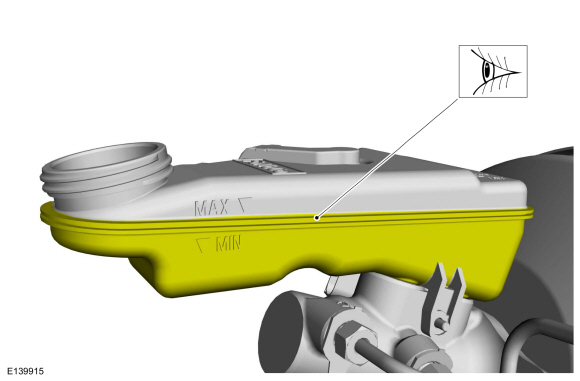
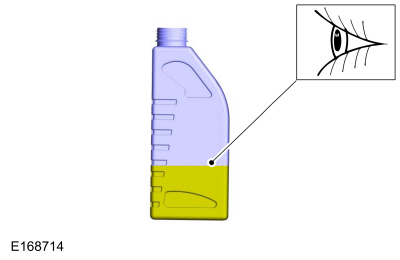
Make sure the fluid reservoir is filled with clean specified brake fluid.
Refer to: Specifications (206-00 Brake System - General Information, Specifications).
 |
-
-
NOTE: Master cylinder pressure bleeder adapter tools are available from various manufacturers of pressure bleeding equipment. Follow the instructions of the manufacturer when installing the adapter.
Install the bleeder adapter to the brake master cylinder reservoir and attach the bleeder tank hose to the fitting on the adapter.
Use the General Equipment: Brake/Clutch System Pressure Bleeder/Filler
-
NOTE: Make sure the bleeder tank contains enough clean, specified brake fluid to complete the bleeding operation.
Open the valve on the bleeder tank and apply 207-345 kPa (30-50 psi) to the brake system.
-
-
With the vehicle in NEUTRAL, position it on a hoist.
Refer to: Jacking and Lifting - Overview (100-02 Jacking and Lifting, Description and Operation).
-
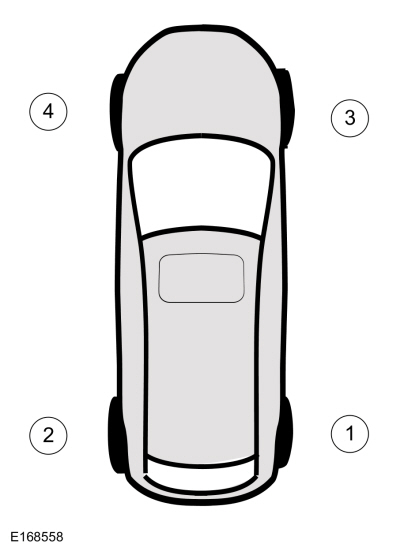
Bleeding steps must be followed in the order indicated in the graphic.
 |
-
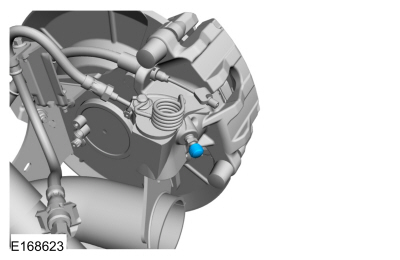
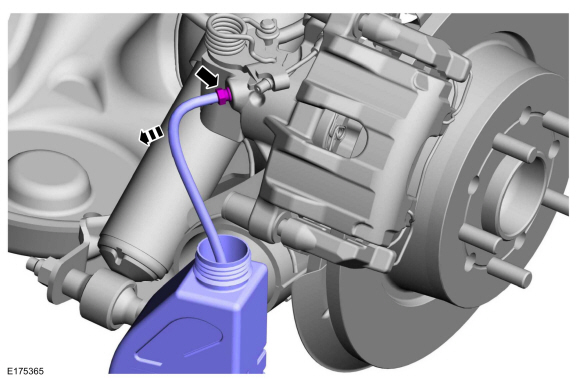
If equipped, remove the bleeder screw cap.
 |
-
Partially fill a clean brake fluid container with clean specified brake fluid.
Refer to: Specifications (206-00 Brake System - General Information, Specifications).
Use the General Equipment: Fluid Container
 |
-
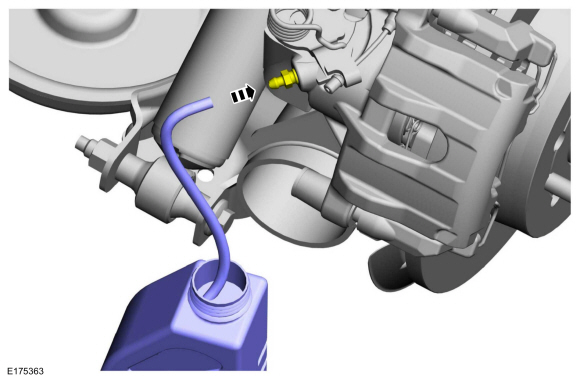
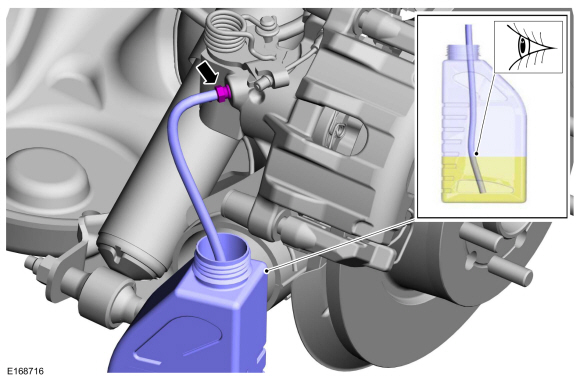
Submerge a hose into the brake fluid in the container and connect the hose to bleeder screw.
 |
-
-
Loosen the bleeder screw.
Loosen:
: 180°
-
Leave open until clear, bubble-free brake fluid flows, then tighten the bleeder screw.
-
Loosen the bleeder screw.
 |
-
-
Disconnect the hose and tighten the bleeder screw to specification.
Refer to: Specifications (206-00 Brake System - General Information, Specifications).
-
Disconnect the hose and tighten the bleeder screw to specification.
 |
-
Repeat steps 8-10 at the remaining wheel ends.
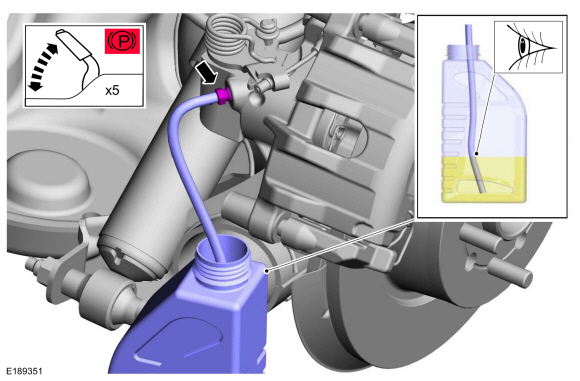
Vehicles with rear integral parking brake calipers
-
NOTE: Due to the complexity of the fluid path within the rear integral parking brake calipers, it is necessary to apply and release the parking brake during the bleed procedure.
-
Apply and release the parking brake 5 times.
-
Loosen the bleeder screw.
Loosen: 180°
-
Leave open until clear, bubble-free fluid flows and then tighten the bleeder screw to specification.
Refer to: Specifications (206-00 Brake System - General Information, Specifications).
-
Repeat as necessary.
-
Apply and release the parking brake 5 times.
 |
All vehicles
-
If equipped, install the bleeder screw cap.
|
-
Lower the vehicle.
-
Close the bleeder tank valve and release the pressure.
Remove the General Equipment: Brake/Clutch System Pressure Bleeder/Filler
-
Fill the reservoir with clean, specified brake fluid.
Refer to: Specifications (206-00 Brake System - General Information, Specifications).
|
-
Install the brake fluid reservoir cap.
|
Vehicles with new hydraulic control unit (HCU) installed
NOTE: The HCU bleeding procedure and a second brake system pressure bleed must be carried out if a new HCU has been installed.
-
Using the diagnostic scan tool, follow the ABS Service Bleed instructions.
-
Repeat brake system pressure bleeding steps.
 Brake Disc Machining. General Procedures
Repair
NOTE:
Do not machine the brake discs for any brake noise concern
(squeal, squeak, moan, groan, grunt, grind, etc.). Brake disc machining
is allowed if one of the below conditions is present;
Excessive corrosion/rust and/or pitting on the braking surface...
 Component Bleeding. General Procedures
Special Tool(s) /
General Equipment
Master Cylinder Bleeding Set
Bleeding
NOTICE:
If the fluid is spilled on the paintwork, the affected area must be immediately washed down with cold water...
Other information:
Lincoln Nautilus 2018-2026 Owners Manual: Wireless Accessory Charger
What Is the Wireless Accessory Charger Wireless Charging Pad The wireless accessory charger allows you to charge one compatible Qi wireless charging device on the charging area. Wireless Accessory Charger Precautions WARNING: Wireless charging devices can affect the operation of implanted medical devices, including cardiac pacemakers...
Lincoln Nautilus 2018-2026 Owners Manual: Reverse Wipe. Checking the Wiper Blades
Reverse Wipe What Is Reverse Wipe Reverse wipe turns on the rear window wiper when you shift into reverse (R) and the windshield wipers are on. Reverse Wipe Settings Using the instrument cluster controls on the steering wheel, select Settings. Select Vehicle...
Categories
- Manuals Home
- 1st Generation Nautilus Owners Manual
- 1st Generation Nautilus Service Manual
- Opening the Liftgate
- Child Safety Locks
- Replacing the Rear Wiper Blades
- New on site
- Most important about car
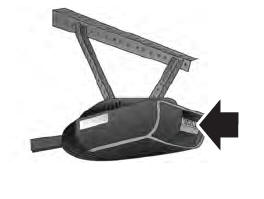
Programming the Garage Door Opener to Your Garage Door Opener Motor