Lincoln Nautilus: Climate Control System - General Information / Fluorescent Dye Leak Detection. General Procedures
Leak detection
-
Review next note for important refrigerant system dye information.
NOTE: Fluorescent refrigerant system dye is added to the refrigerant system at the factory to assist in refrigerant system leak diagnosis using a Rotunda-approved UV lamp. Do not add dye to the refrigerant system before diagnosing leaks or after repairs, even if a significant amount of refrigerant has been removed from the system. Replacement suction accumulators, receiver driers, receiver drier elements, and service condensers are shipped with a fluorescent dye wafer included in the desiccant bag which dissolves after approximately 30 minutes of continuous A/C operation. Do not add dye after flushing the refrigerant system because a new suction accumulator, receiver drier or receiver drier element is installed as part of the flushing procedure.
NOTE: Ford Motor Company vehicles are produced with R134a or R-1234yf fluorescent dye installed in the refrigerant system from the factory. The location of leaks can be pinpointed by the bright yellow-green glow of the fluorescent dye under a UV lamp. Since more than one leak can exist, inspect each component, line and fitting in the refrigerant system for a leak.
NOTE: Use of dye-enhancing glasses or goggles greatly improves the detection of the dye under the UV lamp.
NOTE: Not all UV lamps will fluoresce the dye used in Ford vehicles. All Rotunda UV lamps are optimized to fluoresce the dye.
NOTE: If the system has been out of refrigerant through the winter the dye at the leak point may have oxidized and may not fluoresce. If this happens, recharge and operate the A/C system to circulate the oil and allow any residual dye to show up at the leak point. It is important to understand that dye adheres to the oil not the refrigerant; the refrigerant carries the oil out of the leak point.
-
Check for leaks using a Rotunda-approved UV lamp and dye enhancing glasses.
For access to the UV lamp and dye enhancing glasses.
Refer to: Climate Control Tools and Equipment (412-00 Climate Control System - General Information, General Procedures).
-
Inspect all components, lines and fittings of the refrigerant system. For component and fitting locations,
Refer to: Climate Control System - Vehicles With: Dual Automatic Temperature Control (DATC) (412-00) .
-
After the leak(s) is repaired, remove any traces of fluorescent dye with a general purpose oil solvent.
-
Verify the repair by running the vehicle for a short
period of time and rechecking the area of the leak with a
Rotunda-approved UV lamp.
For access to the approved UV lamp.
Refer to: Climate Control Tools and Equipment (412-00 Climate Control System - General Information, General Procedures).
-
If it is a small leak the dye may take awhile to
reappear a Rotunda-approved electronic leak detector is also suggested
to use.
Refer to: Electronic Leak Detection (412-00 Climate Control System - General Information, General Procedures).
 Evaporator Core Leak Check. General Procedures
Inspection
Recover the refrigerant.
Refer to: Air Conditioning (A/C) System Recovery, Evacuation and
Charging (412-00 Climate Control System - General Information, General
Procedures)...
 Heater Core Leak Check. General Procedures
Inspection
NOTE:
A coolant leak in the heater hose could follow the
heater core tube to the heater core and appear as a leak in the heater
core...
Other information:
Lincoln Nautilus 2018-2026 Service Manual: Wheel and Tire Health and Safety Precautions. Description and Operation
WARNING: Never inflate a tire that has been run flat without first removing the tire from the wheel to inspect for damage. A damaged tire can fail during inflation. Failure to follow this instruction may result in serious personal injury...
Lincoln Nautilus 2018-2026 Service Manual: Body System. Diagnosis and Testing
Symptom Chart(s) Diagnostics in this manual assume a certain skill level and knowledge of Ford-specific diagnostic practices. REFER to: Diagnostic Methods (100-00 General Information, Description and Operation). Dust and Water Leaks Most dust and water leaks occur due to missing or incorrectly installed body sealer or components...
Categories
- Manuals Home
- 1st Generation Nautilus Owners Manual
- 1st Generation Nautilus Service Manual
- Massage Seats
- Anti-Theft Alarm System Settings. Security – Troubleshooting
- USB Ports
- New on site
- Most important about car
Parking Aid Indicators. Parking Aids – Troubleshooting
Parking Aid Indicators
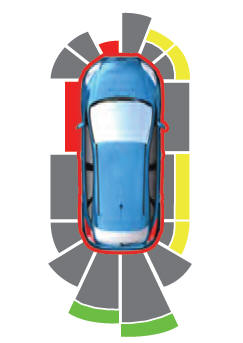
The system provides object distance indication through the information and entertainment display.
As the distance to the object decreases, the indicator waves and the lines move toward the vehicle icon. If there is no object detected, the distance indicator lines are grey.