Lincoln Nautilus: Rear End Sheet Metal Repairs / Rear Exhaust Mounting Bracket. Removal and Installation
Special Tool(s) / General Equipment
| 8 mm Drill Bit | |
| MIG/MAG Welding Equipment | |
| Spot Weld Drill Bit | |
| Locking Pliers |
Removal
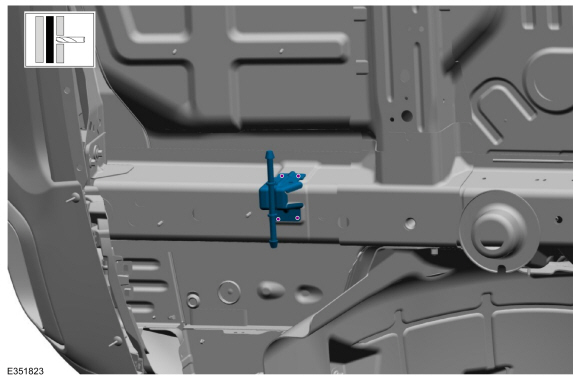
NOTE: LH side shown, RH side similar.
NOTE: Factory welds may be substituted with resistance or metal inert gas (MIG) plug welds. Resistance welds may not be placed directly over original location. They must be placed adjacent to original location and match factory welds in quantity. Metal inert gas (MIG) plug welds must equal factory welds in both location and quantity.
NOTE: Adequately protect all adjacent areas against cutting, grinding and welding procedures.
-
Position aside the exhaust.
-
Remove the welds and the exhaust bracket.
Use the General Equipment: Spot Weld Drill Bit
 |
Installation
NOTE: Factory welds may be substituted with resistance or metal inert gas (MIG) plug welds. Resistance welds may not be placed directly over original location. They must be placed adjacent to original location and match factory welds in quantity. Metal inert gas (MIG) plug welds must equal factory welds in both location and quantity.
NOTE: Adequately protect all adjacent areas against cutting, grinding and welding procedures.
-
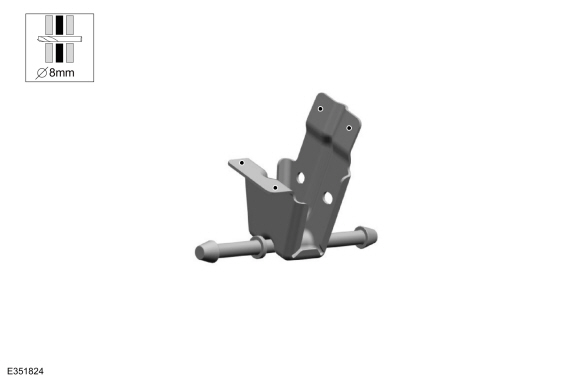
Drill plug weld holes in the replacement bracket.
Use the General Equipment: 8 mm Drill Bit
 |
-
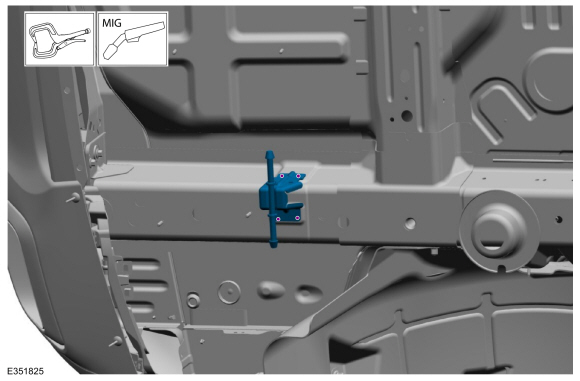
Install, properly position, clamp and weld the replacement exhaust bracket.
Use the General Equipment: Locking Pliers
Use the General Equipment: MIG/MAG Welding Equipment
 |
-
Refinish the entire repair using a Ford approved paint system.
-
Restore corrosion protection.
Refer to: Corrosion Prevention (501-25 Body Repairs - General Information, General Procedures).
-
Position and secure the exhaust in original location.
 Rear Bumper Mounting Bracket. Removal and Installation
Special Tool(s) /
General Equipment
8 mm Drill Bit
MIG/MAG Welding Equipment
Spot Weld Drill Bit
Locking Pliers
Materials
Name
Specification
Seam SealerTA-2-B, 3M™ 08308, LORD Fusor® 803DTM
-
Removal
NOTE:
LH side shown, RH side similar...
 Rear Floor Panel. Removal and Installation
Special Tool(s) /
General Equipment
Scraper for Straight Edges
Grinder
Hot Air Gun
8 mm Drill Bit
MIG/MAG Welding Equipment
Spot Weld Drill Bit
Locking Pliers
Materials
Name
Specification
Seam SealerTA-2-B, 3M™ 08308, LORD Fusor® 803DTM
-
Removal
NOTE:
Roof removed for clarity...
Other information:
Lincoln Nautilus 2018-2026 Owners Manual: Engine Oil
Engine Oil Dipstick Overview - 2.0L Minimum. Nominal. Maximum. Engine Oil Dipstick Overview - 2.7L Minimum. Nominal. Maximum. Checking the Engine Oil Level Make sure that your vehicle is on level ground. Check the oil level before starting the engine, or switch the engine off after warming up and wait 10 minutes for the oil to drain into the oil pan...
Lincoln Nautilus 2018-2026 Owners Manual: Power Seats
Folding the Seat Backrest WARNING: Do not fold a seat if it is occupied. Failure to follow this instruction could result in personal injury. This feature operates when the vehicle is in park (P) and the liftgate has been open for less than 10 minutes...
Categories
- Manuals Home
- 1st Generation Nautilus Owners Manual
- 1st Generation Nautilus Service Manual
- Power Outlet - Vehicles With: 110V Power Outlet
- Locating the Pre-Collision Assist Sensors
- Fuel Quality
- New on site
- Most important about car
Changing a Flat Tire
WARNING: If the tire pressure monitor sensor becomes damaged it may not function.
Note: The use of tire sealant may damage your tire pressure monitoring system and should only be used in roadside emergencies. If you must use a sealant, use the Tire Mobility Kit sealant. Replace the tire pressure monitoring system sensor and valve stem on the wheel by an authorized dealer after use of the sealant.
Note: The tire pressure monitoring system indicator light will illuminate when the spare tire is in use. To restore the full function of the monitoring system, all road wheels equipped with tire pressure monitoring sensors must be mounted on the vehicle.
If you get a flat tire while driving, do not apply the brake hea