Refer to Wiring Diagrams Cell 90 for schematic and connector information.
Normal Operation and Fault Conditions
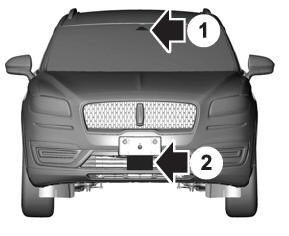
REFER to: Exterior Lighting - Overview (417-01 Exterior Lighting, Description and Operation).
REFER to: Exterior Lighting (417-01 Exterior Lighting)
.
DTC Fault Trigger Conditions
| DTC |
Description |
Fault Trigger Condition |
| BCM B1115:11 |
High Mounted Stop Lamp control: Circuit Short To Ground |
A continuous memory and on-demand DTC that sets when the BCM detects a
short to ground from the high mounted stop lamp voltage supply circuit.
|
| BCM B1115:15 |
High Mounted Stop Lamp control: Circuit Short To Battery Or Open |
A continuous memory and on-demand DTC that sets when the BCM detects an
open or short to voltage from the high mounted stop lamp voltage supply
circuit.
|
| BCM B1444:11 |
Left Rear Stop/Position Lamp Output: Circuit Short To Ground |
A continuous memory and on-demand DTC that sets when the BCM detects a
short to ground from the LH rear stop lamp voltage supply circuit.
|
| BCM B1444:15 |
Left Rear Stop/Position Lamp Output: Circuit Short To Battery Or Open |
A continuous memory and on-demand DTC that sets when the BCM detects an
open or short to voltage from the LH rear stop lamp voltage supply
circuit.
|
| BCM B1448:11 |
Right Rear Stop/Position Lamp Output: Circuit Short To Ground |
A continuous memory and on-demand DTC that sets when the BCM detects a
short to ground from the RH stop lamp voltage supply circuit.
|
| BCM B1448:15 |
Right Rear Stop/Position Lamp Output: Circuit Short To Battery Or Open |
A continuous memory and on-demand DTC that sets when the BCM detects an
open or short to voltage from the RH stop lamp voltage supply circuit.
|
| BCM B148D:11 |
Stop Lamps Output: Circuit Short To Ground |
A continuous memory and on-demand DTC that sets when the BCM detects a
short to ground from the applique stop lamp voltage supply circuit.
|
| BCM B148D:15 |
Stop Lamps Output: Circuit Short To Battery Or Open |
A continuous memory and on-demand DTC that sets when the BCM detects an
open or short to voltage from the right applique stop lamp voltage
supply circuit.
|
| BCM U1000:00 |
Solid State Driver Protection Active -Driver Disabled: No Sub Type Information |
This DTC sets when the BCM
has temporarily shut down the output driver. The module has
temporarily disabled an output because an excessive current draw exists
(such as a short to ground). The BCM
cannot enable the output until the cause of the short is corrected,
the Diagnostic Trouble Codes (DTCs) have been cleared and a successful
self-test is run. For additional information on BCM Field Effect Transistor (FET) protection,
REFER
to: Module Controlled Functions - System Operation and Component
Description (419-10 Multifunction Electronic Modules, Description and
Operation).
|
| BCM U3000:49 |
Control Module: Internal Electronic Failure |
This DTC sets when the BCM
has permanently shut down the output driver. The module has
permanently disabled an output because an excessive current draw fault
(such as a short to ground) has exceeded the limits that the BCM can
withstand. CORRECT the cause of the excessive current draw before
installing a new BCM . For additional information on BCM Field Effect
Transistor (FET) protection,
REFER to: Module Controlled Functions -
System Operation and Component Description (419-10 Multifunction
Electronic Modules, Description and Operation).
|
Possible Sources
- Wiring, terminals or connectors
- Rear lamp assembly
- High mounted stop lamp
- Reversing lamp assembly
-
BCM
|
| B1 IDENTIFY THE INOPERATIVE STOP LAMP |
-
Apply the brake pedal and observe the rear and high mounted stop lamps.
Is only an individual stop lamp inoperative?
| Yes |
For the high mounted stop lamp, GO to B2
For a LH rear stop lamp or RH rear stop lamp, GO to B7
For the liftgate applique stop lamp (part of the reversing lamp assembly), GO to B12
|
| No |
If all stop lamps are inoperative, GO to Pinpoint Test A.
|
|
| B2 CHECK FOR VOLTAGE TO THE HIGH MOUNTED STOP LAMP |
-
Disconnect: High Mounted Stop Lamp C475.
-
While applying the brake pedal, measure:
Click to display connectors
|
Positive Lead
|
Measurement / Action
|
Negative Lead
|
|
C475-A
|

|
Ground
|
Is the voltage greater than 11 volts?
|
| B3 REPEAT THE ON-DEMAND SELF-TEST AND CHECK FOR VOLTAGE TO THE HIGH MOUNTED STOP LAMP |
-
Using a diagnostic scan tool, perform the BCM self-test.
-
Clear the Diagnostic Trouble Codes (DTCs) and repeat
the self-test (required to enable the lamp output driver if DTC U1000:00 is present).
-
While applying the brake pedal, measure:
Click to display connectors
|
Positive Lead
|
Measurement / Action
|
Negative Lead
|
|
C475-A
|
|
Ground
|
Is the voltage greater than 11 volts?
| Yes |
INSTALL a new high mounted stop lamp.
REFER to: High Mounted Stoplamp (417-01 Exterior Lighting, Removal and Installation).
|
|
| B4 CHECK THE HIGH MOUNTED STOP LAMP GROUND CIRCUIT FOR AN OPEN |
-
While applying the brake pedal, measure:
Click to display connectors
|
Positive Lead
|
Measurement / Action
|
Negative Lead
|
|
C475-A
|
|
C475-B
|
Is the voltage greater than 11 volts?
| Yes |
INSTALL a new high mounted stop lamp.
REFER to: High Mounted Stoplamp (417-01 Exterior Lighting, Removal and Installation).
|
|
| B5 CHECK THE HIGH MOUNTED STOP LAMP SUPPLY CIRCUIT FOR A SHORT TO GROUND |
-
Measure:
Click to display connectors
|
Positive Lead
|
Measurement / Action
|
Negative Lead
|
|
C475-A
|

|
Ground
|
Is the resistance greater than 10,000 ohms?
| No |
REPAIR the circuit. After the repair:
If no Diagnostic Trouble Codes (DTCs) are present, TEST the system for normal operation.
If DTC
U1000:00 is present, CLEAR the Diagnostic Trouble Codes (DTCs) and
REPEAT the self-test (required to enable the lamp output driver if DTC U1000:00 is present).
If DTC U3000:49 is present, INSTALL a new BCM. Refer to the appropriate Removal and Installation procedure in Section 419-10.
|
|
| B6 CHECK THE HIGH MOUNTED STOP LAMP SUPPLY CIRCUIT FOR AN OPEN |
-
Measure:
Click to display connectors
|
Positive Lead
|
Measurement / Action
|
Negative Lead
|
|
C475-A
|
|
C2280D-13
|
Is the resistance less than 3 ohms?
|
| B7 CHECK FOR VOLTAGE TO THE REAR LAMP ASSEMBLY |
-
Disconnect: Inoperative LH Rear Lamp C412 or RH Rear Lamp C415.
-
While applying the brake pedal, measure:
Click to display connectors
LH Stop Lamp
|
Positive Lead
|
Measurement / Action
|
Negative Lead
|
|
C412-8
|
|
Ground
|
Click to display connectors
RH Stop Lamp
|
Positive Lead
|
Measurement / Action
|
Negative Lead
|
|
C415-8
|
|
Ground
|
Is the voltage greater than 11 volts?
|
| B8 REPEAT THE ON-DEMAND SELF-TEST AND CHECK FOR VOLTAGE TO THE REAR LAMP ASSEMBLY |
-
Using a diagnostic scan tool, perform the BCM self-test.
-
Clear the Diagnostic Trouble Codes (DTCs) and repeat
the self-test (required to enable the lamp output driver if DTC U1000:00 is present).
-
While applying the brake pedal, measure:
Click to display connectors
LH Stop Lamp
|
Positive Lead
|
Measurement / Action
|
Negative Lead
|
|
C412-8
|
|
Ground
|
Click to display connectors
RH Stop Lamp
|
Positive Lead
|
Measurement / Action
|
Negative Lead
|
|
C415-8
|
|
Ground
|
Is the voltage greater than 11 volts?
| Yes |
INSTALL a new rear lamp assembly.
REFER to: Rear Lamp Assembly (417-01 Exterior Lighting, Removal and Installation).
|
|
| B9 CHECK THE REAR STOP LAMP GROUND CIRCUIT FOR AN OPEN |
Is the voltage greater than 11 volts?
| Yes |
INSTALL a new rear lamp assembly.
REFER to: Rear Lamp Assembly (417-01 Exterior Lighting, Removal and Installation).
|
| No |
REPAIR the circuit in question.
|
|
| B10 CHECK THE REAR STOP LAMP SUPPLY CIRCUIT FOR A SHORT TO GROUND |
-
Measure:
Click to display connectors
LH Stop Lamp
|
Positive Lead
|
Measurement / Action
|
Negative Lead
|
|
C412-8
|
|
Ground
|
Click to display connectors
RH Stop Lamp
|
Positive Lead
|
Measurement / Action
|
Negative Lead
|
|
C415-8
|
|
Ground
|
Is the resistance greater than 10,000 ohms?
| No |
REPAIR the circuit. After the repair:
If no Diagnostic Trouble Codes (DTCs) are present, TEST the system for normal operation.
If DTC
U1000:00 is present, CLEAR the Diagnostic Trouble Codes (DTCs) and
REPEAT the self-test (required to enable the lamp output driver if DTC U1000:00 is present).
If DTC U3000:49 is present, INSTALL a new BCM. Refer to the appropriate Removal and Installation procedure in Section 419-10.
|
|
| B11 CHECK THE REAR STOP LAMP SUPPLY CIRCUITS FOR AN OPEN |
-
Measure:
Click to display connectors
LH Stop Lamp
|
Positive Lead
|
Measurement / Action
|
Negative Lead
|
|
C412-8
|
|
C2280D-24
|
Click to display connectors
RH Stop Lamp
|
Positive Lead
|
Measurement / Action
|
Negative Lead
|
|
C415-8
|
|
C2280D-23
|
Is the resistance less than 3 ohms?
| No |
REPAIR the circuit in question.
|
|
| B12 CHECK FOR VOLTAGE TO THE LIFTGATE APPLIQUE STOP LAMP |
-
Disconnect: Reversing Lamp C4352.
-
While applying the brake pedal, measure:
Click to display connectors
|
Positive Lead
|
Measurement / Action
|
Negative Lead
|
|
C4352-5
|
|
Ground
|
Is the voltage greater than 11 volts?
|
| B13 REPEAT THE ON-DEMAND SELF-TEST AND CHECK FOR VOLTAGE TO THE LIFTGATE APPLIQUE STOP LAMP |
-
Using a diagnostic scan tool, perform the BCM self-test.
-
Clear the Diagnostic Trouble Codes (DTCs) and repeat
the self-test (required to enable the lamp output driver if DTC U1000:00 is present).
-
While applying the brake pedal, measure:
Click to display connectors
|
Positive Lead
|
Measurement / Action
|
Negative Lead
|
|
C4352-5
|
|
Ground
|
Is the voltage greater than 11 volts?
| Yes |
INSTALL a new liftgate applique stop lamp (part of the reversing lamp assembly).
REFER to: Reversing Lamp (417-01 Exterior Lighting, Removal and Installation).
|
|
| B14 CHECK THE LIFTGATE APPLIQUE STOP LAMP GROUND CIRCUIT FOR AN OPEN |
-
While applying the brake pedal, measure:
Click to display connectors
|
Positive Lead
|
Measurement / Action
|
Negative Lead
|
|
C4352-5
|
|
C4352-6
|
Is the voltage greater than 11 volts?
| Yes |
INSTALL a new liftgate applique stop lamp (part of the reversing lamp assembly).
REFER to: Reversing Lamp (417-01 Exterior Lighting, Removal and Installation).
|
|
| B15 CHECK THE LIFTGATE APPLIQUE STOP LAMP SUPPLY CIRCUIT FOR A SHORT TO GROUND |
-
Measure:
Click to display connectors
|
Positive Lead
|
Measurement / Action
|
Negative Lead
|
|
C4352-5
|
|
Ground
|
Is the resistance greater than 10,000 ohms?
| No |
REPAIR the circuit. After the repair:
If no Diagnostic Trouble Codes (DTCs) are present, TEST the system for normal operation.
If DTC
U1000:00 is present, CLEAR the Diagnostic Trouble Codes (DTCs) and
REPEAT the self-test (required to enable the lamp output driver if DTC U1000:00 is present).
If DTC U3000:49 is present, INSTALL a new BCM. Refer to the appropriate Removal and Installation procedure in Section 419-10.
|
|
| B16 CHECK THE LIFTGATE APPLIQUE STOP LAMP SUPPLY CIRCUIT FOR AN OPEN |
-
Measure:
Click to display connectors
|
Positive Lead
|
Measurement / Action
|
Negative Lead
|
|
C4352-5
|
|
C2280F-25
|
Is the resistance less than 3 ohms?
|
| B17 CHECK FOR CORRECT BCM (BODY CONTROL MODULE)
OPERATION |
-
Disconnect and inspect all BCM connectors.
-
Repair:
-
corrosion (install new connector or terminals – clean module pins)
-
damaged or bent pins – install new terminals/pins
-
pushed-out pins – install new pins as necessary
-
Reconnect the BCM connectors. Make sure they seat and latch correctly.
-
Operate the system and determine if the concern is still present.
Is the concern still present?
| Yes |
CHECK OASIS for any applicable service articles: TSB , GSB , SSM or FSA
. If a service article exists for this concern, DISCONTINUE this test
and FOLLOW the service article instructions. If no service articles
address this concern, INSTALL a new BCM. Refer to the appropriate Removal and Installation procedure in Section 419-10.
.
|
| No |
The system is operating correctly at this time. The
concern may have been caused by module connections. ADDRESS the root
cause of any connector or pin issues.
|
|

 Reversing Lamps. Diagnosis and Testing
 Trailer Lamps. Diagnosis and Testing