
Lincoln Nautilus: Information and Entertainment System - General Information - Vehicles With: SYNC 4 / Audio Front Control Module (ACM). Removal and Installation
Lincoln Nautilus 2018-2026 Service Manual / Electrical / Information and Entertainment Systems / Information and Entertainment System - General Information - Vehicles With: SYNC 4 / Audio Front Control Module (ACM). Removal and Installation
Removal
NOTE: Removal steps in this procedure may contain installation details.
-
NOTE: If installing a new module, it is necessary to upload the module configuration information to the scan tool prior to removing the module. This information must be downloaded into the new module after installation.
Using a diagnostic scan tool, begin the PMI process for the ACM following the onscreen instructions.
-
Remove the instrument panel speaker.
Refer to: Instrument Panel Speaker (415-00 Information and Entertainment System - General Information - Vehicles With: SYNC 4, Removal and Installation).
-
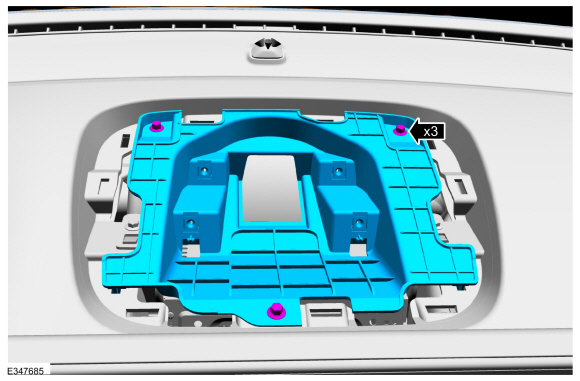
Remove the screws and the instrument panel speaker bracket.
Torque: 12 lb.in (1.3 Nm)
 |
-
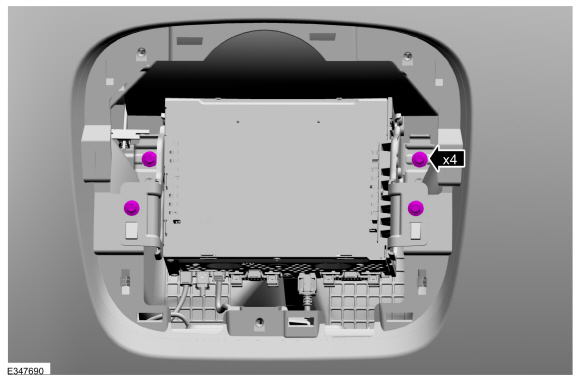
Remove the bolts.
Torque: 22 lb.in (2.5 Nm)
 |
-
Position the ACM .
.jpg) |
-
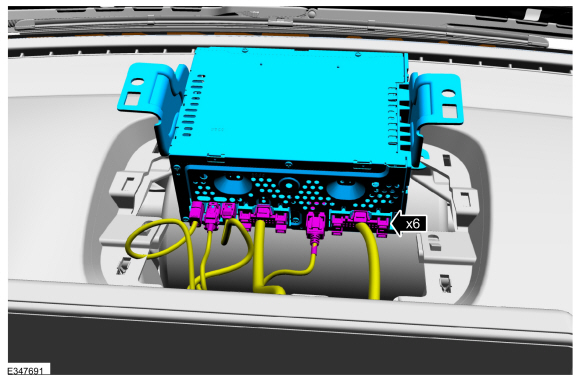
Disconnect the electrical connectors and remove the ACM .
 |
Installation
-
To install, reverse the removal procedure.
-
NOTE: This step is only necessary when installing a new component.
Using a diagnostic scan tool, complete the PMI process for the ACM following the onscreen instructions.
 Audio Digital Signal Processing (DSP) Module. Removal and Installation
Removal
NOTE:
Removal steps in this procedure may contain installation details.
NOTE:
If installing a new module, it is necessary to
upload the module configuration information to the scan tool prior to
removing the module...
 Audio Unit Antenna. Removal and Installation
Removal
NOTE:
Removal steps in this procedure may contain installation details.
AM Antenna.
NOTE:
The AM antenna is part of the rear spoiler...
Other information:
Lincoln Nautilus 2018-2026 Service Manual: Rear Subframe - FWD. Removal and Installation
Special Tool(s) / General Equipment 300-OTC1585AEPowertrain Lift Wooden Block Removal NOTICE: Suspension fasteners are critical parts that affect the performance of vital components and systems. Failure of these fasteners may result in major service expense...
Lincoln Nautilus 2018-2026 Service Manual: Specifications
Material Item Specification Fill Capacity Motorcraft® High Temperature Nickel Anti-Seize Lubricant XL-2 - Motorcraft® Wheel and Tire Cleaner ZC-37-A - General Specifications Item Specification Tire Inflation Tires See Safety Certi..
Categories
- Manuals Home
- 1st Generation Nautilus Owners Manual
- 1st Generation Nautilus Service Manual
- Anti-Theft Alarm System Settings. Security – Troubleshooting
- Drive Mode Control
- Opening and Closing the Hood
- New on site
- Most important about car
Opening and Closing the Hood
Opening the Hood

Copyright © 2026 www.linautilus.com