Lincoln Nautilus: Interior Trim and Ornamentation / Headliner. Removal and Installation
Special Tool(s) / General Equipment
| Interior Trim Remover |
Materials
| Name | Specification |
|---|---|
| 3M™ Super-Fast Repair Adhesive 04747 |
- |
Removal
-
Remove the following items:
-
On both sides.
Remove the A-pillar trim panels.
Refer to: A-Pillar Trim Panel (501-05 Interior Trim and Ornamentation, Removal and Installation).
-
On both sides.
Remove the B-pillar trim panels.
Refer to: B-Pillar Trim Panel (501-05 Interior Trim and Ornamentation, Removal and Installation).
-
On both sides.
Remove the C-pillar trim panels.
Refer to: C-Pillar Trim Panel (501-05 Interior Trim and Ornamentation, Removal and Installation).
-
On both sides.
Remove the D-pillar trim panels.
Refer to: D-Pillar Trim Panel (501-05 Interior Trim and Ornamentation, Removal and Installation).
-
On both sides.
-
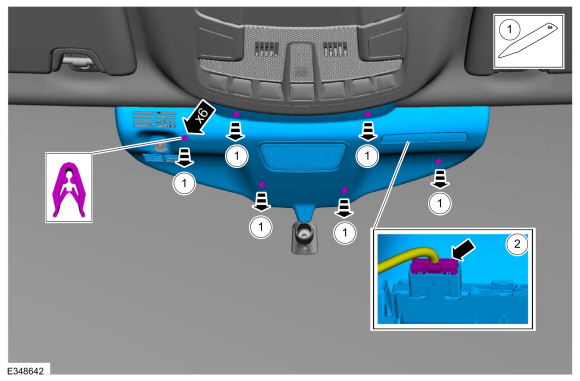
NOTE: Interior rear view mirror removed for clarity.
Remove the IPMA cover.
-
Release the IPMA cover clips.
Use the General Equipment: Interior Trim Remover
-
If equipped.
Disconnect the PAD indicator electrical connector.
-
Release the IPMA cover clips.
 |
-
Disconnect the headliner wiring harness electrical connectors.
-
Disconnect the interior rear view mirror electrical connector.
-
Disconnect the IPMA electrical connector.
-
Disconnect the rain sensor electrical connector.
-
Disconnect the in-vehicle temperature and humidity sensor electrical connector.
-
Disconnect the interior rear view mirror electrical connector.
.jpg) |
-
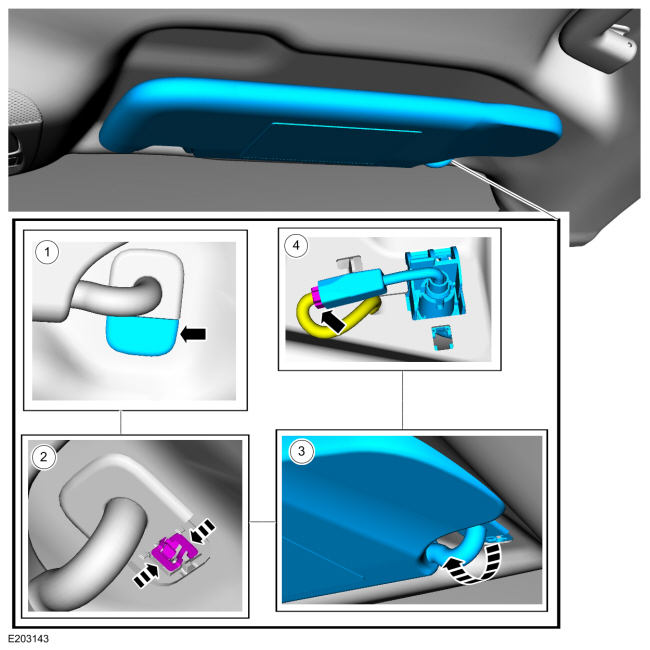
NOTE: Right hand (RH) shown, left hand (LH) similar.
On both sides.
Remove both sun visors.
-
Remove the sun visor retainer cover.
-
Remove the sun visor retainer.
-
Remove the sun visor.
-
If equipped.
Disconnect the sun visor electrical connector.
-
Remove the sun visor retainer cover.
 |
-
NOTE: Right hand (RH) shown, left hand (LH) similar.
On both sides.
Remove the retainer and the sun visor clip.
.jpg) |
-
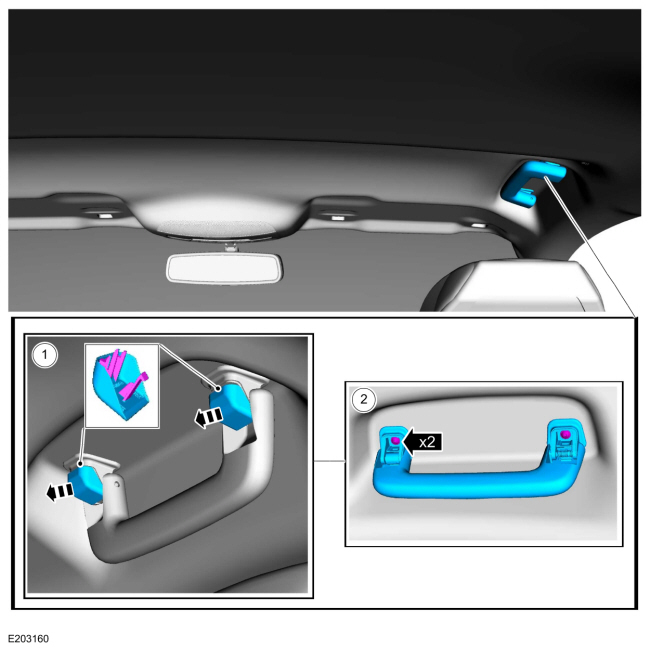
NOTE: Right hand (RH) shown, left hand (LH) similar.
On both sides.
Remove the front grab handles.
-
Remove the bolt covers.
-
Remove the retainers and the grab handle.
-
Remove the bolt covers.
 |
-
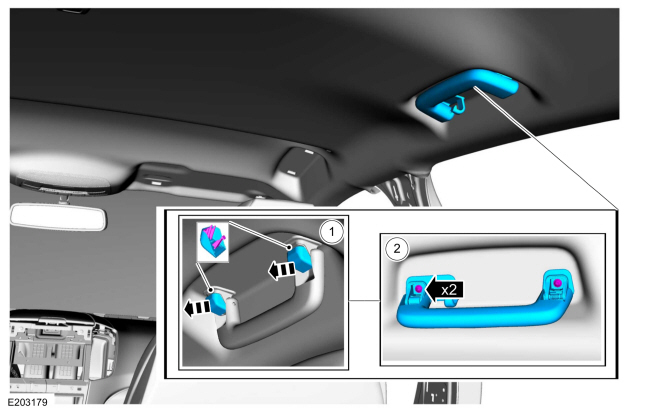
NOTE: Right hand (RH) shown, left hand (LH) similar.
On both sides.
Remove the rear grab handles.
-
Remove the bolt covers.
-
Remove the retainers and the rear grab handle.
-
Remove the bolt covers.
 |
-
Disconnect the headliner wire harness electrical connectors.
.jpg) |
-
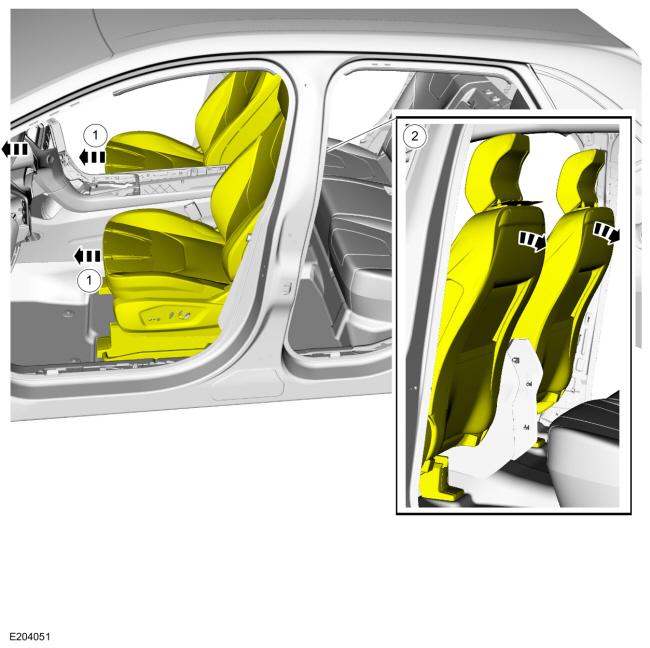
Position both front seats.
-
Move both front seats to the full forward position.
-
Fully recline both front seats.
-
Move both front seats to the full forward position.
 |
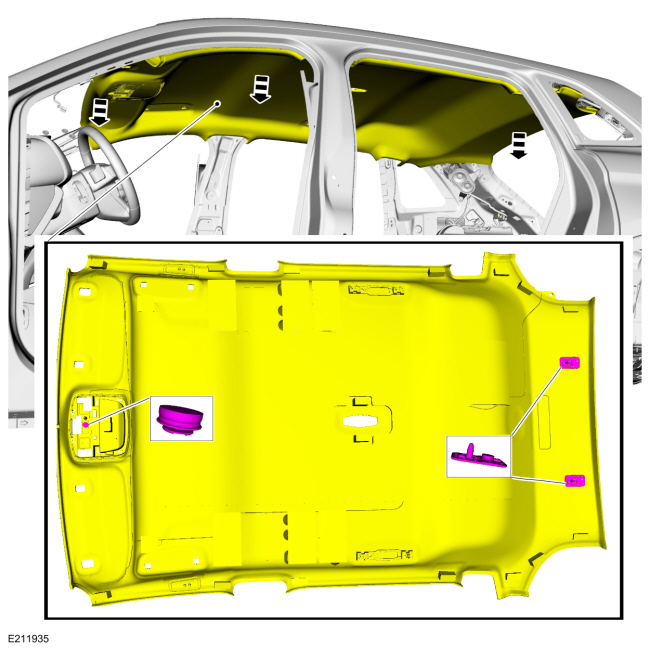
Vehicles without roof opening panel
-
Release the magnets and lower the headliner.
 |
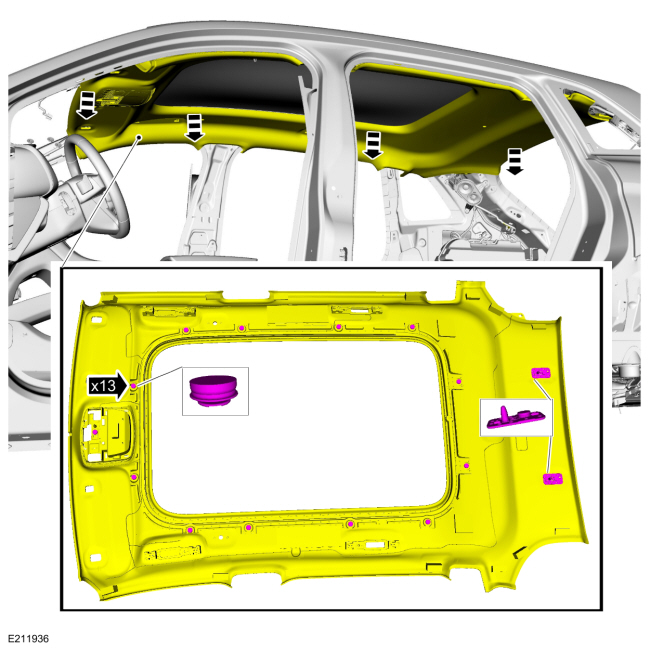
Vehicles With: Roof Opening Panel
-
Release the magnets and lower the headliner.
 |
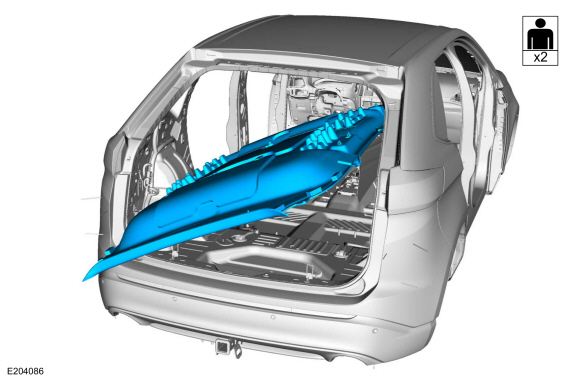
All vehicles
-
Remove the headliner.
 |
Installation
-
NOTE: These steps are only necessary when installing a new component.
NOTE: When transferring the headliner harness to a new headliner note the location of each electrical connector during removal and maintain those locations when transferring the harness. If equipped with noise cancellation the microphone connectors are the same but are not interchangeable and must maintain their original locations for the system to operate correctly.
NOTE: Obtain the specified adhesive commercially. Depending on the headliner and optional wire harness(es), the purchase of multiple tubes is suggested.
-
Using tape, mark the wire at the exit points for proper length from headliner-to-body/ roof connectors.
-
Carefully remove the wire harness from the original headliner.
-
Using a marking tool, mark the new headliner with
the routing and exit points of the wire harness from the original
headliner.
-
NOTICE: Make sure not to damage the wire harness when cutting the excess adhesive from the wire harness.
Cut and remove any excess adhesive from the wire harness.
-
Position the wire harness onto the new headliner,
making sure the harness has enough length to be connected to the body/
roof connectors at the tape location(s) applied earlier. Apply tape to
temporarily hold the wire harness in position on the headliner.
-
Apply the adhesive in the same location as the
factory installed adhesive along the full length of the wire
harness-to-headliner to avoid any NVH concern(s).
Material: 3M™ Super-Fast Repair Adhesive / 04747
-
Using tape, mark the wire at the exit points for proper length from headliner-to-body/ roof connectors.
-
NOTICE: For vehicles equipped with noise cancellation microphones, the brackets must be glued flush to the new headliner and a bead of glue placed around the bracket to ensure proper sealing and correct system operation.
NOTE: Transfer parts as necessary.
To install, reverse the removal procedure.
 Front Door Trim Panel. Removal and Installation
Removal
NOTE:
Removal steps in this procedure may contain installation details.
NOTE:
LH side shown, RH side similar.
Release the clips and remove the door trim panel bolt cover...
 Headliner - Lowering. Removal and Installation
Special Tool(s) /
General Equipment
Interior Trim Remover
Remove the following items:
On both sides.
Remove the A-pillar trim panels...
Other information:
Lincoln Nautilus 2018-2026 Service Manual: Hood Latch Release Handle. Removal and Installation
Removal Remove the hood latch release handle access cover. NOTE: Insert a 10mm 1/4 inch drive socket to release the clips. Remove the hood latch release handle. Release the hood latch release handle retaining clips...
Lincoln Nautilus 2018-2026 Service Manual: Climate Control System - System Operation and Component Description. Description and Operation
System Operation System Diagram E385077 *.sttxt { visibility: hidden; } *.stcallout { visibility: visible; } 1 Microphone 2 APIM 3 GWM 4 Ambient Air Tempera..
Categories
- Manuals Home
- 1st Generation Nautilus Owners Manual
- 1st Generation Nautilus Service Manual
- Autounlock and Autolock
- Replacing the Rear Wiper Blades
- USB Ports
- New on site
- Most important about car
Locating the Pre-Collision Assist Sensors
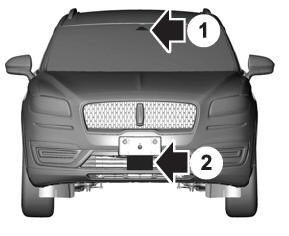
If a message regarding a blocked sensor or camera appears in the information display, something is obstructing the radar signals or camera images. The radar sensor is behind the fascia cover in the center of the lower grille. With a blocked sensor or camera, the system may not function, or performance may reduce. See Pre-Collision Assist – Information Messages.