Lincoln Nautilus: Interior Trim and Ornamentation / Headliner - Lowering. Removal and Installation
Lincoln Nautilus 2018-2026 Service Manual / Body and Paint / Body and Paint / Interior Trim and Ornamentation / Headliner - Lowering. Removal and Installation
Special Tool(s) / General Equipment
| Interior Trim Remover |
-
Remove the following items:
-
On both sides.
Remove the A-pillar trim panels.
Refer to: A-Pillar Trim Panel (501-05 Interior Trim and Ornamentation, Removal and Installation).
-
On both sides.
Remove the B-pillar trim panels.
Refer to: B-Pillar Trim Panel (501-05 Interior Trim and Ornamentation, Removal and Installation).
-
On both sides.
Remove the C-pillar trim panels.
Refer to: C-Pillar Trim Panel (501-05 Interior Trim and Ornamentation, Removal and Installation).
-
On both sides.
Remove the D-pillar trim panels.
Refer to: D-Pillar Trim Panel (501-05 Interior Trim and Ornamentation, Removal and Installation).
-
On both sides.
-
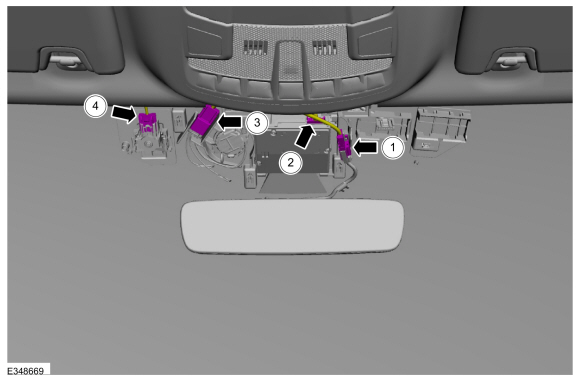
NOTE: Interior rear view mirror removed for clarity.
Remove the IPMA cover.
-
Release the IPMA cover clips.
Use the General Equipment: Interior Trim Remover
-
If equipped.
Disconnect the PAD indicator electrical connector.
-
Release the IPMA cover clips.
.jpg) |
-
Disconnect the headliner wiring harness electrical connectors.
-
Disconnect the interior rear view mirror electrical connector.
-
Disconnect the IPMA electrical connector.
-
Disconnect the rain sensor electrical connector.
-
Disconnect the in-vehicle temperature and humidity sensor electrical connector.
-
Disconnect the interior rear view mirror electrical connector.
 |
-
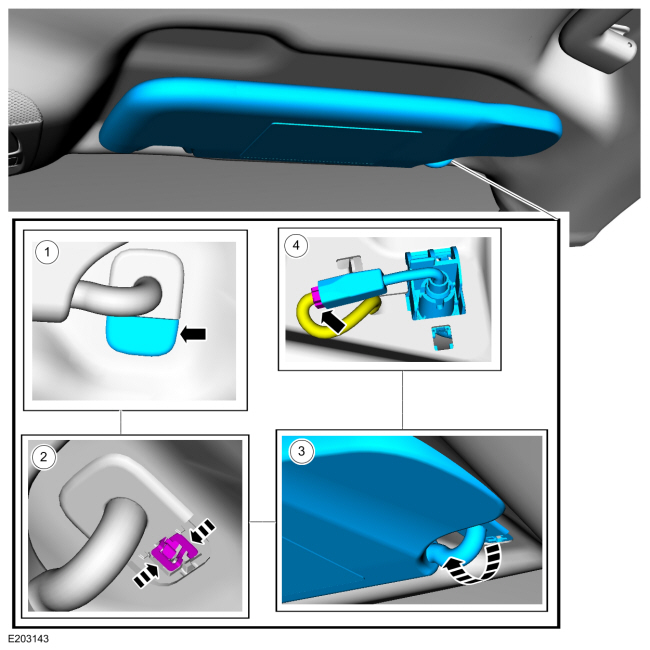
NOTE: Right hand (RH) shown, left hand (LH) similar.
On both sides.
Remove both sun visors.
-
Remove the sun visor retainer cover.
-
Remove the sun visor retainer.
-
Remove the sun visor.
-
If equipped.
Disconnect the sun visor electrical connector.
-
Remove the sun visor retainer cover.
 |
-
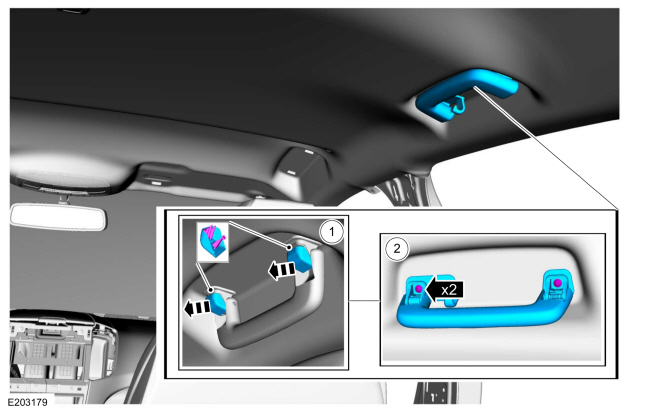
NOTE: Right hand (RH) shown, left hand (LH) similar.
On both sides.
Remove the retainer and the sun visor clip.
 |
-
NOTE: Right hand (RH) shown, left hand (LH) similar.
On both sides.
Remove the front grab handles.
-
Remove the bolt covers.
-
Remove the retainers and the grab handle.
-
Remove the bolt covers.
.jpg) |
-
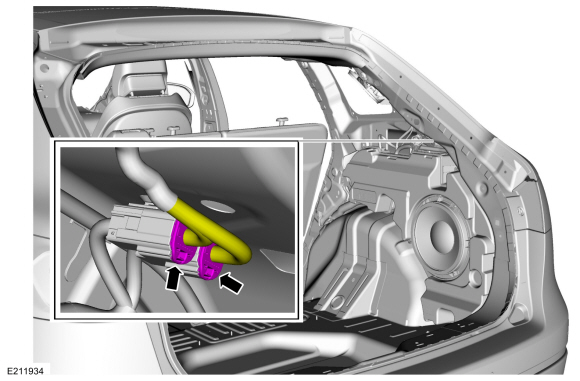
NOTE: Right hand (RH) shown, left hand (LH) similar.
On both sides.
Remove the rear grab handles.
-
Remove the bolt covers.
-
Remove the retainers and the rear grab handle.
-
Remove the bolt covers.
 |
-
Disconnect the headliner wire harness electrical connectors.
 |
-
Position both front seats.
-
Move both front seats to the full forward position.
-
Fully recline both front seats.
-
Move both front seats to the full forward position.
 |
-
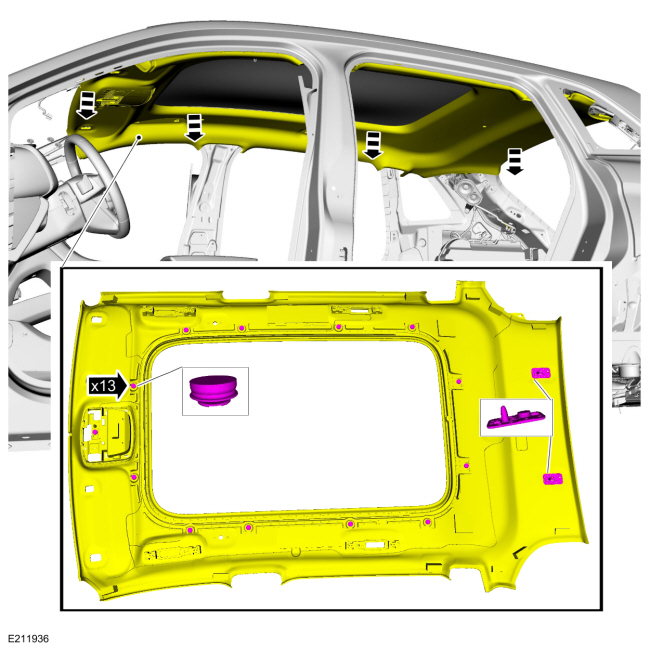
NOTE: Headliner with roof opening panel shown, others similar.
Release the magnets and lower the headliner.
 |
 Headliner. Removal and Installation
Special Tool(s) /
General Equipment
Interior Trim Remover
Materials
Name
Specification
3M™ Super-Fast Repair Adhesive04747
-
Removal
Remove the following items:
On both sides...
 Liftgate Trim Panel. Removal and Installation
Removal
Release the clips and remove the liftgate upper center trim panel.
Release the clips and remove the liftgate grab handle cover...
Other information:
Lincoln Nautilus 2018-2026 Service Manual: Body Control Module (BCM). Removal and Installation
Removal NOTE: Removal steps in this procedure may contain installation details. NOTE: If the BCM did not respond to the diagnostic scan tool, As-Built Data may need to be entered as part of the repair. This step is only necessary if the BCM is being replaced Using a diagnostic scan tool, begin the PMI process for the BCM following the on-screen instructions...
Lincoln Nautilus 2018-2026 Service Manual: Specifications
Lubricants, Fluids, Sealers and Adhesives Item Specifications Intermediate shaft bearing O-ring seal Motorcraft® MERCON® ULV Automatic Transmission Fluid XT-12-QULV Torque Specifications NOTE: Applicable only for FWD vehicles...
Categories
- Manuals Home
- 1st Generation Nautilus Owners Manual
- 1st Generation Nautilus Service Manual
- Interior Lamp Function. Adjusting the Instrument Panel Lighting Brightness. Ambient Lighting. Interior Lighting – Troubleshooting
- Replacing the Rear Wiper Blades
- Opening the Liftgate
- New on site
- Most important about car
Clearing the Garage Door Opener. Reprogramming the Garage Door Opener. Garage Door Opener Radio Frequencies
Clearing the Garage Door Opener

Copyright © 2026 www.linautilus.com