Lincoln Nautilus: Body Closures / Hood Alignment. General Procedures
Inspection
NOTE: Removal steps in this procedure may contain installation details.
-
Inspect the hood-to-body dimensions.
Refer to: Body and Frame (501-26 Body Repairs - Vehicle Specific Information and Tolerance Checks, Description and Operation).
All alignments
-
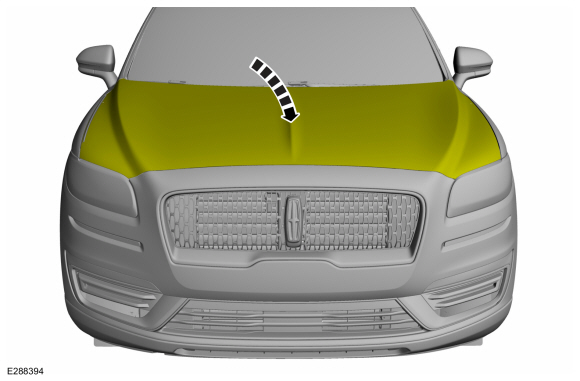
Open the hood.
.jpg) |
-
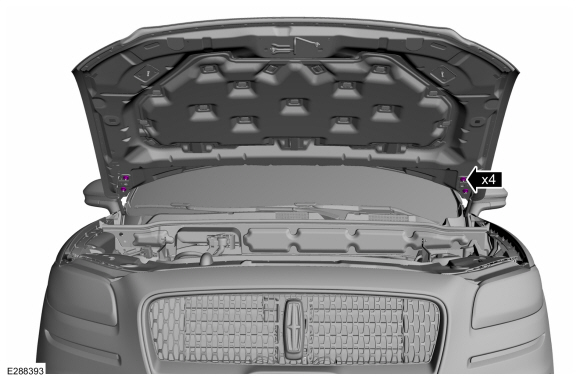
NOTE: Support the hood before removing the struts. Failure to follow this direction may result in damage to the components.
Release the clips and remove the struts.
.jpg) |
-
Remove the hood latch.
Refer to: Hood Latch (501-14 Handles, Locks, Latches and Entry Systems, Removal and Installation).
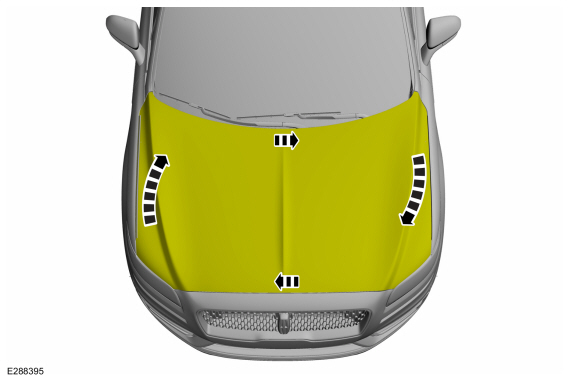
Hood fore and aft, left and right alignments
-
Loosen the nuts enough to permit movement of the hood.
 |
-
Carefully close the hood.
 |
-
Adjust the hood to specification.
Refer to: Body and Frame (501-26 Body Repairs - Vehicle Specific Information and Tolerance Checks, Description and Operation).
 |
-
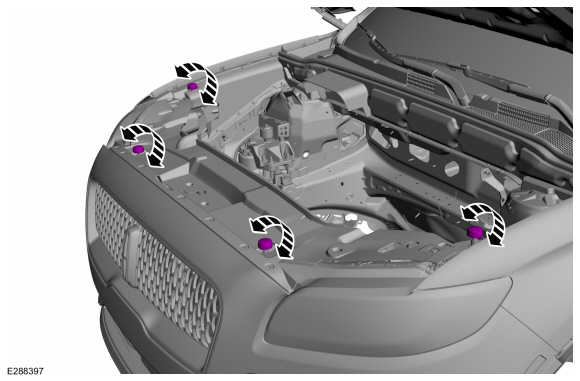
Carefully open the hood.
.jpg) |
-
Tighten the nuts.
Torque: 18 lb.ft (25 Nm)
|
Hood front up and down alignments
-
Adjust the bump stop rubbers.
 |
-
Carefully close the hood.
|
-
Adjust the hood to specification.
Refer to: Body and Frame (501-26 Body Repairs - Vehicle Specific Information and Tolerance Checks, Description and Operation).
.jpg) |
All alignments
-
Carefully open the hood.
|
-
Install the struts and secure the clips.
|
-
Install the hood latch.
Refer to: Hood Latch (501-14 Handles, Locks, Latches and Entry Systems, Removal and Installation).
-
Inspect the body-to-hood dimensions.
Refer to: Body and Frame (501-26 Body Repairs - Vehicle Specific Information and Tolerance Checks, Description and Operation).
.jpg) |
 Front Door Alignment. General Procedures
Inspection
NOTE:
Removal steps in this procedure may contain installation details.
NOTE:
LH side shown, RH side similar.
Inspect the front door-to-body dimensions...
 Liftgate Alignment. General Procedures
Inspection
NOTE:
Removal steps in this procedure may contain installation details.
Check liftgate-to-body dimensions.
Refer to: Body and Frame (501-26 Body Repairs - Vehicle Specific Information and Tolerance Checks, Description and Operation)...
Other information:
Lincoln Nautilus 2018-2026 Service Manual: Fixed Glass. General Procedures
Special Tool(s) / General Equipment Glass Cut-Out Wire Power Caulk Gun Power Fixed Glass Removal Tool Cold Knife Knife Vacuum Cleaner Materials Name Specification Sika® SikaTack® MACH 60 / Sika® SikaTack® MACH 30 / Dow® BETASEAL™ Express - Sika Tack ASAP Urethane Adhesive - Motorcraft® Ultra-Clear Spray Glass CleanerZC-..
Lincoln Nautilus 2018-2026 Owners Manual: Adjusting the Exterior Mirrors
WARNING: Do not adjust the mirrors when your vehicle is moving. This could result in the loss of control of your vehicle, serious personal injury or death. Left-hand mirror. Adjustment control. Right-hand mirror. To adjust your mirrors, switch your vehicle on, with the ignition in accessory mode or the engine running and then: Select the mirror you want to adjust. The control light ..
Categories
- Manuals Home
- 1st Generation Nautilus Owners Manual
- 1st Generation Nautilus Service Manual
- Anti-Theft Alarm System Settings. Security – Troubleshooting
- Programming the Garage Door Opener to Your Garage Door Opener Motor
- Folding the Exterior Mirrors - Vehicles With: Manual Folding Mirrors. Folding the Exterior Mirrors - Vehicles With: Power Folding Mirrors
- New on site
- Most important about car
Auto-Start-Stop
What Is Auto-Start-Stop
The system is designed to help reduce fuel consumption and CO2 emissions by stopping the engine when it is idling, for example at traffic lights.
Auto-Start-Stop Precautions
WARNING: Apply the parking brake, shift into park (P), switch the ignition off and remove the key before you leave your vehicle. Failure to follow this instruction could result in personal injury or death.
WARNING: Apply the parking brake, shift into park (P), switch the ignition off and remove the key before you open the hood or have any service or repair work completed. If you do not switch the ignition off, the engine could restart at any time. Failure to follow this instruction could result in personal injury or d