Lincoln Nautilus: Handles, Locks, Latches and Entry Systems / Hood Latch Release Cable. Removal and Installation
Special Tool(s) /
General Equipment
Removal
NOTE:
Removal steps in this procedure may contain installation details.
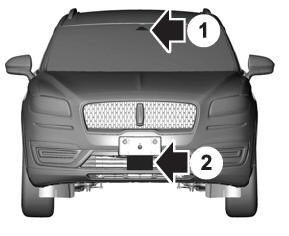
Front Cable
-
Remove the hood latch.
Refer to: Hood Latch (501-14 Handles, Locks, Latches and Entry Systems, Removal and Installation).
-
Open the top cover.
-
Release the clips.
-
Open the top cover.
-
Disconnect the cable end and position aside the hood latch release cable.
-
Remove the front hood latch release cable.
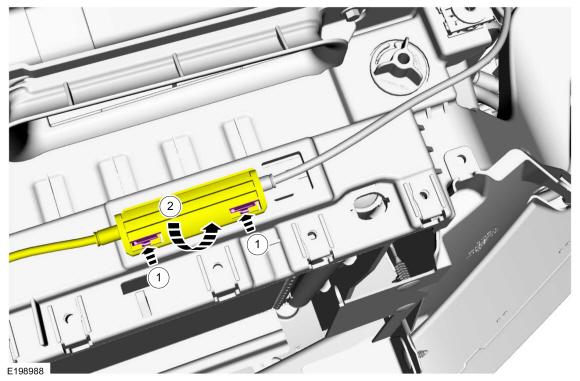
Rear Cable
-
Remove the pin-type retainers and the radiator sight shield.
-
Open the top cover.
-
Release the clips.
-
Open the top cover.
-
Disconnect the cable end and position aside the hood latch release cable.
-
Remove the air cleaner.
-
Remove the battery tray.
Refer to: Battery Tray (414-01 Battery, Mounting and Cables, Removal and Installation).
-
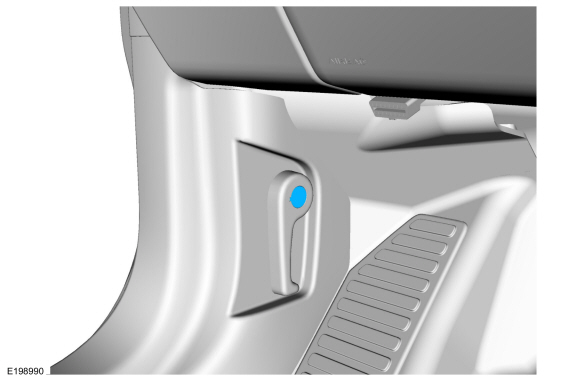
Remove the hood latch release handle access cover.
-
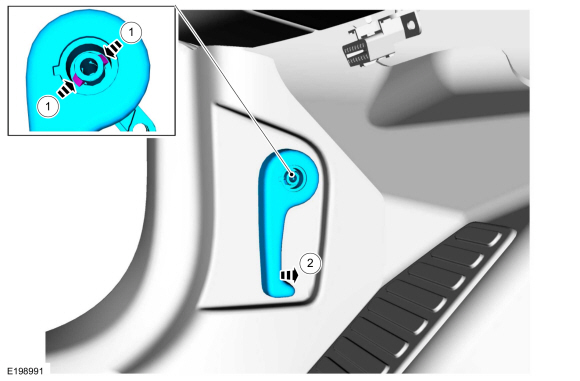
NOTE:
Insert a 10mm 1/4 inch drive socket to release the clips.
Remove the hood latch release handle.
-
Release the hood latch release handle retaining clips.
-
Remove the hood latch release handle.
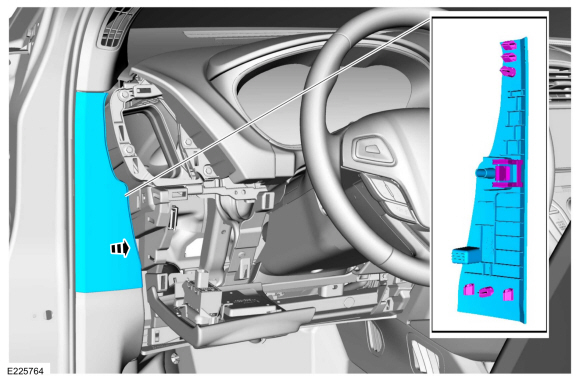
-
Detach the clips and pivot the instrument panel LH lower trim panel downward.
Use the General Equipment: Interior Trim Remover
-
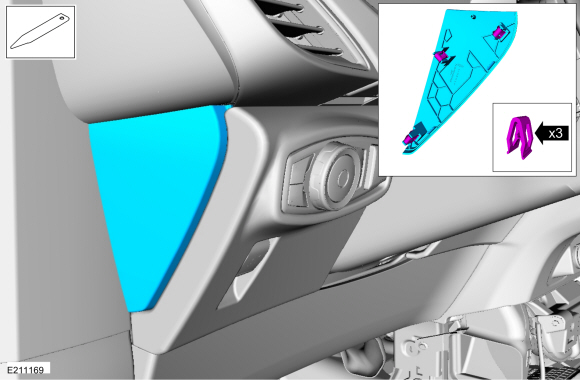
Release the clips and remove the LH instrument panel finish panel.
Use the General Equipment: Interior Trim Remover
-
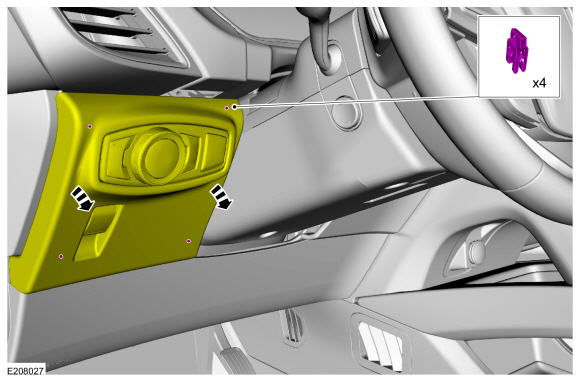
Remove the bolt, release the clips and remove the LH register assembly.
Use the General Equipment: Interior Trim Remover
Torque:
22 lb.in (2.5 Nm)
-
Remove the LH cowl trim panel.
-
Release the clips, disconnect the electrical connector and remove the driver door scuff plate.
Use the General Equipment: Interior Trim Remover
-
Release the clips and remove the front foot rest pad.
Use the General Equipment: Interior Trim Remover
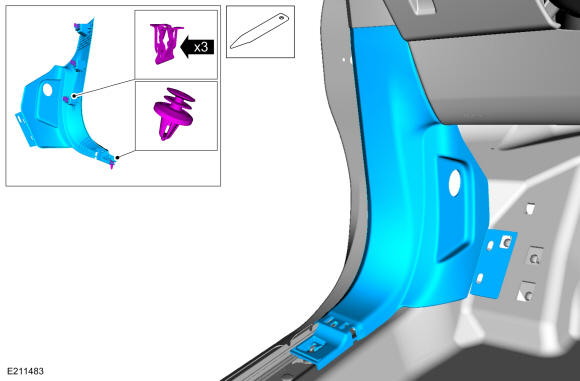
-
Release the clips and remove the LH side kick panel.
-
Remove the clip and position the carpet aside.
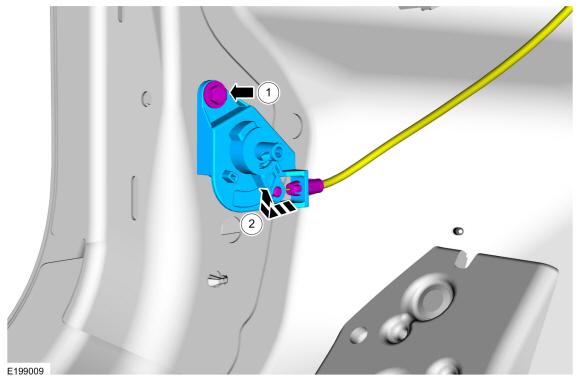
-
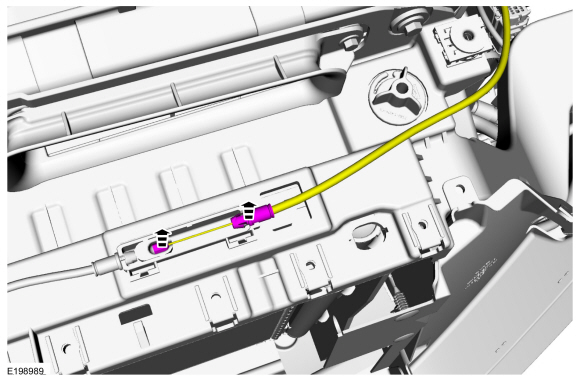
Remove the hood latch release and disconnect the rear hood latch release cable.
-
Remove the bolt.
Torque:
80 lb.in (9 Nm)
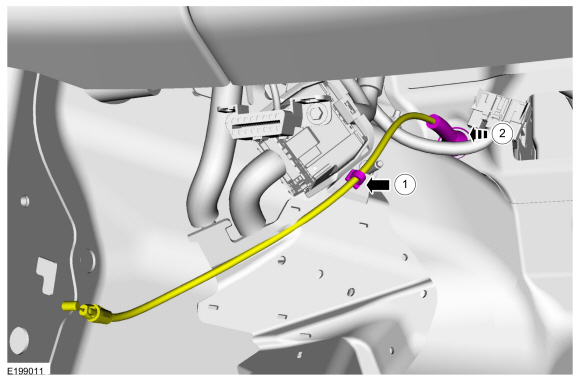
-
Disconnect the rear hood latch release cable.
-
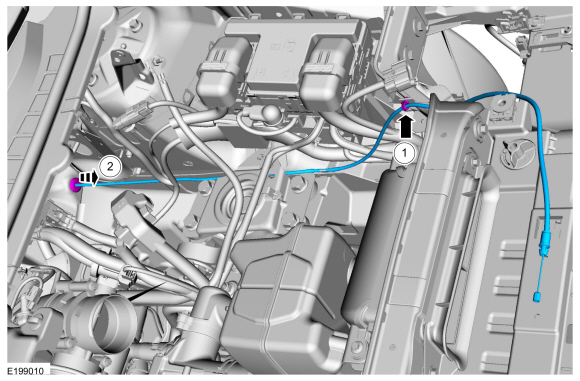
Route the rear hood latch release cable through the cowl.
-
Release the routing clip.
-
Route the rear hood latch release cable through the cowl.
-
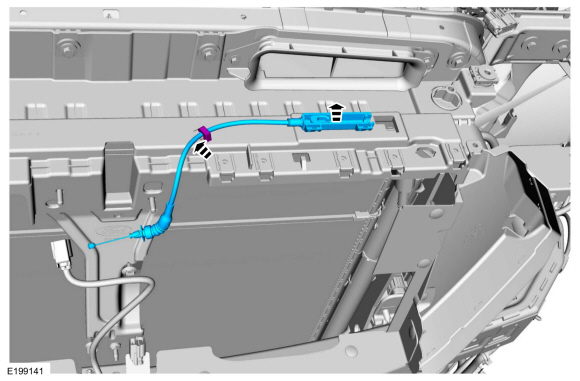
Remove the rear hood latch release cable through the engine compartment.
-
If equipped.
Release the routing clip.
-
Route the cable through the engine compartment and remove the rear hood latch release cable.
Installation
-
To install, reverse the removal procedure.
Removal
NOTE:
Removal steps in this procedure may contain installation details.
NOTE:
Some vehicles are equipped with a grille shutter
assembly framework only...
Removal
Remove the hood latch release handle access cover.
NOTE:
Insert a 10mm 1/4 inch drive socket to release the clips...
Other information:
Lane Keeping System Settings
To change the steering wheel vibration, use
the instrument cluster display:
Using the instrument cluster display
controls on the steering wheel, select
Driver Assist.
Select Lane Keeping Sys.
Select Alert Intensity...
System Operation
System Diagram
E385077
*.sttxt {
visibility: hidden;
}
*.stcallout {
visibility: visible;
}
1
Microphone
2
APIM
3
GWM
4
Ambient
Air
Tempera..
.jpg)
.jpg)
.jpg)

.jpg)
 Hood Latch. Removal and Installation
 Hood Latch Release Handle. Removal and Installation