Lincoln Nautilus: Interior Trim and Ornamentation / Rear Door Trim Panel. Removal and Installation
Lincoln Nautilus 2018-2026 Service Manual / Body and Paint / Body and Paint / Interior Trim and Ornamentation / Rear Door Trim Panel. Removal and Installation
Removal
NOTE: LH side shown, RH side similar.
NOTE: Removal steps in this procedure may contain installation details.
-
Release the clips and remove the door trim panel bolt cover.
 |
-
Remove the door trim panel bolt.
Torque: 62 lb.in (7 Nm)
 |
-
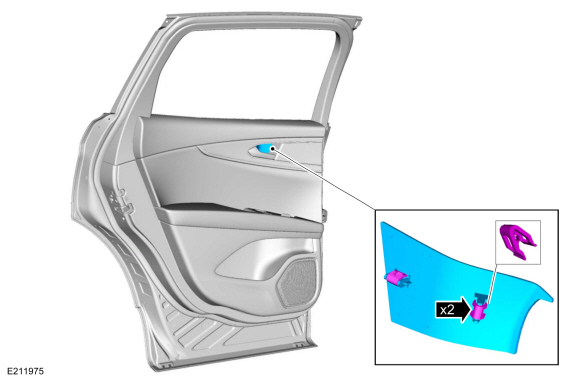
Remove the rear door window control switch.
Refer to: Rear Door Window Control Switch (501-11 Glass, Frames and Mechanisms, Removal and Installation).
-
Remove the door trim panel bolt.
Torque: 62 lb.in (7 Nm)
.jpg) |
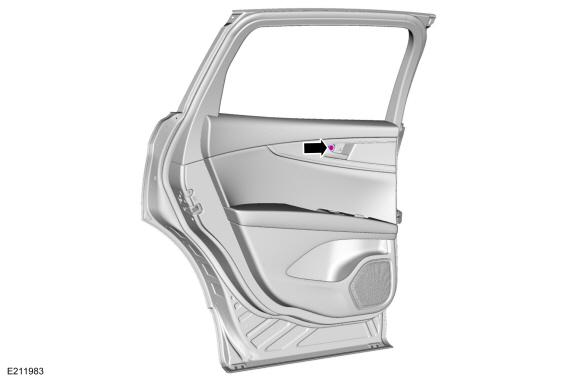
-
Remove the lower door trim panel bolt.
.jpg) |
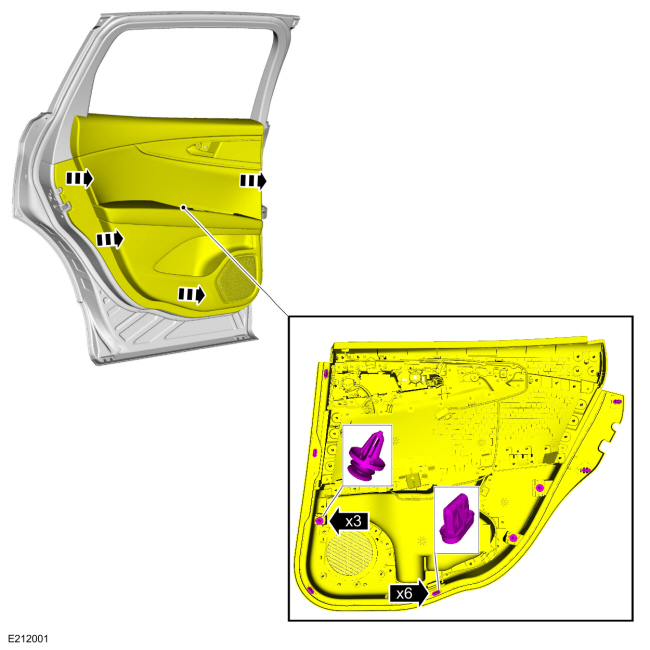
-
Release the clips and separate the door trim panel from the door.
 |
-
Remove the front door trim panel.
-
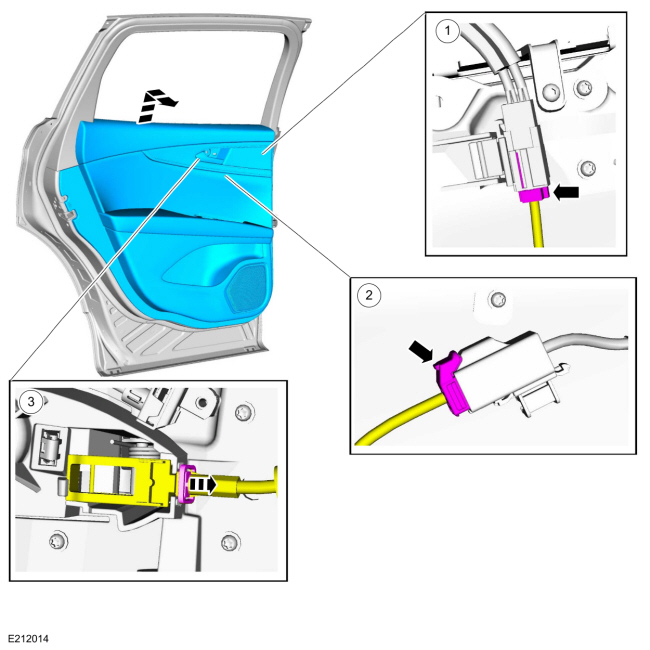
If equipped.
Disconnect the speaker electrical connectors.
-
Disconnect the ambient light electrical connector.
-
Release the tab, disconnect the latch cable and remove the door trim panel.
-
If equipped.
 |
Installation
-
To install, reverse the removal procedure.
 Loadspace Trim Panel Cargo Net Hook. Removal and Installation
Special Tool(s) /
General Equipment
Flat Headed Screw Driver
Interior Trim Remover
Removal
NOTE:
LH shown, RH similar.
NOTE:
Removal steps in this procedure may contain installation details...
 Steering Column Shrouds. Removal and Installation
Removal
Fully extend and lower the steering column.
Release the upper tabs and disconnect the gap hider from the upper steering column shroud...
Other information:
Lincoln Nautilus 2018-2026 Service Manual: Rear Drive Axle and Differential - System Operation and Component Description. Description and Operation
System Operation System Diagram Item Description 1 Drive Mode 2 PCM 3 ABS 4 Accelerator Pedal Position 5 BCM 6 Ignition Status 7 GWM 8 AWD 9 Speed / Position sensor 10 Actuator motor 11 Steering Wheel Angle 12 Vehicle Acceleration 13 Wheel Speed 14 RDU R..
Lincoln Nautilus 2018-2026 Service Manual: Roof Opening Panel Motor. Removal and Installation
Removal NOTE: Removal steps in this procedure may contain installation details. Place the roof opening panel glass in the fully CLOSE position. Place the roof opening panel shield to the fully OPEN position. Lower the headliner. Refer to: Headliner - Lowering (501-05) . Roof Opening Panel Motor - Glass ..
Categories
- Manuals Home
- 1st Generation Nautilus Owners Manual
- 1st Generation Nautilus Service Manual
- Changing the 12V Battery
- Folding the Exterior Mirrors - Vehicles With: Manual Folding Mirrors. Folding the Exterior Mirrors - Vehicles With: Power Folding Mirrors
- Opening the Liftgate
- New on site
- Most important about car
USB Ports
Locating the USB Ports
Data Transfer USB Ports

The USB Ports could be in the following locations:
On the lower instrument panel. Inside the media bin. Inside the center console.Note: These USB ports can also charge devices.
Copyright © 2026 www.linautilus.com