Lincoln Nautilus: Exterior Trim and Ornamentation / Rear Door Upper Moulding. Removal and Installation
Removal
NOTE:
Removal steps in this procedure may contain installation details.
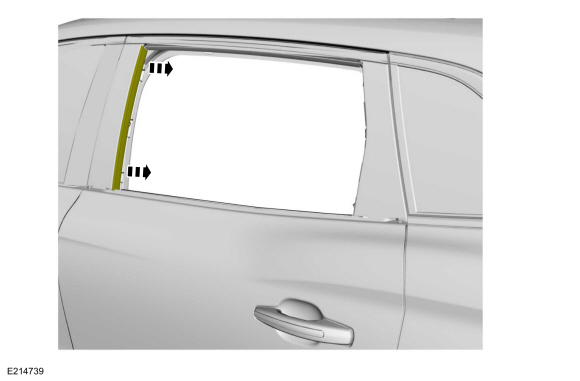
Aft Rear Door Upper Moulding
-
Remove the front screw from the upper belt moulding.
Torque:
12 lb.in (1.4 Nm)
-
Remove the rear screw from the upper belt moulding.
Torque:
12 lb.in (1.4 Nm)
-
Disengage the retainer tabs along the length of the moulding and remove the moulding.
-
Lower the rear door glass.
-
Pull the rear door glass run leg out of U-channel of door moulding.
-
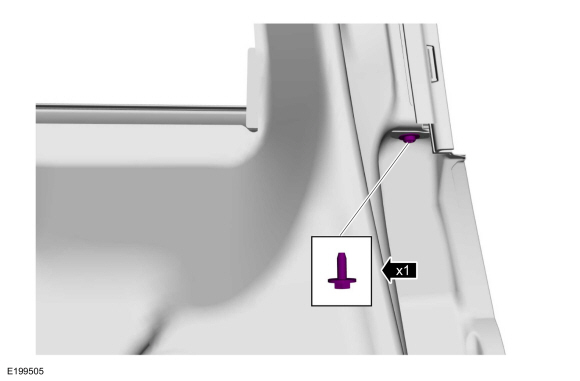
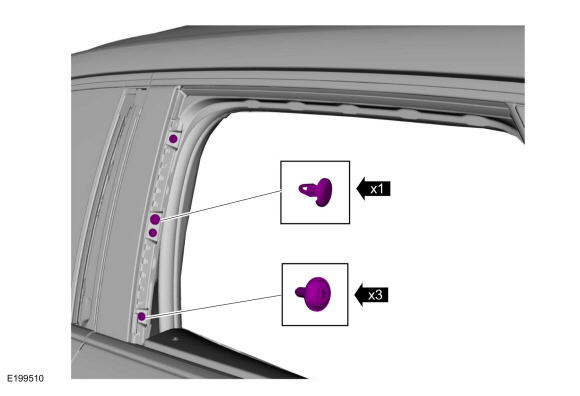
Remove the pushpin and the screws.
Torque:
17 lb.in (1.9 Nm)
-
Detach the rear edge of the moulding from the door frame and pull the moulding upward to remove.
Torque:
17 lb.in (1.9 Nm)
Fore Rear Door Upper Moulding
-
Remove the front screw from the upper belt moulding.
Torque:
12 lb.in (1.4 Nm)
-
Remove the rear screw from the upper belt moulding.
Torque:
12 lb.in (1.4 Nm)
-
Disengage the retainer tabs along the length of the moulding and remove the moulding.
-
Lower the rear door glass.
-
Remove the rear door window glass.
Refer to: Rear Door Window Glass (501-11 Glass, Frames and Mechanisms, Removal and Installation).
-
Pull the rear door glass run leg out of U-channel of door moulding.
-
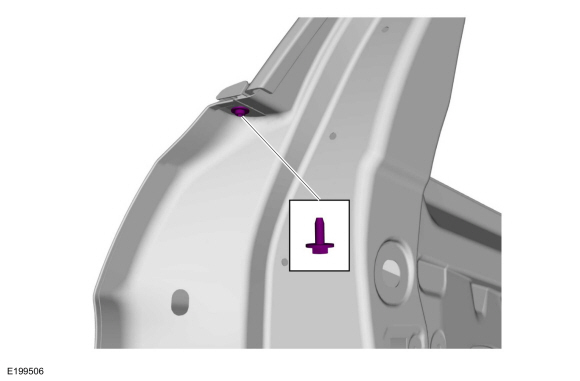
Remove the pushpin and the screws.
Torque:
17 lb.in (1.9 Nm)
-
Detach the front edge of the moulding from the door frame and pull the moulding upward to remove.
Installation
-
To install, reverse the removal procedure.
Removal
NOTE:
LH side shown RH side similar.
NOTE:
Removal steps in this procedure may contain installation details.
NOTICE:
To avoid damage to the moulding, only use moderate force...
Removal
NOTE:
LH side shown, RH side similar.
NOTE:
Removal steps in this procedure may contain installation details.
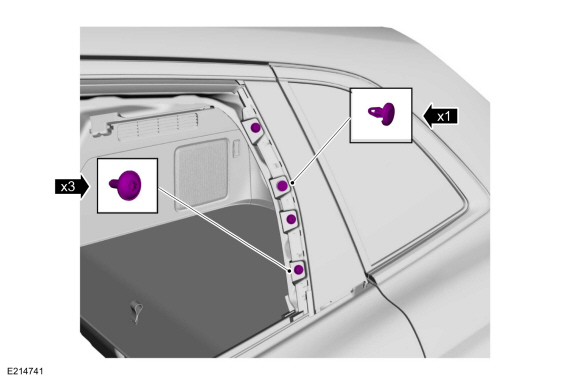
If equipped, remove the pushpins and remove the deflector...
Other information:
Overview
The cruise control system is controlled by the PCM .
The
cruise control mode is selected from the steering wheel mounted
switches which are integrated into the steering wheel. Refer to Owners
Literature for additional information.
The
cruise control system maintains a selected vehicle speed between 32 kmh
(20 mph) or 30 kmh (18 mph) (metric cluster) and the maximum limited
vehicl..
Special Tool(s) /
General Equipment
Brake Caliper Piston Retractor
Materials
Name
Specification
Motorcraft® Metal Brake Parts CleanerPM-4-A, PM-4-B, APM-4-C
-
Removal
NOTE:
Removal steps in this procedure may contain installation details.
All vehicles
Remove the wheel and tire.
Refer to: Wheel and Tire (204-04A Wheels and Tires, Removal and Install..
.jpg)
.jpg)
.jpg)

.jpg)
 Rear Door Moulding. Removal and Installation
 Rear Quarter Panel Moulding. Removal and Installation