Lincoln Nautilus: Rear End Sheet Metal Repairs / Rear Floor Panel Section. Removal and Installation
Special Tool(s) /
General Equipment
| Spherical Cutter |
| Grinder |
| Air Body Saw |
| MIG/MAG Welding Equipment |
| Spot Weld Drill Bit |
Materials
| Name |
Specification |
Flange Sealant
CU7Z-19B508-A |
WSS-M2G348-A11
|
Removal
-
Restore vehicle to pre-accident dimensions, if required.
Refer to: Body and Frame (501-26 Body Repairs - Vehicle Specific Information and Tolerance Checks, Description and Operation).
-
Reposition the carpeting and the wiring harness away from the working area.
-
Remove the following items:
-
Remove the rear bumper.
Refer to: Rear Bumper (501-19 Bumpers, Removal and Installation).
-
Remove the fuel tank (as equipped).
Refer to: Fuel Tank (310-01B Fuel Tank and Lines - 2.7L EcoBoost (238kW/324PS), Removal and Installation).
Refer to: Fuel Tank (310-01B Fuel Tank and Lines - 2.7L EcoBoost (238kW/324PS), Removal and Installation).
-
Remove the loadspace trim panel.
Refer to: Loadspace Trim Panel (501-05 Interior Trim and Ornamentation, Removal and Installation).
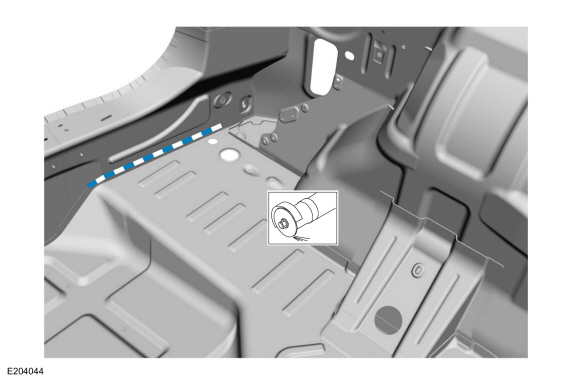
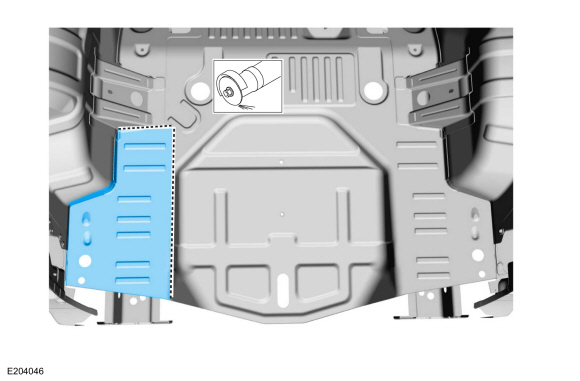
NOTE:
LH side shown, RH side similar.
-
Using a grinder with an abrasive disc or equivalent, remove the sealer along the floor pan rear flange.
Use the General Equipment: Grinder
-
Using a grinder with an abrasive disc or equivalent, remove the sealer along the floor pan flange.
Use the General Equipment: Grinder
-
Remove the spot welds along the floor pan wheelhouse flange.
Use the General Equipment: Spot Weld Drill Bit
-
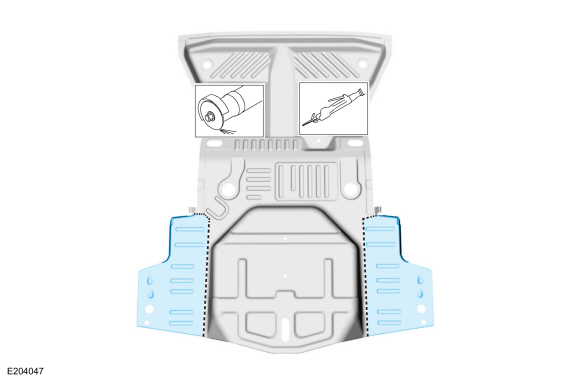
Remove the spot welds along the rear flange and frame rail area.
Use the General Equipment: Spot Weld Drill Bit
-
Remove the spot welds along the floor pan lower wheelhouse flange.
-
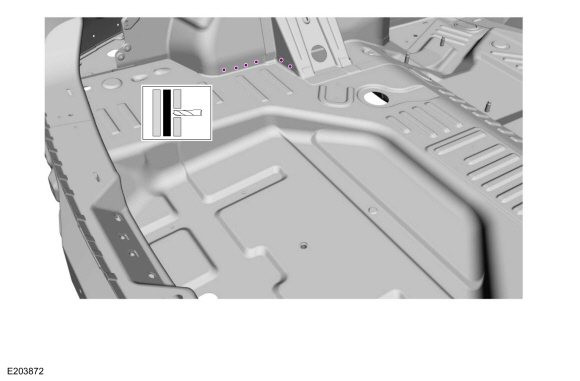
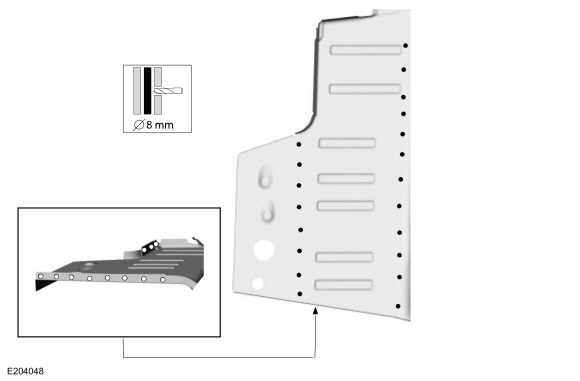
NOTICE:
Cut through floor panel only, do not cut into reinforcements or crossmembers.
NOTE:
Back panel removed from view for clarity.
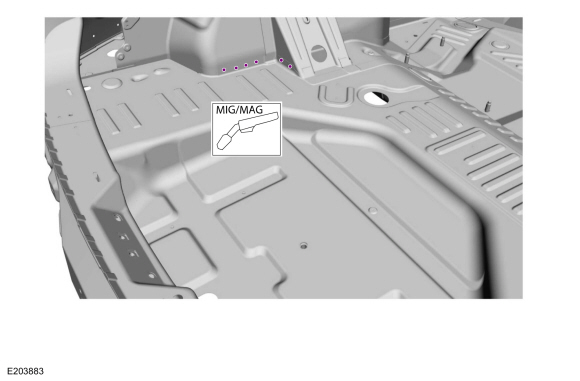
Cut and remove the floor panel section as indicated.
Use the General Equipment: Spherical Cutter
Installation
-
Create sectioning piece from the replacement part as required.
Use the General Equipment: Spherical Cutter
Use the General Equipment: Air Body Saw
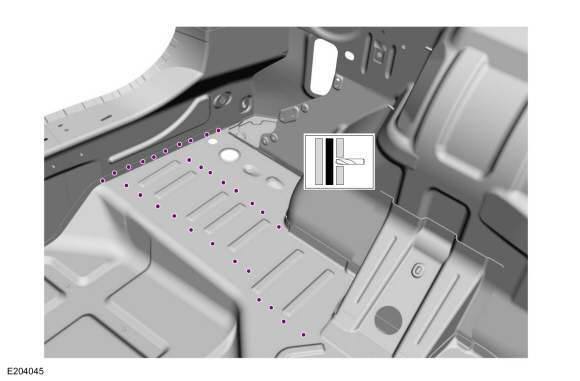
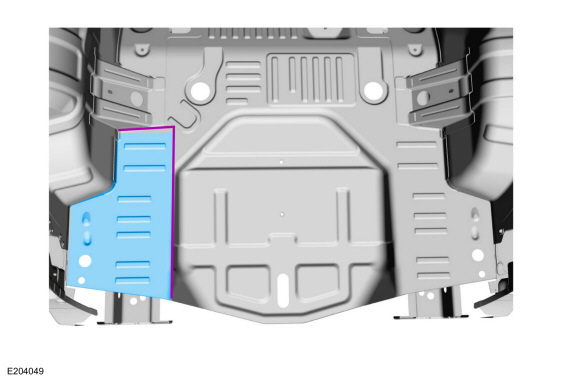
NOTE:
LH side shown, RH side similar.
-
Drill holes for plug welding in the replacement section.
-
Install the replacement section and seam weld.
Use the General Equipment: MIG/MAG Welding Equipment
-
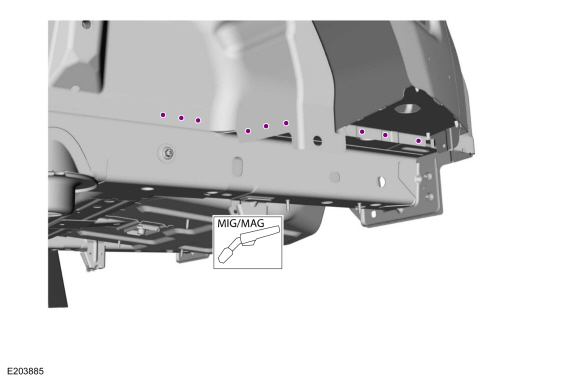
Weld the floor panel to the side member and rear flange.
Use the General Equipment: MIG/MAG Welding Equipment
-
Weld the floor panel at the wheelhouse.
Use the General Equipment: MIG/MAG Welding Equipment
-
Weld the lower floor panel flange on the affected side.
Use the General Equipment: MIG/MAG Welding Equipment
-
Metal finish as required using typical metal finishing techniques.
-
Refinish using a Ford approved paint system.
-
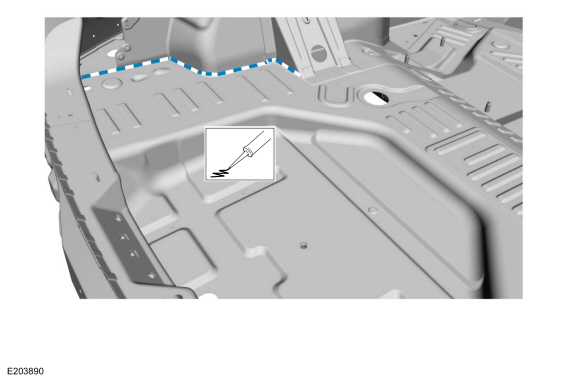
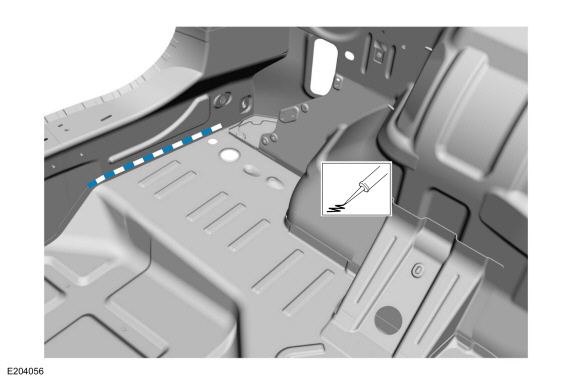
Apply sealer to the floor panel wheelhouse flange.
Material: Flange Sealant
/ CU7Z-19B508-A
(WSS-M2G348-A11)
-
Apply sealer to the floor panel rear flange.
-
Sealing work: All areas must be sealed to production level.
-
Restore corrosion protection.
Refer to: Corrosion Prevention (501-25 Body Repairs - General Information, General Procedures).
-
Reposition the carpeting and the wiring harness.
-
Install the following items:
-
Install the fuel tank (as equipped).
Refer to: Fuel Tank (310-01B Fuel Tank and Lines - 2.7L EcoBoost (238kW/324PS), Removal and Installation).
Refer to: Fuel Tank (310-01B Fuel Tank and Lines - 2.7L EcoBoost (238kW/324PS), Removal and Installation).
-
Install the rear bumper.
Refer to: Rear Bumper (501-19 Bumpers, Removal and Installation).
-
Install the loadspace trim panel.
Refer to: Loadspace Trim Panel (501-05 Interior Trim and Ornamentation, Removal and Installation).
Special Tool(s) /
General Equipment
8 mm Drill Bit
MIG/MAG Welding Equipment
Spot Weld Drill Bit
Locking Pliers
Materials
Name
Specification
Seam SealerTA-2-B, 3M™ 08308, LORD Fusor® 803DTM
-
Removal
NOTE:
Factory welds may be substituted with resistance or metal
inert gas (MIG) plug welds...
Special Tool(s) /
General Equipment
MIG/MAG Welding Equipment
Spot Weld Drill Bit
Removal
NOTICE:
The rear side member(s) are constructed of Dual Phase
(DP) 800 steel and cannot be sectioned...
Other information:
Overview
The vehicle may be equipped with:
Rear only parking aid camera system
360 degree view camera system
Rear Only Parking Aid Camera
The
rear parking aid camera system visually aids the driver while reversing
or reverse parking the vehicle...
Parking Aid Overview
Parking Aid - Audible
The
available parking aid features depend on the vehicle trim level and
options selected. The possible audio parking aid configurations are as
follows:
Rear parking aid
Front and rear parking aid
Front and rear parking aid, plus active park assist and the side sensing system
The
rear parking aid system sounds a warning tone..
.jpg)
.jpg)
 Rear Floor Panel Reinforcement. Removal and Installation
 Rear Side Member. Removal and Installation