Lincoln Nautilus: Rear Seats / Rear Seat Backrest Cover. Removal and Installation
Lincoln Nautilus 2018-2026 Service Manual / Body and Paint / Body and Paint / Rear Seats / Rear Seat Backrest Cover. Removal and Installation
Removal
NOTE: LH rear seat shown, RH rear seat similar.
NOTE: Removal steps in this procedure may contain installation details.
-
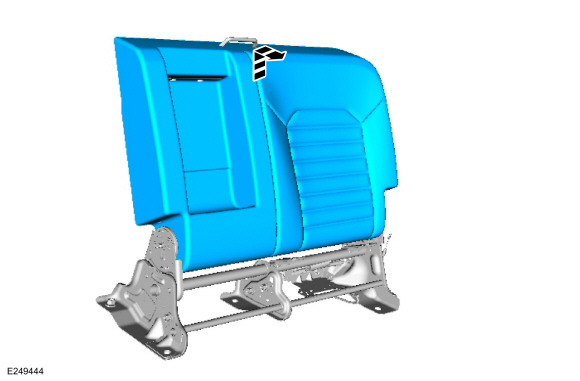
Remove the rear seat backrest.
Refer to: Rear Seat Backrest (501-10 Rear Seats) .
-
Remove the rear head restraint guide sleeves.
Refer to: Rear Head Restraint Guide Sleeve (501-10B Rear Seats, Removal and Installation).
-
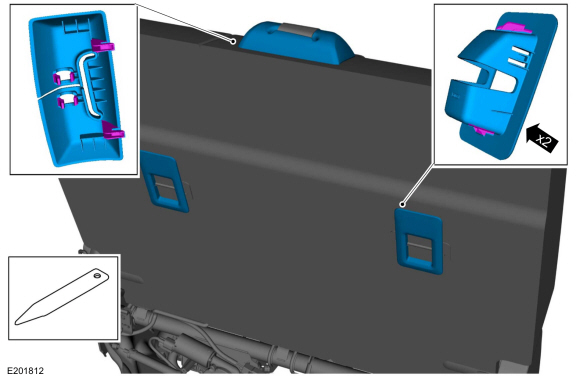
If equipped.
Remove the child safety seat tether anchor bezels and the seatbelt guide bezel.
 |
-
If equipped.
Remove the rear seat armrest.
Refer to: Rear Seat Armrest (501-10B Rear Seats, Removal and Installation).
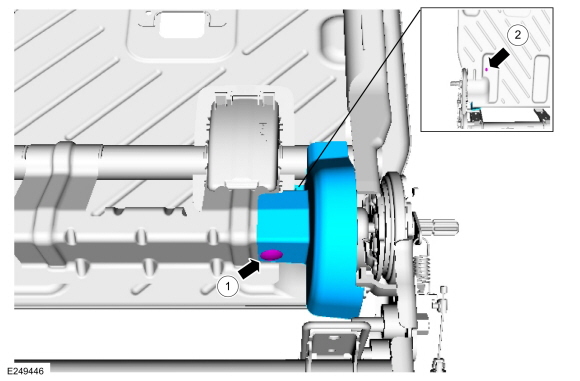
-
Release the U-clip and remove the backrest recline handle.
.jpg) |
-
Remove the outboard side shield.
-
Remove the fastener.
-
Remove the fastener.
-
Remove the fastener.
 |
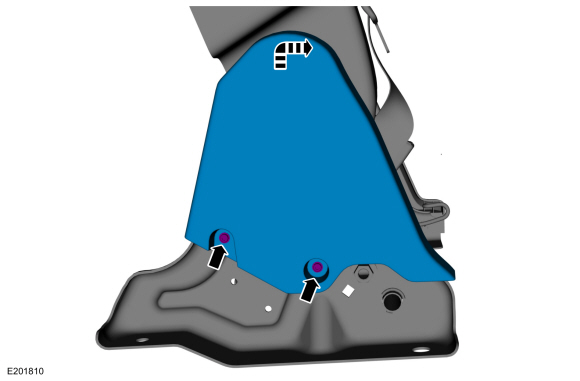
-
Remove the fasteners and the inboard side shield.
 |
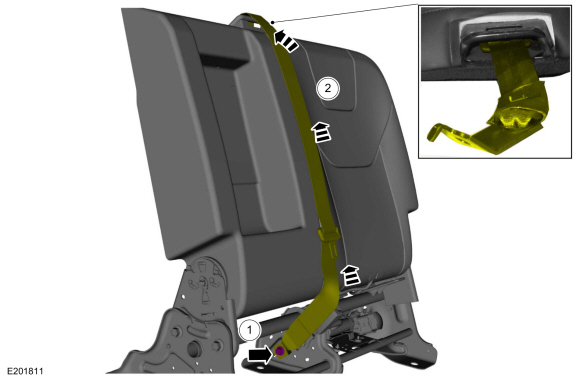
-
Detach the rear center seatbelt lower anchor.
-
Remove the fastener.
Torque: 35 lb.ft (47.5 Nm)
-
Route the seatbelt through the upper backrest cover.
-
Remove the fastener.
 |
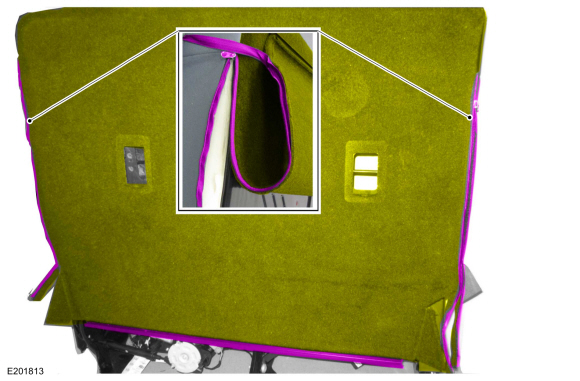
-
Release the lower J-clip and unzip the backrest cover.
 |
-
If equipped.
Disconnect the heated seat electrical connector.
 |
-
NOTICE: Use care when separating the backrest cover from the hook-and-loop strip or the hook-and-loop can be torn from the foam pad.
NOTICE: Use care when separating the backrest cover from the hook-and-arrow strip or the hook-and-arrow can be torn from the foam pad.
Remove the rear seat backrest cover.
-
If equipped.
Route the heated seat wire harness through the rear seat backrest cover.
-
Disengage the backrest cover hook-and-loop and hook-and-arrow strips from the backrest foam.
-
If equipped.
.jpg) |
NOTE: This step is only necessary when installing a new component.
-
Remove the backrest foam.
 |
NOTE: This step is only necessary when installing a new component.
-
Remove the RH rear seat backrest spring cover.
-
Remove the pin-type retainer.
-
Remove the screw.
-
Remove the pin-type retainer.
.jpg) |
NOTE: This step is only necessary when installing a new component.
-
Remove the LH rear seat backrest spring cover.
-
Remove the pin-type retainer.
-
Remove the screw.
-
Remove the pin-type retainer.
 |
Installation
-
To install, reverse the removal procedure.
 Rear Seat Backrest. Removal and Installation
Removal
WARNING:
The following procedure describes critical repair steps
required for correct seat component installation. Follow all notes and
steps carefully...
 Rear Seat Cushion. Removal and Installation
Removal
NOTE:
Removal steps in this procedure may contain installation details.
Release the rear seat cushion front locking tabs.
Release the rear seat cushion...
Other information:
Lincoln Nautilus 2018-2026 Service Manual: Specifications
Lubricants, Fluids and Capacities NOTE: Per the warranty and policy manual the Ford Engineering-approved refrigerant (see table for service part number) must be used for air conditioning repairs. ITEM CAPACITIES Material: Motorcraft® PAG Refrigerant Compressor Oil / YN-12-D (WSH-M1C231-B) (Mexico) 3...
Lincoln Nautilus 2018-2026 Service Manual: Front Floor Panel Bracket and Support. Removal and Installation
Special Tool(s) / General Equipment 8 mm Drill Bit MIG/MAG Welding Equipment Spot Weld Drill Bit Locking Pliers Materials Name Specification Seam SealerTA-2-B, 3M™ 08308, LORD Fusor® 803DTM - Removal NOTE: The following components are available separately...
Categories
- Manuals Home
- 1st Generation Nautilus Owners Manual
- 1st Generation Nautilus Service Manual
- Opening the Liftgate
- Changing the 12V Battery
- Replacing the Rear Wiper Blades
- New on site
- Most important about car
Opening and Closing the Hood
Opening the Hood
Copyright © 2026 www.linautilus.com