Lincoln Nautilus: Handles, Locks, Latches and Entry Systems / Exterior Front Door Handle. Removal and Installation
Lincoln Nautilus 2018-2026 Service Manual / Body and Paint / Body and Paint / Handles, Locks, Latches and Entry Systems / Exterior Front Door Handle. Removal and Installation
Removal
NOTE: LH side shown, RH side similar.
Both doors
-
Remove the front door trim panel.
Refer to: Front Door Trim Panel (501-05 Interior Trim and Ornamentation, Removal and Installation).
-
NOTE: The front door removed for clarity.
Remove the front door watershield.
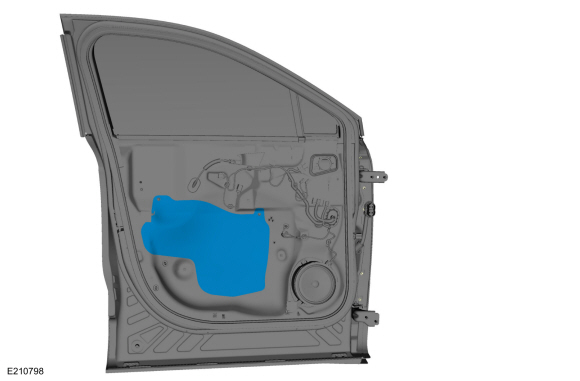 |
-
Remove the grommet.
.jpg) |
-
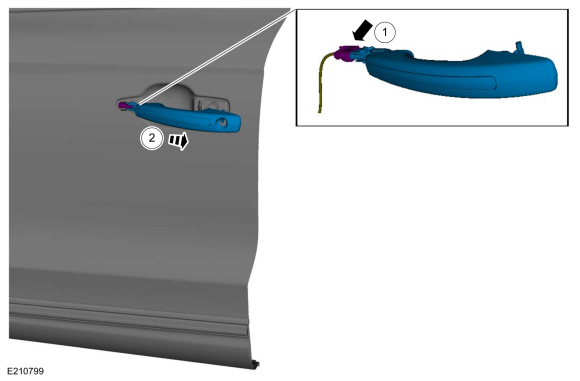
Release the exterior front door handle.
-
Hold the exterior front door handle open.
-
While turning the release screw 8 turns. The
handle releases around 6 to 6.5 turns. You must continue to the full 8
revolutions for installation.
-
Hold the exterior front door handle open.
.jpg) |
-
NOTICE: Do not pull the exterior front door handle out of the door too far without disconnecting the handle from the electrical connector or damage to the harness occurs.
Remove the exterior front door handle.
-
From inside the door, disconnect the exterior
front door handle electrical connector from the exterior front door
handle.
-
Remove the exterior front door handle.
-
From inside the door, disconnect the exterior
front door handle electrical connector from the exterior front door
handle.
 |
Driver door
-
Remove the door lock cylinder.
Refer to: Door Lock Cylinder (501-14 Handles, Locks, Latches and Entry Systems, Removal and Installation).
Passenger door
-
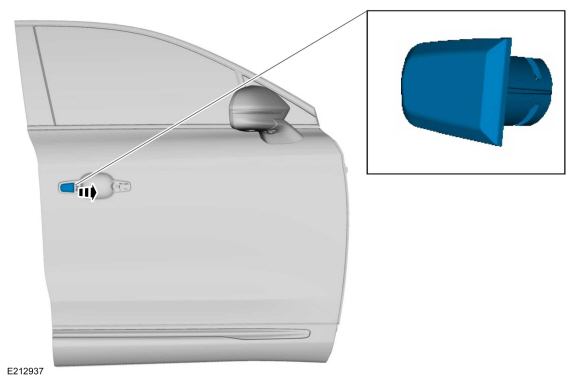
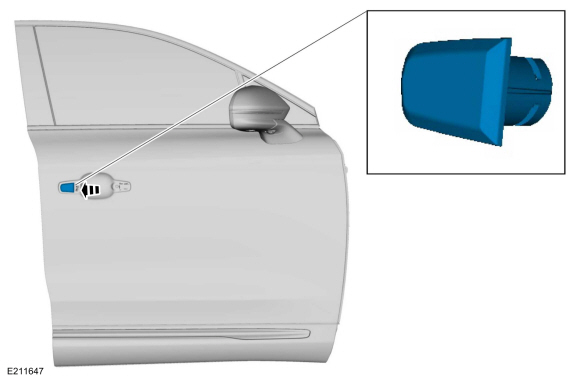
Remove the passenger exterior front door handle plug.
 |
Installation
Passenger door
-
Install the passenger exterior front door handle plug.
 |
Driver door
-
Install the door lock cylinder.
Refer to: Door Lock Cylinder (501-14 Handles, Locks, Latches and Entry Systems, Removal and Installation).
Both doors
-
Install the exterior front door handle.
-
Install the exterior front door handle.
-
From inside the door, connect the exterior front
door handle electrical connector to the exterior front door handle.
-
Install the exterior front door handle.
 |
-
Install the front door handle.
-
Position the front door handle.
-
Apply light pressure to the front door handle
while turning the release screw 8 turns. The handle engages around 6 to
6.5 turns. You must continue to the full 8 revolutions for installation
then torque to the specified value.
Torque: 62 lb.in (7 Nm)
-
Position the front door handle.
.jpg) |
-
Install the grommet.
|
-
Install the front door lower watershield.
|
-
Install the front door trim panel.
Refer to: Front Door Trim Panel (501-05 Interior Trim and Ornamentation, Removal and Installation).
 Door Lock Cylinder. Removal and Installation
Removal
Remove the exterior front door handle.
Refer to: Exterior Front Door Handle (501-14 Handles, Locks, Latches and Entry Systems, Removal and Installation)...
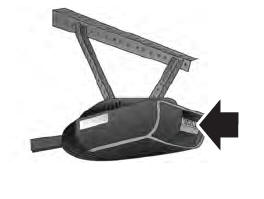
 Exterior Front Door Handle Reinforcement. Removal and Installation
Removal
NOTE:
LH side shown, RH side similar.
Remove the front door latch.
Refer to: Front Door Latch (501-14 Handles, Locks, Latches and Entry Systems, Removal and Installation)...
Other information:
Lincoln Nautilus 2018-2026 Service Manual: Condenser Outlet Line - 2.0L EcoBoost (184kW/250PS) – MI4. Removal and Installation
Removal NOTICE: During the removal of components, cap, tape or otherwise appropriately protect all openings to prevent the ingress of dirt or other contamination. Remove protective materials prior to installation. NOTE: Removal steps in this procedure may contain installation details...
Lincoln Nautilus 2018-2026 Service Manual: Tie Rod. Removal and Installation
Special Tool(s) / General Equipment Tie Rod Remover and Installer Boot Clamp Pliers Materials Name Specification Motorcraft® Premium Long-Life GreaseXG-1-E1 ESA-M1C75-B Removal NOTICE: When servicing inner tie rods, install a new bellows boot and clamps...
Categories
- Manuals Home
- 1st Generation Nautilus Owners Manual
- 1st Generation Nautilus Service Manual
- Drive Mode Control
- Auto-Start-Stop
- Interior Lamp Function. Adjusting the Instrument Panel Lighting Brightness. Ambient Lighting. Interior Lighting – Troubleshooting
- New on site
- Most important about car
Programming the Garage Door Opener to Your Garage Door Opener Motor
Copyright © 2026 www.linautilus.com