Lincoln Nautilus: Handles, Locks, Latches and Entry Systems / Exterior Front Door Handle Reinforcement. Removal and Installation
Lincoln Nautilus 2018-2025 Service Manual / Body and Paint / Body and Paint / Handles, Locks, Latches and Entry Systems / Exterior Front Door Handle Reinforcement. Removal and Installation
Removal
NOTE: LH side shown, RH side similar.
-
Remove the front door latch.
Refer to: Front Door Latch (501-14 Handles, Locks, Latches and Entry Systems, Removal and Installation).
-
NOTE: This step is only necessary when installing a new component.
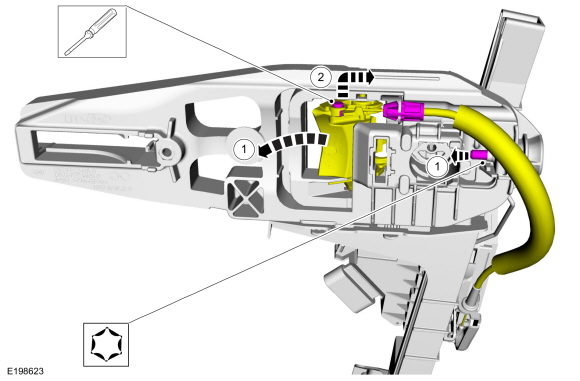
Remove the exterior front door handle reinforcement.
-
Tighten the screw to release the front exterior handle actuation lever tension on the cable.
-
Detach and position aside the cable from the exterior front door handle reinforcement.
-
Tighten the screw to release the front exterior handle actuation lever tension on the cable.
 |
-
NOTE: This step is only necessary when installing a new component.
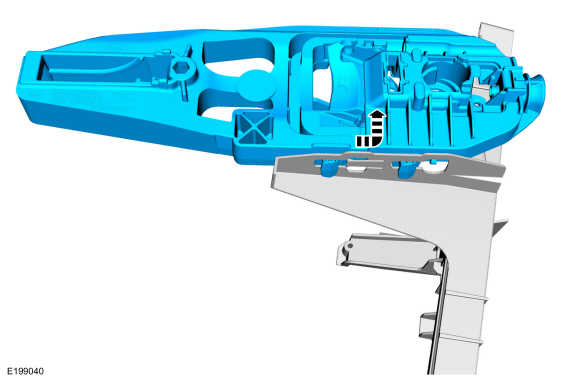
Remove the exterior front door handle reinforcement.
 |
Installation
-
NOTE: This step is only necessary when installing a new component.
Install the exterior front door handle reinforcement.
.jpg) |
-
NOTE: This step is only necessary when installing a new component.
Install the front door latch.
-
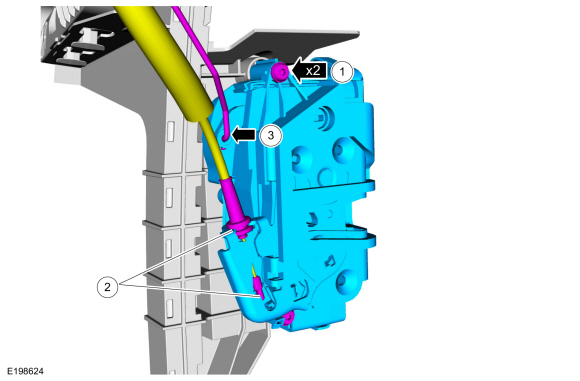
Install the front door latch and the screws.
-
Attach the cable to the front door latch.
-
Attach the rod to the front door latch.
-
Install the front door latch and the screws.
 |
-
NOTE: This step is only necessary when installing a new component.
NOTE: This step must be done correctly or the exterior door handle will not engage the lever on installation.
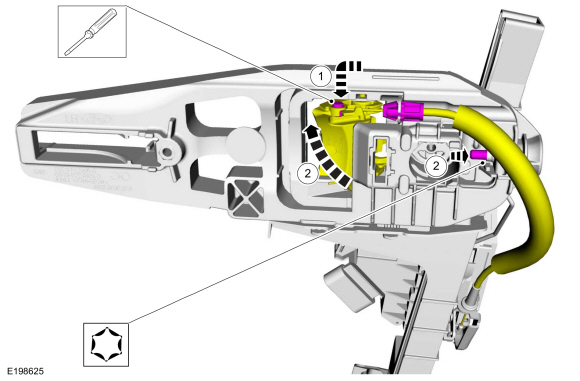
Install the exterior front door handle reinforcement.
-
Install the cable eyelet to the lever.
-
while keeping tension on the cable and holding the
handle lever in the engaged position, turn the release screw until the
handle lever is positioned against the stop.
-
Install the cable eyelet to the lever.
 |
-
Install the front door latch.
Refer to: Front Door Latch (501-14 Handles, Locks, Latches and Entry Systems, Removal and Installation).
-
If the door is equipped with one touch up/down, perform the power door window initialization.
Refer to: Power Door Window Initialization (501-11 Glass, Frames and Mechanisms, General Procedures).
 Exterior Front Door Handle. Removal and Installation
Removal
NOTE:
LH side shown, RH side similar.
Both doors
Remove the front door trim panel.
Refer to: Front Door Trim Panel (501-05 Interior Trim and Ornamentation, Removal and Installation)...
 Exterior Rear Door Handle. Removal and Installation
Removal
NOTE:
LH side shown, RH side similar.
Remove the rear door trim panel.
Refer to: Rear Door Trim Panel (501-05 Interior Trim and Ornamentation, Removal and Installation)...
Other information:
Lincoln Nautilus 2018-2025 Service Manual: Driver Door Module (DDM). Removal and Installation
Removal NOTE: Removal steps in this procedure may contain installation details. NOTE: If installing a new module, it is necessary to upload the module configuration information to the diagnostic scan tool prior to removing the module. This information must be downloaded into the new module after installation...
Lincoln Nautilus 2018-2025 Owners Manual: Cleaning the Interior
Cleaning the Instrument Panel WARNING: Do not use chemical solvents or strong detergents when cleaning the steering wheel or instrument panel to avoid contamination of the airbag system. We recommend that you only clean the instrument panel and cluster lens with a damp soft cloth...
Categories
- Manuals Home
- 1st Generation Nautilus Owners Manual
- 1st Generation Nautilus Service Manual
- Refueling
- Engine Oil Capacity and Specification - 2.0L
- Auto Hold
- New on site
- Most important about car
Parking Aid Indicators. Parking Aids – Troubleshooting
Parking Aid Indicators
The system provides object distance indication through the information and entertainment display.
As the distance to the object decreases, the indicator waves and the lines move toward the vehicle icon. If there is no object detected, the distance indicator lines are grey.Copyright © 2025 www.linautilus.com