Lincoln Nautilus: Rear View Mirrors / Exterior Mirror. Removal and Installation
Lincoln Nautilus 2018-2026 Service Manual / Body and Paint / Body and Paint / Rear View Mirrors / Exterior Mirror. Removal and Installation
Removal
NOTE: Removal steps in this procedure may contain installation details.
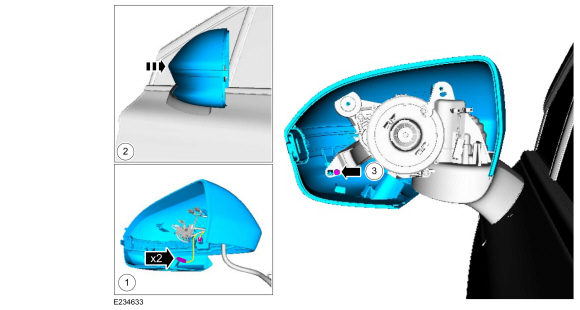
Exterior mirror assembly
-
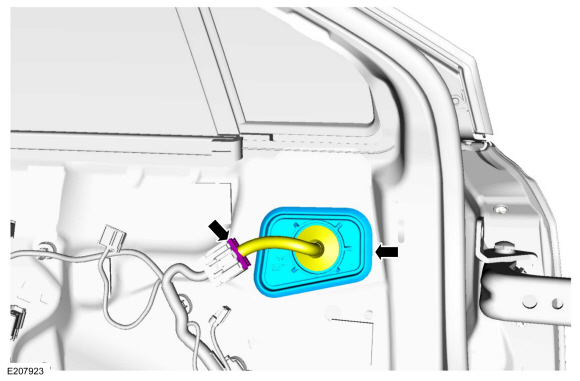
Remove the ft door interior trim panel.
Refer to: Front Door Trim Panel (501-05 Interior Trim and Ornamentation, Removal and Installation).
-
Disconnect the exterior rear view mirror electrical connector and remove the seal.
 |
-
Remove the nuts and the exterior rear view mirror.
Torque: 80 lb.in (9 Nm)
 |
Mirror glass
-
Position the mirror glass in and up.
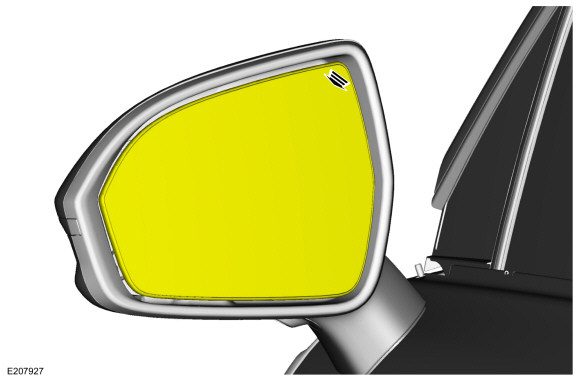 |
-
Remove the mirror glass.
-
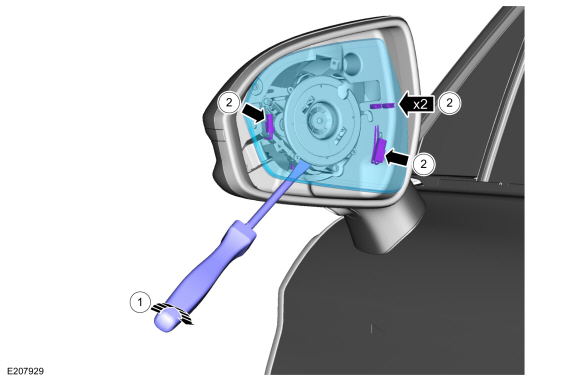
Using a flat blade screwdriver, separate the mirror glass from the mirror motor.
-
Disconnect the mirror glass electrical connectors.
-
Using a flat blade screwdriver, separate the mirror glass from the mirror motor.
 |
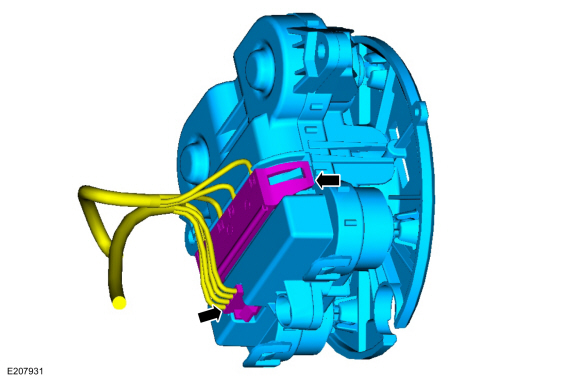
Mirror motor
-
Remove the exterior mirror glass.
-
Remove the screws and position the mirror motor aside.
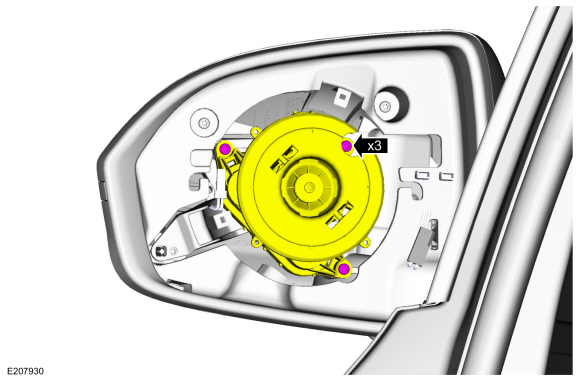 |
-
Disconnect the electrical connectors and remove the mirror motor.
 |
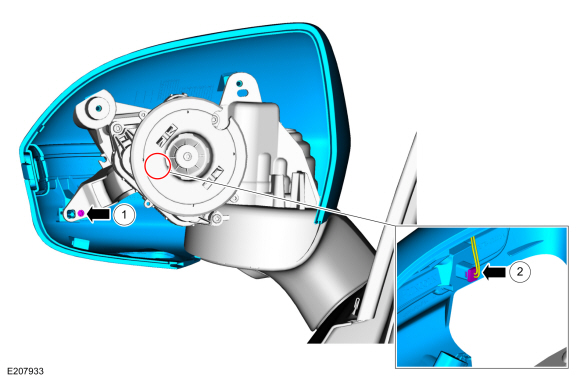
Mirror cover
-
Remove the exterior mirror glass.
-
Remove the mirror bezel.
-
Remove the mirror bezel screws.
-
Release the tabs.
-
Remove the mirror bezel screws.
.jpg) |
-
Remove the puddle lamp.
-
Remove the mirror cover.
-
Remove the screw and position the mirror cover out.
-
Disconnect the mirror mounted turn signal electrical connector.
-
Remove the screw and position the mirror cover out.
 |
Mirror mounted turn signal
-
Remove the exterior mirror cover.
-
Remove the mirror mounted turn signal.
 |
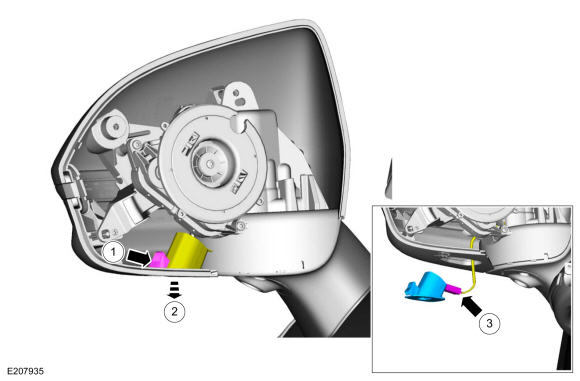
Puddle lamp
-
Remove the exterior mirror glass.
-
Remove the mirror bezel.
-
Remove the mirror bezel screws.
-
Release the tabs.
-
Remove the mirror bezel screws.
|
-
Remove the puddle lamp.
-
Release the tab.
-
Position the puddle lamp down.
-
Disconnect the puddle lamp electrical connector.
-
Release the tab.
 |
Installation
Puddle Lamp
-
To install, reverse the removal procedure.
Mirror mounted turn signal
-
To install, reverse the removal procedure.
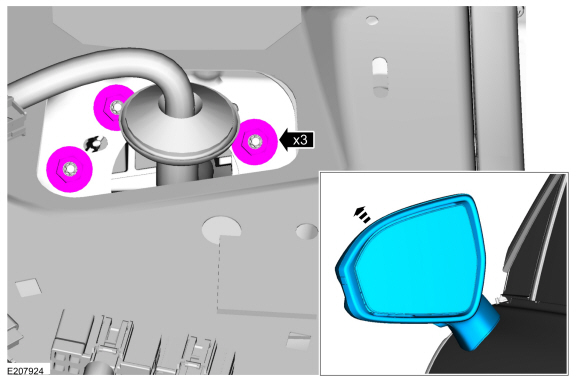
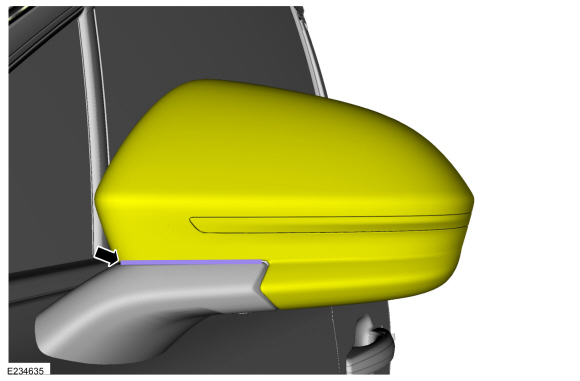
Mirror Cover
-
-
Connect the 2 electrical connectors.
-
Position the mirror cover onto the mirror assembly.
-
Loosely install the screw.
-
Connect the 2 electrical connectors.
 |
-
Position the mirror glass bezel and loosely install the screws.
.jpg) |
-
Install a 2 mm (0.0787 in) feeler gauge blade between the exterior mirror base and the mirror cover.
 |
-
Tighten the screws and remove the feeler gauge.
.jpg) |
Mirror Motor
-
To install, reverse the removal procedure.
Mirror Glass
-
To install, reverse the removal procedure.
Mirror Assembly
-
To install, reverse the removal procedure.
-
On vehicles equipped with 360° camera only.
Align the 360° camera.
Refer to: 360 Degree View Camera Alignment (413-13B Parking Aid - Vehicles With: Parking Aid Camera, General Procedures).
 Power Mirrors Synchronization. General Procedures
Synchronization
NOTE:
The power folding mirrors may need to be synchronized any
time the mirrors are folded or unfolded without using the folding
switch, or if a new power folding mirror is installed...
 Interior Rear View Mirror. Removal and Installation
Removal
NOTE:
Removal steps in this procedure may contain installation details.
Remove the IPMA cover.
Release the tabs and clips from the IPMA cover...
Other information:
Lincoln Nautilus 2018-2026 Service Manual: Hands-Free Liftgate Actuation Lower Sensor. Removal and Installation
Removal NOTE: Removal steps in this procedure may contain installation details. Remove the rear bumper cover. Refer to: Rear Bumper Cover (501-19 Bumpers, Removal and Installation). Remove the lower rear bumper cover. Remove the rivets...
Lincoln Nautilus 2018-2026 Owners Manual: Seatbelt Reminder
How Does the Seatbelt Reminder Work This feature supplements the seatbelt warning function by providing additional reminders that intermittently sound a tone and illuminate the seatbelt warning lamp when you are in the driver seat or you have a front seat passenger and a seatbelt is unbuckled...
Categories
- Manuals Home
- 1st Generation Nautilus Owners Manual
- 1st Generation Nautilus Service Manual
- Power Outlet - Vehicles With: 110V Power Outlet
- Programming the Garage Door Opener to Your Garage Door Opener Motor
- Auto-Start-Stop
- New on site
- Most important about car
Parking Aid Indicators. Parking Aids – Troubleshooting
Parking Aid Indicators
The system provides object distance indication through the information and entertainment display.
As the distance to the object decreases, the indicator waves and the lines move toward the vehicle icon. If there is no object detected, the distance indicator lines are grey.Copyright © 2026 www.linautilus.com