Lincoln Nautilus: Handles, Locks, Latches and Entry Systems / Exterior Rear Door Handle. Removal and Installation
Lincoln Nautilus 2018-2026 Service Manual / Body and Paint / Body and Paint / Handles, Locks, Latches and Entry Systems / Exterior Rear Door Handle. Removal and Installation
Removal
NOTE: LH side shown, RH side similar.
-
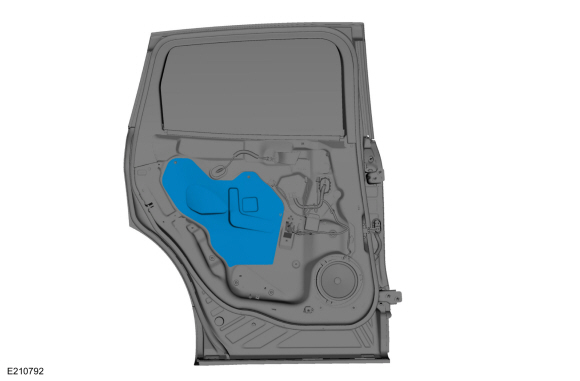
Remove the rear door trim panel.
Refer to: Rear Door Trim Panel (501-05 Interior Trim and Ornamentation, Removal and Installation).
-
Remove the rear door watershield.
 |
-
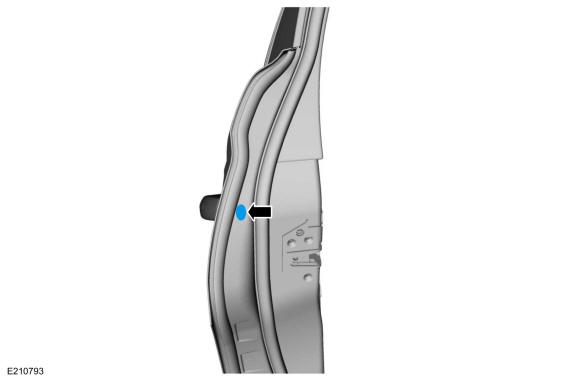
Remove the grommet.
 |
-
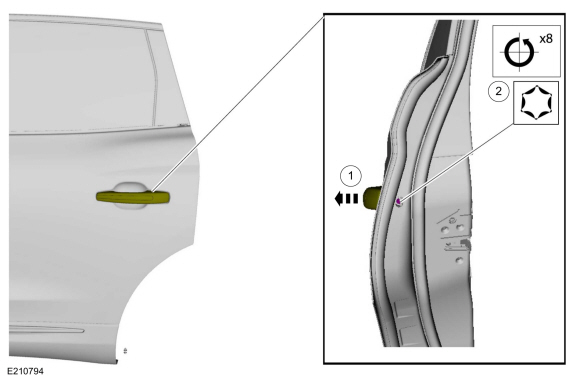
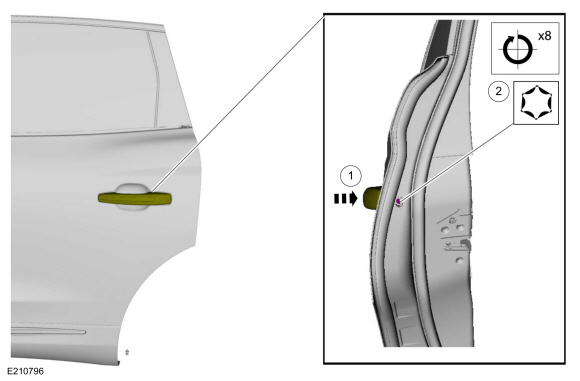
Release the exterior rear door handle.
-
Hold the exterior rear door handle open.
-
While turning the release screw 8 turns. The
exterior rear door handle releases around 6 to 6.5 turns. You must
continue to the full 8 revolutions for installation.
-
Hold the exterior rear door handle open.
 |
-
NOTICE: Do not pull the exterior rear door handle out of the door too far without disconnecting the handle from the electrical connector or damage to the harness occurs.
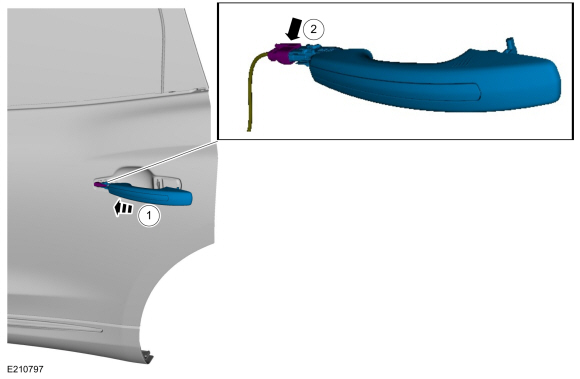
Remove the exterior rear door handle.
-
From inside the door, disconnect the exterior rear
door handle electrical connector from the exterior rear door handle.
-
Remove the exterior rear door handle.
-
From inside the door, disconnect the exterior rear
door handle electrical connector from the exterior rear door handle.
.jpg) |
-
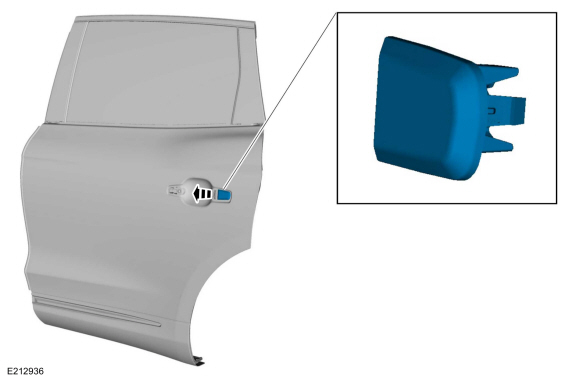
Remove the exterior rear door handle plug.
 |
Installation
-
Install the exterior rear door handle plug.
.jpg) |
-
Install the exterior rear door handle.
-
Install the exterior rear door handle.
-
From inside the door, connect the exterior rear door
handle electrical connector to exterior rear door handle.
-
Install the exterior rear door handle.
 |
-
Install the exterior rear door handle.
-
Position the exterior rear door handle.
-
Apply light pressure to the door handle while
turning the release screw 8 turns. The handle engages around 6 to 6.5
turns. You must continue to the full 8 revolutions for installation then
torque to the specified value.
Torque: 62 lb.in (7 Nm)
-
Position the exterior rear door handle.
 |
-
Install the grommet.
|
-
Install the rear door watershield.
|
-
Install the rear door trim panel.
Refer to: Rear Door Trim Panel (501-05 Interior Trim and Ornamentation, Removal and Installation).
 Exterior Front Door Handle Reinforcement. Removal and Installation
Removal
NOTE:
LH side shown, RH side similar.
Remove the front door latch.
Refer to: Front Door Latch (501-14 Handles, Locks, Latches and Entry Systems, Removal and Installation)...
 Exterior Rear Door Handle Reinforcement. Removal and Installation
Removal
NOTE:
LH side shown, RH side similar.
Remove the rear door latch.
Refer to: Rear Door Latch (501-14 Handles, Locks, Latches and Entry Systems, Removal and Installation)...
Other information:
Lincoln Nautilus 2018-2026 Service Manual: Electronic Leak Detection. General Procedures
Inspection NOTE: Depending on refrigerant used: Use a Rotunda-approved Electronic Leak Detector for R134a refrigerant SAE Certified to J2791. Use a Rotunda-approved Electronic Leak Detector for R-1234yf refrigerant SAE Certified to J2913...
Lincoln Nautilus 2018-2026 Service Manual: Reversing Lamp. Removal and Installation
Removal Remove the liftgate interior trim panel. Refer to: Liftgate Trim Panel (501-05 Interior Trim and Ornamentation, Removal and Installation). Disconnect the reversing lamp electrical connectors. Remove the reversing lamp assembly...
Categories
- Manuals Home
- 1st Generation Nautilus Owners Manual
- 1st Generation Nautilus Service Manual
- Programming the Garage Door Opener to Your Garage Door Opener Motor
- USB Ports
- Auto-Start-Stop
- New on site
- Most important about car
Opening and Closing the Hood
Opening the Hood
Copyright © 2026 www.linautilus.com