Lincoln Nautilus: Body Closures / Front Door Check Arm. Removal and Installation
Lincoln Nautilus 2018-2026 Service Manual / Body and Paint / Body and Paint / Body Closures / Front Door Check Arm. Removal and Installation
Removal
NOTE: Removal steps in this procedure may contain installation details.
NOTE: LH side shown, RH side similar.
-
Open the door.
 |
-
Remove the check arm bolt.
Torque: 18 lb.ft (25 Nm)
 |
-
Remove the front door trim panel.
Refer to: Front Door Trim Panel (501-05 Interior Trim and Ornamentation, Removal and Installation).
-
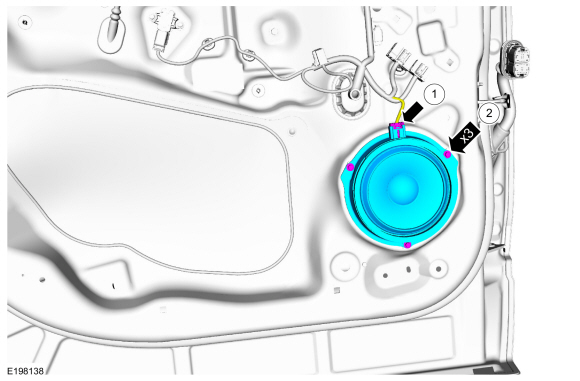
NOTE: Door removed from vehicle for clarity.
Remove the front door speaker.
-
Disconnect the electrical connector.
-
Remove the bolts and the speaker.
Torque: 22 lb.in (2.5 Nm)
-
Disconnect the electrical connector.
 |
-
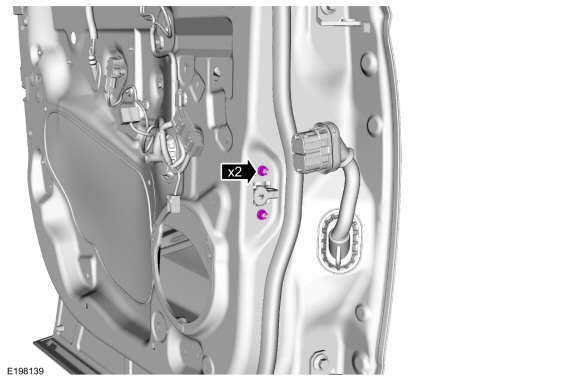
NOTE: Door removed from vehicle for clarity.
Remove the front door check arm nuts.
Torque: 106 lb.in (12 Nm)
 |
-
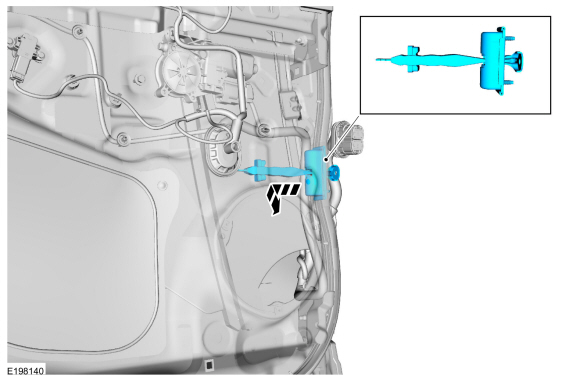
NOTE: Door removed from vehicle for clarity.
Remove the front door check arm assembly.
 |
Installation
-
To install, reverse the removal procedure.
 Front Door. Removal and Installation
Special Tool(s) /
General Equipment
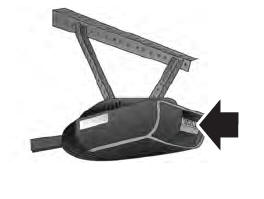
Door Lift
Removal
NOTE:
Removal steps in this procedure may contain installation details.
NOTE:
LH side shown, RH side similar...
 Fuel Filler Door. Removal and Installation
Removal
NOTE:
Removal steps in this procedure may contain installation details.
Open the fuel filler door.
Using a screwdriver, pry the retaining tab back and slide the fuel filler door from the fuel filler door hinge...
Other information:
Lincoln Nautilus 2018-2026 Service Manual: Water Drain Panel Reinforcement. Removal and Installation
Special Tool(s) / General Equipment Resistance Spotwelding Equipment 8 mm Drill Bit MIG/MAG Welding Equipment Spot Weld Drill Bit Locking Pliers Materials Name Specification Seam SealerTA-2-B, 3M™ 08308, LORD Fusor® 803DTM - Removal NOTE: Left hand (LH) side shown, right hand (RH) side similar...
Lincoln Nautilus 2018-2026 Owners Manual: Tire Pressure Monitoring System Overview
WARNING: If the tire pressure monitor sensor becomes damaged it may not function. WARNING: Under-inflation is the most common cause of tire failures and may result in severe tire cracking, tread separation or blowout, with unexpected loss of vehicle control and increased risk of injury...
Categories
- Manuals Home
- 1st Generation Nautilus Owners Manual
- 1st Generation Nautilus Service Manual
- Replacing the Rear Wiper Blades
- Anti-Theft Alarm System Settings. Security – Troubleshooting
- Switching the Lane Keeping System On and Off. Switching the Lane Keeping System Mode
- New on site
- Most important about car
Programming the Garage Door Opener to Your Garage Door Opener Motor
Copyright © 2026 www.linautilus.com