Lincoln Nautilus: Handles, Locks, Latches and Entry Systems / Front Door Latch. Removal and Installation
Lincoln Nautilus 2018-2026 Service Manual / Body and Paint / Body and Paint / Handles, Locks, Latches and Entry Systems / Front Door Latch. Removal and Installation
Removal
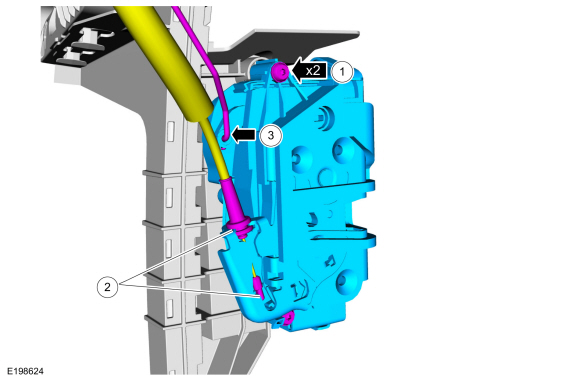
NOTE: LH side shown, RH side similar.
-
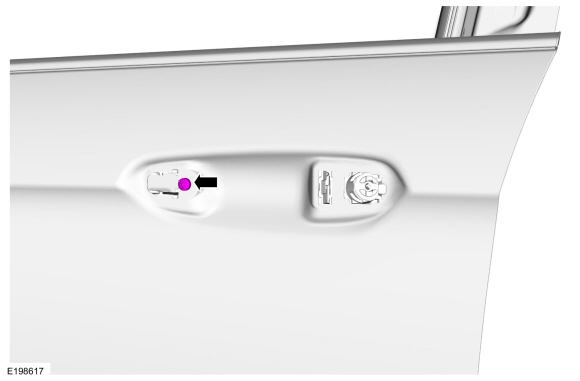
Remove the exterior front door handle.
Refer to: Exterior Front Door Handle (501-14 Handles, Locks, Latches and Entry Systems, Removal and Installation).
-
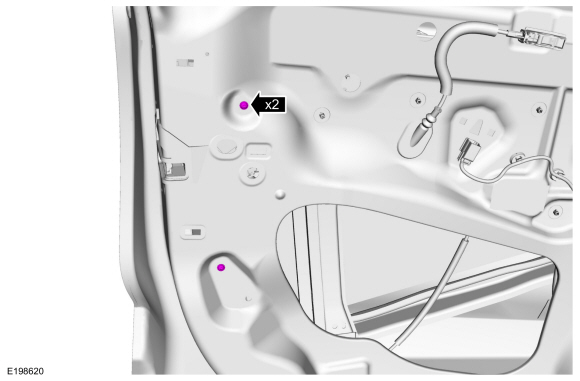
Remove the front door window regulator and motor.
Refer to: Front Door Window Regulator and Motor (501-11 Glass, Frames and Mechanisms, Removal and Installation).
-
Remove the exterior door handle reinforcement screw.
Torque: 62 lb.in (7 Nm)
 |
-
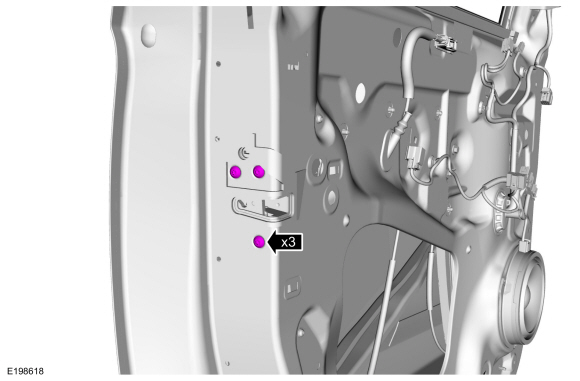
Remove the front door latch bolts.
Torque: 71 lb.in (8 Nm)
 |
-
Disconnect the electrical connector.
 |
-
NOTE: Edge shown, others similar.
Remove the retainer(s).
Torque: 19 lb.in (2.2 Nm)
 |
-
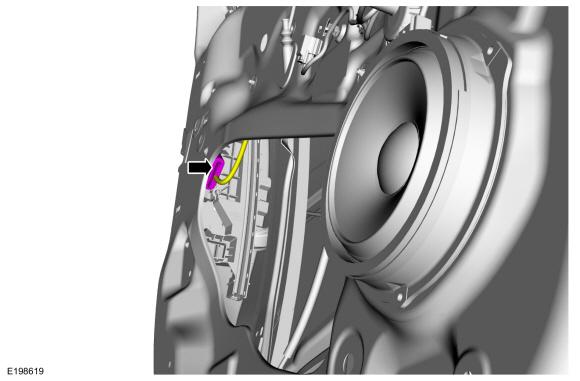
Remove the front door latch.
-
Route the interior front door handle cable through the door.
-
Remove the front door latch.
-
Route the interior front door handle cable through the door.
.jpg) |
-
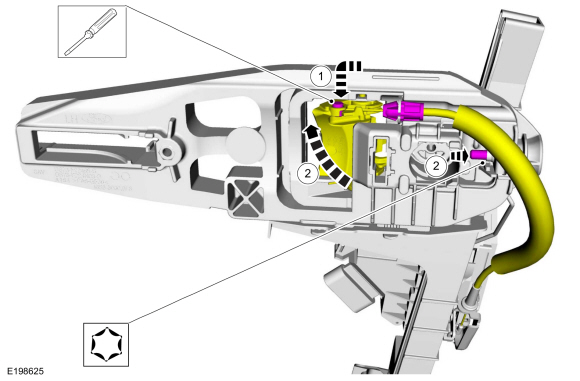
NOTE: This step is only necessary when installing a new component.
Remove the interior front door handle cable from the front door latch.
 |
-
NOTE: This step is only necessary when installing a new component.
Remove the exterior front door handle reinforcement.- Tighten the screw to release the front exterior handle actuation lever tension on the cable.
- Detach and position aside the cable from the exterior front door handle reinforcement.
.jpg) |
-
NOTE: This step is only necessary when installing a new component.
Remove the front door latch.
-
Remove the screws.
-
Detach and position aside the cable from the front door latch.
-
Detach the rod and remove the front door latch.
-
Remove the screws.
 |
Installation
- To install, reverse the removal procedure.
-
NOTE: This step is only necessary when installing a new component.
Install the front door latch.
-
Install the front door latch and the screws.
-
Attach the cable to the front door latch.
-
Attach the rod to the front door latch.
-
Install the front door latch and the screws.
|
-
NOTE: This step is only necessary when installing a new component.
NOTE: This step must be done correctly or the exterior door handle will not engage the lever on installation.
Install the exterior front door handle reinforcement.- Install the cable eyelet to the lever.
- While keeping tension on the cable and holding the handle lever in the engaged position, turn the release screw until the handle lever is positioned against the stop.
 |
-
NOTE: This step is only necessary when installing a new component.
Install the interior front door handle cable to the front door latch.
|
-
If the door is equipped with one touch up/down, perform the power door window initialization.
Refer to: Power Door Window Initialization (501-11 Glass, Frames and Mechanisms, General Procedures).
 Exterior Rear Door Handle Reinforcement. Removal and Installation
Removal
NOTE:
LH side shown, RH side similar.
Remove the rear door latch.
Refer to: Rear Door Latch (501-14 Handles, Locks, Latches and Entry Systems, Removal and Installation)...
 Front Door Lock Control Switch. Removal and Installation
Removal
NOTE:
LH side shown, RH side similar.
Remove the front door trim panel.
Refer to: Front Door Trim Panel (501-05 Interior Trim and Ornamentation, Removal and Installation)...
Other information:
Lincoln Nautilus 2018-2026 Owners Manual: Active Park Assist – Troubleshooting
Active Park Assist – Information Messages Active Park Assist – Frequently Asked Questions Why does active park assist not operate correctly? The system is unable to detect a vehicle, curb or object to park next to or in between. The system needs boundary objects to operate correctly...
Lincoln Nautilus 2018-2026 Service Manual: Direct Current/Alternating Current (DC/AC) Inverter. Diagnosis and Testing
Inspection and Verification Before diagnosing or repairing the Direct Current/Alternating Current (DC/AC) Inverter system refer to the Owner's Literature and REFER to: Direct Current/Alternating Current (DC/AC) Inverter - System Operation and Component Description (414-05 Voltage Converter/Inverter, Description and Operation)...
Categories
- Manuals Home
- 1st Generation Nautilus Owners Manual
- 1st Generation Nautilus Service Manual
- Massage Seats
- Changing the 12V Battery
- Opening and Closing the Hood
- New on site
- Most important about car
Replacing the Rear Wiper Blades
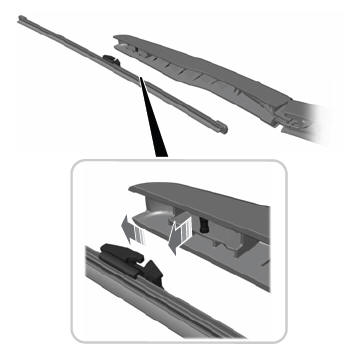
Note: Do not hold the wiper blade to lift the wiper arm.
Remove the wiper blade.Copyright © 2026 www.linautilus.com