Lincoln Nautilus: Exterior Trim and Ornamentation / Front Door Upper Moulding. Removal and Installation
Lincoln Nautilus 2018-2026 Service Manual / Body and Paint / Body and Paint / Exterior Trim and Ornamentation / Front Door Upper Moulding. Removal and Installation
Removal
NOTE: Removal steps in this procedure may contain installation details.
Vehicles With: Keyless Entry
-
Remove the front door latch on the affected side, to gain clearance for removal of the electrical connector.
Refer to: Front Door Latch (501-14 Handles, Locks, Latches and Entry Systems, Removal and Installation).
All vehicles
-
NOTE: Exterior mirror not shown for clarity.
Remove the screw from the front and rear of the door moulding and remove the moulding.
Torque: 13 lb.in (1.5 Nm)
.jpg) |
-
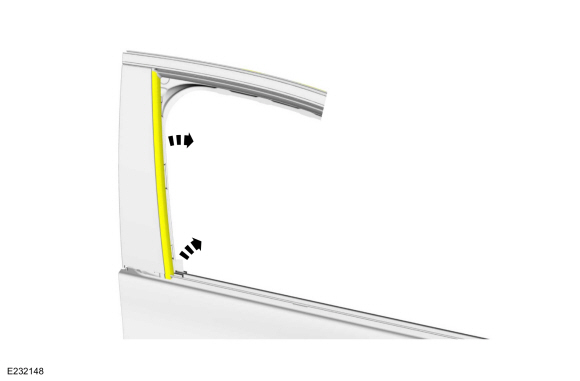
Lower the RH side door glass.
-
Pull B-pillar glass run leg out of the U-channel of the upper moulding.
 |
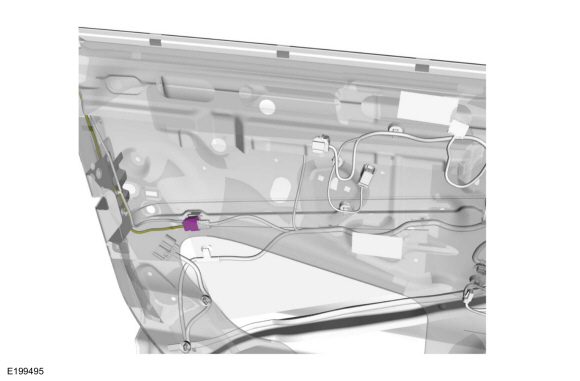
Vehicles With: Keyless Entry
-
Disconnect the electrical connector and route the wiring and connector towards top of door for removal.
 |
All vehicles
NOTE: LH side shown, RH side similar.
-
Remove the screws and pushpin.
Torque: 17 lb.in (1.9 Nm)
.jpg) |
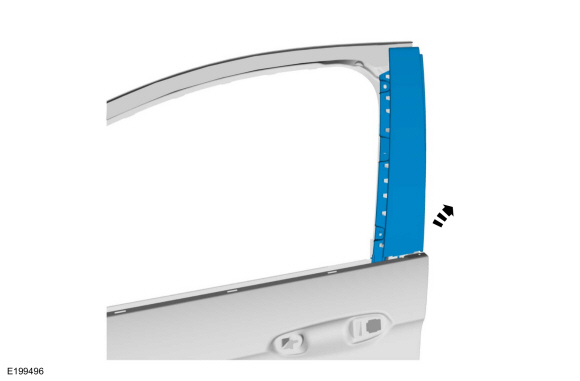
-
Detach the rear edge of the moulding from the door frame and pull the moulding upward to remove.
 |
Installation
-
To install, reverse the removal procedure.
 Front Door Moulding. Removal and Installation
Removal
NOTE:
LH side shown, RH side similar.
NOTE:
Removal steps in this procedure may contain installation details.
NOTICE:
To avoid damage to moulding, only use moderate force...
 Front Fender Moulding. Removal and Installation
Removal
NOTE:
LH side shown, RH side similar.
NOTE:
Removal steps in this procedure may contain installation details.
Remove the pushpins and clip from the rear of the moulding...
Other information:
Lincoln Nautilus 2018-2026 Owners Manual: What Is the 360 Degree Camera. How Does the 360 Degree Camera Work. 360 Degree Camera Precautions. 360 Degree Camera Limitations
What Is the 360 Degree Camera The 360 degree camera system consists of front, side and rear cameras which provide visibility around your vehicle. How Does the 360 Degree Camera Work The 360 Degree Camera system: Allows you to see what is directly in front of or behind your vehicle...
Lincoln Nautilus 2018-2026 Owners Manual: Autowipers
What Are Autowipers Autowipers turns on and controls the speed and frequency of the windshield wipers. Autowipers Settings Using the instrument cluster controls on the steering wheel, select Settings. Select Vehicle. Select Wipers. Switch Rain Sensing on or off...
Categories
- Manuals Home
- 1st Generation Nautilus Owners Manual
- 1st Generation Nautilus Service Manual
- Anti-Theft Alarm System Settings. Security – Troubleshooting
- Locating the Pre-Collision Assist Sensors
- Opening and Closing the Hood
- New on site
- Most important about car
Clearing the Garage Door Opener. Reprogramming the Garage Door Opener. Garage Door Opener Radio Frequencies
Clearing the Garage Door Opener

Copyright © 2026 www.linautilus.com