Lincoln Nautilus: Seatbelt Systems / Seatbelt Shoulder Height Adjuster. Removal and Installation
Lincoln Nautilus 2018-2026 Service Manual / Body and Paint / Body and Paint / Seatbelt Systems / Seatbelt Shoulder Height Adjuster. Removal and Installation
Removal
NOTE: Removal steps in this procedure may contain installation details.
NOTE: LH shown, RH similar.
-
Remove the B-pillar trim panel.
Refer to: B-Pillar Trim Panel (501-05 Interior Trim and Ornamentation, Removal and Installation).
-
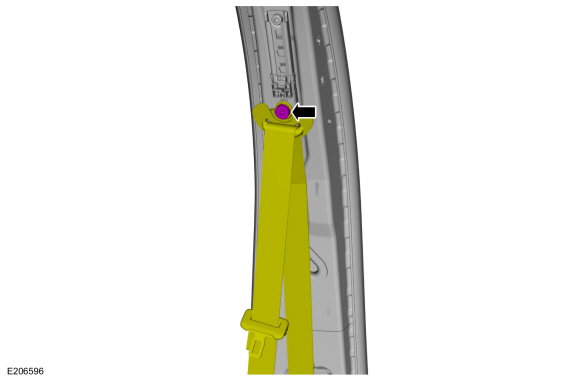
Remove the D-ring bolt and position the seatbelt aside.
Torque: 30 lb.ft (40 Nm)
 |
-
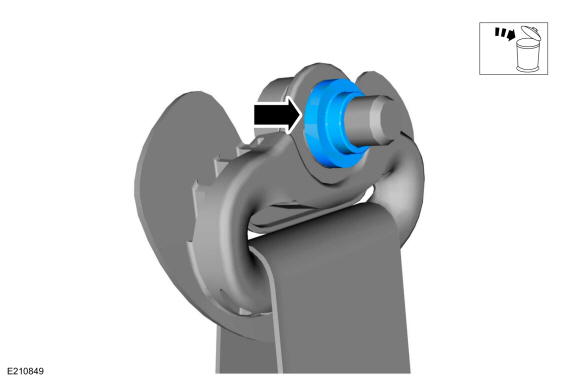
NOTE: This step is only necessary when installing a new component.
NOTE: The spacer is part of the seatbelt shoulder height adjuster.
Remove and discard the spacer from the D-ring bolt.
 |
-
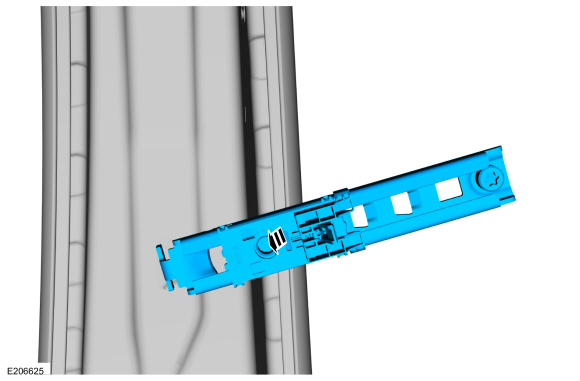
Position the seatbelt height adjuster.
-
Remove the bolt.
Torque: 30 lb.ft (40 Nm)
-
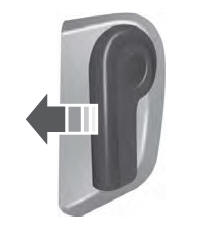
Rotate the seatbelt height adjuster.
-
Remove the bolt.
.jpg) |
-
Remove the seatbelt height adjuster.
 |
Installation
NOTE: During installation, make sure the seatbelt webbing is not twisted and the seatbelts and buckles are accessible to the occupants.
-
To install, reverse the removal procedure.
-
Check the seatbelt system for correct operation.
Refer to: Seatbelt Systems (501-20 Seatbelt Systems) .
 Rear Seatbelt Buckle. Removal and Installation
Removal
NOTE:
Removal steps in this procedure may contain installation details.
All rear seatbelt buckles
Remove the rear seat cushion...
 Rear Seatbelt Retractor and Pretensioner. Removal and Installation
Removal
WARNING:
The following procedure prescribes critical repair steps
required for correct restraint system operation during a crash. Follow
all notes and steps carefully...
Other information:
Lincoln Nautilus 2018-2026 Service Manual: Compression and Cylinder Leakage Test - Gasoline. General Procedures
Make sure the oil in the crankcase is of the correct viscosity and at the correct level and that the battery is correctly charged. Operate the vehicle until the engine is at normal operating temperature. Turn the ignition switch to the OFF position...
Lincoln Nautilus 2018-2026 Service Manual: A-Pillar Trim Panel. Removal and Installation
Special Tool(s) / General Equipment Flat Headed Screw Driver Removal NOTE: Left hand (LH) shown, right hand (RH) similar. Disconnect the tether clips from the A-pillar trim panel. Release the tether clips from the A-pillar trim panel...
Categories
- Manuals Home
- 1st Generation Nautilus Owners Manual
- 1st Generation Nautilus Service Manual
- Auto Hold
- Normal Scheduled Maintenance
- Power Outlet - Vehicles With: 110V Power Outlet
- New on site
- Most important about car
Opening and Closing the Hood
Opening the Hood
Copyright © 2026 www.linautilus.com