Lincoln Nautilus: Wipers and Washers / Washer Hose Coupling. General Procedures
Disconnect
-
Refer to: Health and Safety Precautions (100-00 General Information, Description and Operation). WARNING:
Before beginning any service procedure in this
section, refer to Safety Warnings in section 100-00 General Information.
Failure to follow this instruction may result in serious personal
injury.
WARNING:
Before beginning any service procedure in this
section, refer to Safety Warnings in section 100-00 General Information.
Failure to follow this instruction may result in serious personal
injury.
-
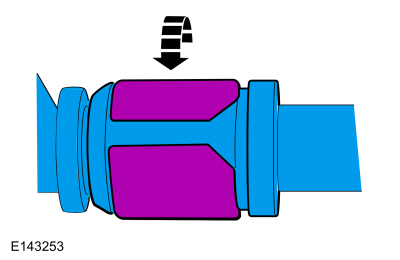
NOTICE: To prevent damage to the coupler, do not use hand tools to disconnect /connect the C-lock.
NOTE: Do not remove the lock ring from the C-lock coupler.
NOTE: Hold the female side of the coupler at the hose connection to prevent the coupler from rotating internally.
Gently twist the lock ring until it has rotated approximately 90 degrees.
 |
-
NOTICE: The female side of the C-lock coupler contains an o-ring seal. Use care not to lose the o-ring.
Slide the C-lock coupler apart from the component fitting.
.jpg) |
-
NOTICE: Do not leave the lock ring in the unlocked position. This will weaken the lock ring and prevent it from correctly locking in place when reassembled, resulting in a leak.
Rotate the lock ring back to the original locked position.
.jpg) |
-
To connect, verify the C-lock coupler lock ring is in the locked position.
-
NOTE: The lock ring flexes open slightly to allow the male fitting to enter the C-lock coupler.
NOTE: The lock ring can be heard as it snaps into the lock position.
Insert the male fitting into the C-lock coupler.
-
Gently pull on the C-lock coupler to verify it is seated correctly.
 Wipers and Washers. Diagnosis and Testing
DTC Chart: BCM
Diagnostics in this manual assume a certain skill level and knowledge of Ford-specific diagnostic practices. REFER to: Diagnostic Methods (100-00 General Information, Description and Operation)...
 Washer Hose Repair. General Procedures
Repair
NOTE:
This procedure may be carried out on rubber hoses only. If a
plastic washer hose is damaged, a new washer hose must be installed.
Locate and verify the damaged washer hose...
Other information:
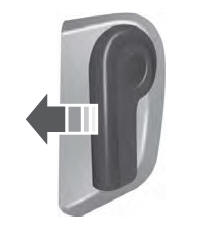
Lincoln Nautilus 2018-2026 Service Manual: C-Pillar Trim Panel. Removal and Installation
Removal NOTE: RH side shown, LH side similar. NOTE: Removal steps in this procedure may contain installation details. Remove the loadspace trim panel. Refer to: Loadspace Trim Panel (501-05 Interior Trim and Ornamentation) . Remove the bolt and position the seatbelt aside...
Lincoln Nautilus 2018-2026 Service Manual: Loadspace Trim Panel. Removal and Installation
Removal NOTE: Right hand (RH) shown, left hand (LH) similar. Release the clips and remove the rear door scuff plate trim panel. If equipped. Remove the load compartment cover. Remove the load compartment floor cover...
Categories
- Manuals Home
- 1st Generation Nautilus Owners Manual
- 1st Generation Nautilus Service Manual
- USB Ports
- Auto Hold
- Normal Scheduled Maintenance
- New on site
- Most important about car
Opening and Closing the Hood
Opening the Hood