Lincoln Nautilus: Wipers and Washers / Wiper Linkage Assembly. Removal and Installation
Removal
NOTE: Removal steps in this procedure may contain installation details.
NOTE: Hood removed in this procedure for clarity.
-
Remove the cowl panel grille.
Refer to: Cowl Panel Grille (501-02 Front End Body Panels) .
-
NOTE: This step is only necessary when installing a new component.
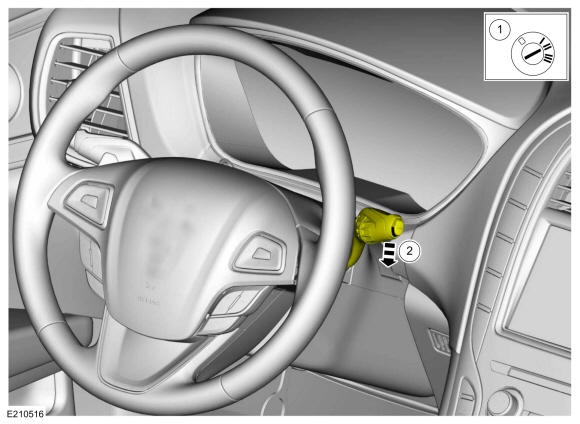
Activate the windshield wipers.
-
Turn the ignition ON.
-
Set the windshield wiper switch to run the wipers continuously.
-
Turn the ignition ON.
 |
-
NOTE: This step is only necessary when installing a new component.
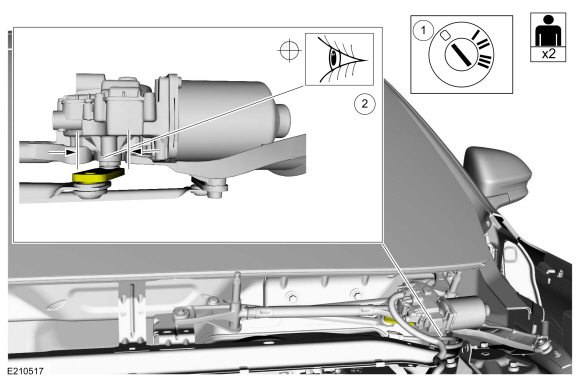
NOTE: To aid in aligning the wiper motor crank between the alignment marks, turn the ignition switch OFF when the wiper motor crank reaches one o'clock position. This ensures the wiper motor crank comes to rest between the five o'clock and the seven o'clock position which is within the alignment marks.
Align the wiper motor crank to access the wiper motor bolts.
-
Turn the ignition OFF when the motor crank reaches
the one o'clock position, ensuring the wiper motor crank comes to rest
between the five o'clock and seven o'clock position.
-
Visually verify the wiper motor crank is between the
five o'clock and the seven o'clock position, which is within the
alignment marks.
-
Turn the ignition OFF when the motor crank reaches
the one o'clock position, ensuring the wiper motor crank comes to rest
between the five o'clock and seven o'clock position.
 |
-
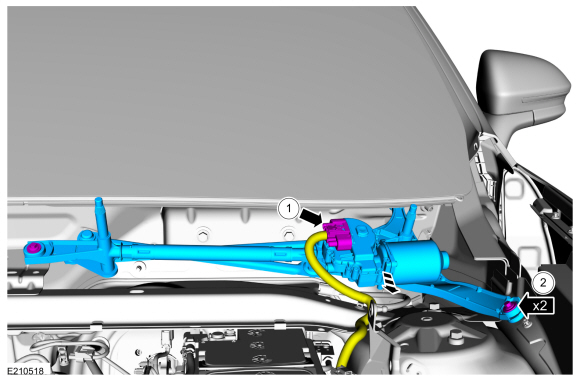
Remove the wiper linkage assembly.
-
Disconnect the electrical connector.
-
Remove the bolts.
Torque: 62 lb.in (7 Nm)
-
Disconnect the electrical connector.
 |
-
NOTE: This step is only necessary when installing a new component.
NOTE: This step is only necessary if the wiper linkage assembly mount grommet remains in the square locator hole after the wiper motor has been removed.
Remove the wiper linkage assembly mount grommet.
 |
-
NOTICE: Be careful not to damage the link seals during removal. Failure to follow this instruction may result in poor windshield wiper performance.
NOTE: This step is only necessary when installing a new component.
Detach the windshield wiper link from the windshield wiper motor crank.
-
Detach the link.
-
Position the link aside.
-
Detach the link.
.jpg) |
-
NOTE: This step is only necessary when installing a new component.
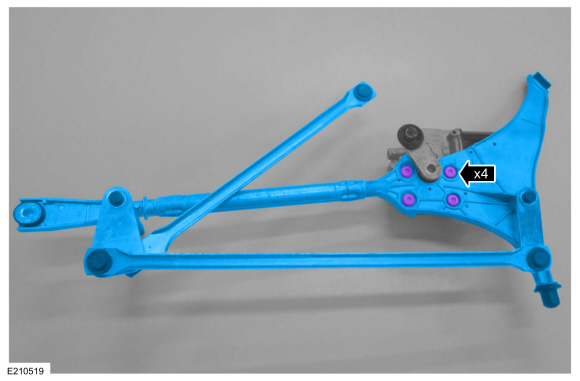
Remove the bolts and the wiper linkage assembly.
Torque: 115 lb.in (13 Nm)
 |
Installation
-
To install, reverse the removal procedure.
 Windshield Wiper Pivot Arm. Removal and Installation
Special Tool(s) /
General Equipment
Two Leg Puller
Removal
Remove windshield wiper pivot arm nut covers.
Remove windshield wiper pivot arm nuts...

Other information:
Lincoln Nautilus 2018-2026 Service Manual: Rear Drive Halfshafts. Diagnosis and Testing
Preliminary Inspection Visually inspect the CV joints, housing, boots, and clamps for obvious signs of mechanical damage. If an obvious cause for an observed or reported concern is found, correct the cause (if possible) before proceeding to the next step If the cause is not visually evident, verify the symptom and REFER to Symptom Chart: NVH. Symptom Chart(s) Diagn..
Lincoln Nautilus 2018-2026 Owners Manual: Switching Apple CarPlay On and Off
Enabling Apple CarPlay with USB Connect your device to a USB port. Follow the instructions on your device and the touchscreen. Note: Selecting "Enable Wireless CarPlay" on your device will prepare the device for wireless carplay when you re-enter the vehicle. Enabling Apple CarPlay with Wireless Pair your device to Bluetooth. Follow the instructions on your device and the touchscreen..
Categories
- Manuals Home
- 1st Generation Nautilus Owners Manual
- 1st Generation Nautilus Service Manual
- Opening and Closing the Hood
- Interior Lamp Function. Adjusting the Instrument Panel Lighting Brightness. Ambient Lighting. Interior Lighting – Troubleshooting
- Fuel Quality
- New on site
- Most important about car
Replacing the Rear Wiper Blades
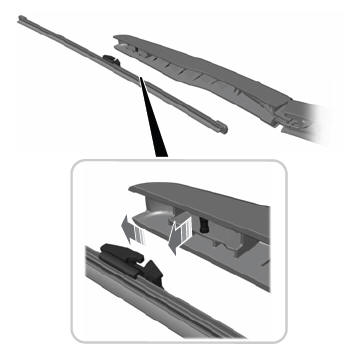
Note: Do not hold the wiper blade to lift the wiper arm.
Remove the wiper blade.