Lincoln Nautilus: Body Closures / Rear Door. Removal and Installation
Lincoln Nautilus 2018-2026 Service Manual / Body and Paint / Body and Paint / Body Closures / Rear Door. Removal and Installation
Special Tool(s) / General Equipment
| Door Lift |
Removal
NOTE: Removal steps in this procedure may contain installation details.
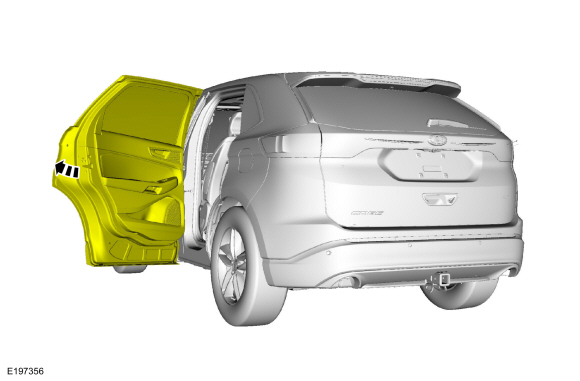
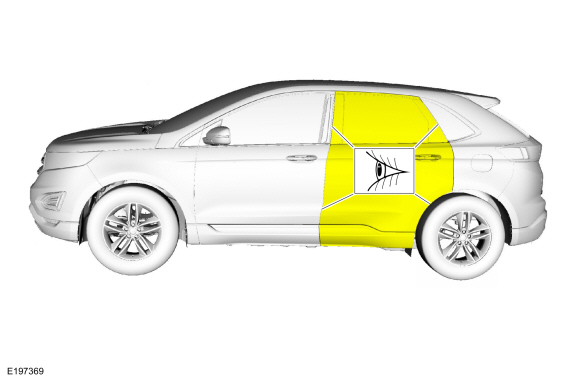
NOTE: LH side shown, RH side similar.
-
Open the door.
 |
-
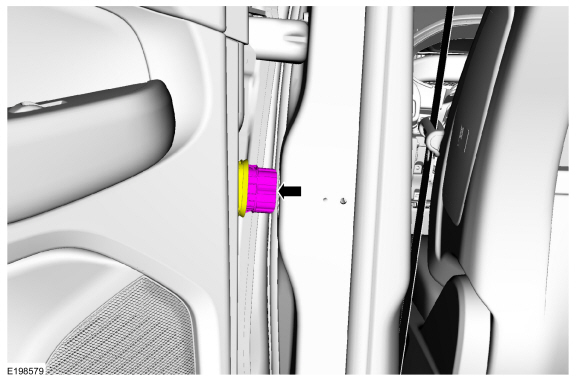
Remove the check arm bolt.
Torque: 18 lb.ft (25 Nm)
.jpg) |
-
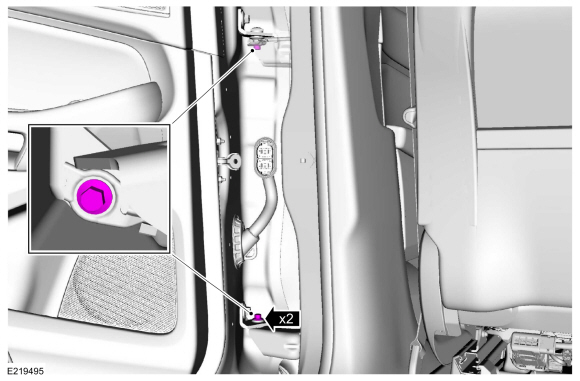
Disconnect the rear door electrical connector.
 |
-
Remove the door hinge pivot bolts.
Use the General Equipment: Door Lift
Torque: 22 lb.ft (30 Nm)
 |
-
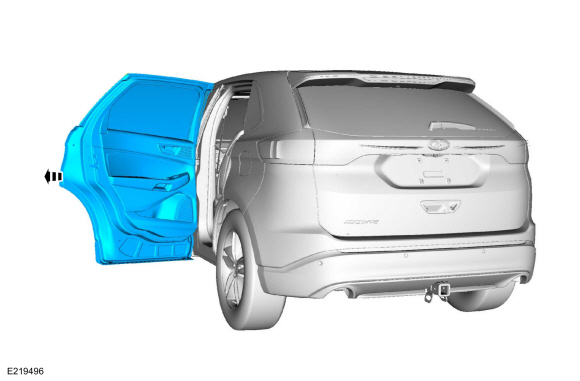
Remove the rear door.
Use the General Equipment: Door Lift
 |
Installation
-
To install, reverse the removal procedure.
-
NOTE: This step is only necessary when installing a new component.
Check the door-to-body alignment. Align the door as necessary.
Refer to: Rear Door Alignment (501-03 Body Closures, General Procedures).
 |
 Power Liftgate Motor. Removal and Installation
Removal
Remove the D-pillar trim panel.
Refer to: D-Pillar Trim Panel (501-05 Interior Trim and Ornamentation, Removal and Installation).
NOTICE:
Take extra care not to crease the headliner...
 Rear Door Check Arm. Removal and Installation
Removal
NOTE:
Removal steps in this procedure may contain installation details.
NOTE:
LH side shown, RH similar.
Open the door.
Remove the rear check arm bolt...
Other information:
Lincoln Nautilus 2018-2026 Service Manual: Water Drain Panel. Removal and Installation
Special Tool(s) / General Equipment Resistance Spotwelding Equipment 8 mm Drill Bit MIG/MAG Welding Equipment Spot Weld Drill Bit Locking Pliers Materials Name Specification Seam SealerTA-2-B, 3M™ 08308, LORD Fusor® 803DTM - Removal NOTE: Left hand (LH) side shown, right hand (RH) side similar...
Lincoln Nautilus 2018-2026 Service Manual: Joining Techniques. General Procedures
Special Tool(s) / General Equipment Resistance Spotwelding Equipment Grinder Plasma Cutter Air Body Saw 8 mm Drill Bit MIG/MAG Welding Equipment Spot Weld Drill Bit Materials Name Specification Metal Bonding AdhesiveTA-1, TA-1-B, 3M™ 08115, LORD Fusor® 108B, Henkel Teroson EP 5055 - Seam SealerTA-2-B, 3M™ 08308, LORD Fusor® 803DTM..
Categories
- Manuals Home
- 1st Generation Nautilus Owners Manual
- 1st Generation Nautilus Service Manual
- Child Safety Locks
- Folding the Exterior Mirrors - Vehicles With: Manual Folding Mirrors. Folding the Exterior Mirrors - Vehicles With: Power Folding Mirrors
- Locating the Pre-Collision Assist Sensors
- New on site
- Most important about car
Clearing the Garage Door Opener. Reprogramming the Garage Door Opener. Garage Door Opener Radio Frequencies
Clearing the Garage Door Opener

Copyright © 2026 www.linautilus.com