Lincoln Nautilus: Instrument Panel and Console / Instrument Panel Upper Section. Removal and Installation
Special Tool(s) /
General Equipment
Removal
-
.jpg) WARNING:
Before beginning any service procedure in this
manual, refer to health and safety warnings in section 100-00 General
Information. Failure to follow this instruction may result in serious
personal injury.
WARNING:
Before beginning any service procedure in this
manual, refer to health and safety warnings in section 100-00 General
Information. Failure to follow this instruction may result in serious
personal injury.
Refer to: Pyrotechnic Device Health and Safety Precautions (100-00 General Information, Description and Operation).
-
Depower the SRS .
Refer to: Supplemental Restraint System (SRS) Depowering (501-20B Supplemental Restraint System, General Procedures).
-
Release the clips and remove the lower RH instrument panel trim panel.
Use the General Equipment: Interior Trim Remover
-
NOTE:
RH shown, LH similar.
On both sides, release the clips and remove the trim panel.
Use the General Equipment: Interior Trim Remover
-
NOTE:
RH shown, LH similar.
On both sides, remove the trim panel.
-
Remove the floor console.
Refer to: Floor Console (501-12 Instrument Panel and Console, Removal and Installation).
-
Remove the A-pillar trim panels.
Refer to: A-Pillar Trim Panel (501-05 Interior Trim and Ornamentation, Removal and Installation).
-
Remove the instrument panel speaker.
Refer to: Instrument Panel Speaker (415-00 Information and
Entertainment System - General Information - Vehicles With: SYNC 4,
Removal and Installation).
-
Release the clips and remove the information display trim panel.
Use the General Equipment: Interior Trim Remover
-
Remove the bolts and the information dispaly unit.
-
Disconnect the electrical connector.
Torque:
12 lb.in (1.3 Nm)
-
Remove the screw, release the clips and remove the lower center instrument panel trim panel.
Use the General Equipment: Interior Trim Remover
-
Release the clips and remove the finish panel.
Use the General Equipment: Interior Trim Remover
-
Remove the the switch.
-
Disconnect the electrical connector.
Use the General Equipment: Interior Trim Remover
-
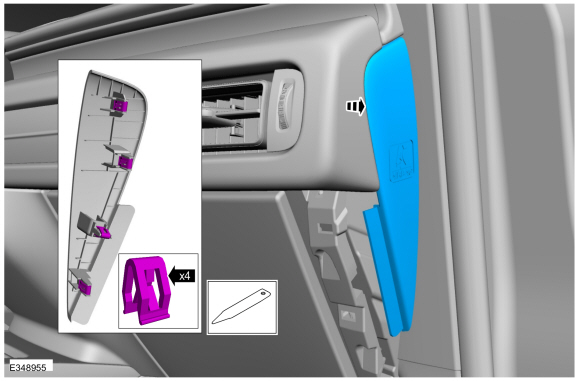
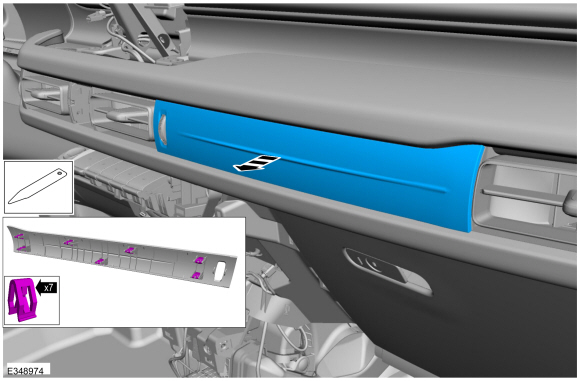
Release the clips and remove the RH instrument panel finish panel.
Use the General Equipment: Interior Trim Remover
-
Remove the bolt, release the clips and remove the RH instrument panel trim panel.
Use the General Equipment: Interior Trim Remover
Torque:
22 lb.in (2.5 Nm)
-
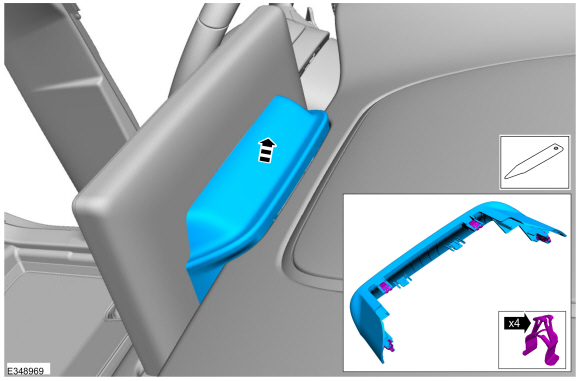
Release the clips and remove the LH instrument panel trim panel.
Use the General Equipment: Interior Trim Remover
-
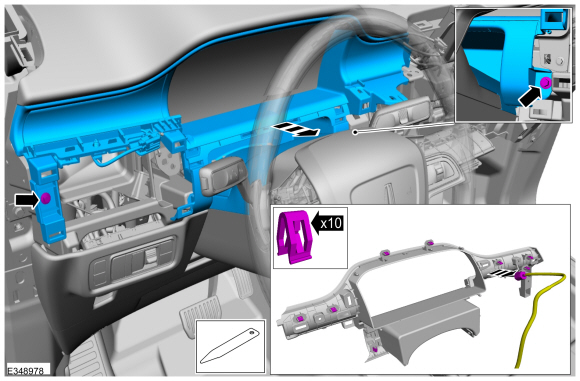
Remove the bolts, release the clips and remove the IPC bezel.
-
Detach the upper steering column trim panel.
-
Disconnect the electrical connector.
Use the General Equipment: Interior Trim Remover
Torque:
22 lb.in (2.5 Nm)
-
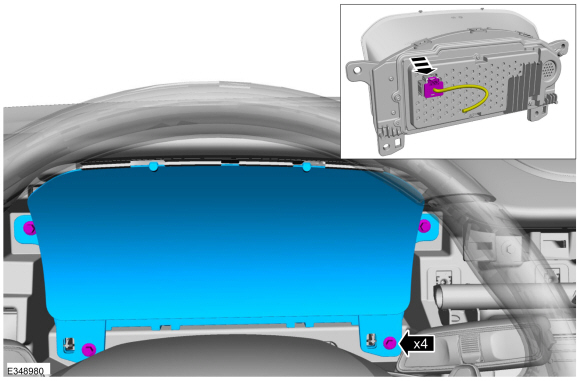
Remove the bolts and the IPC .
-
Disconnect the electrical connector.
Torque:
22 lb.in (2.5 Nm)
-
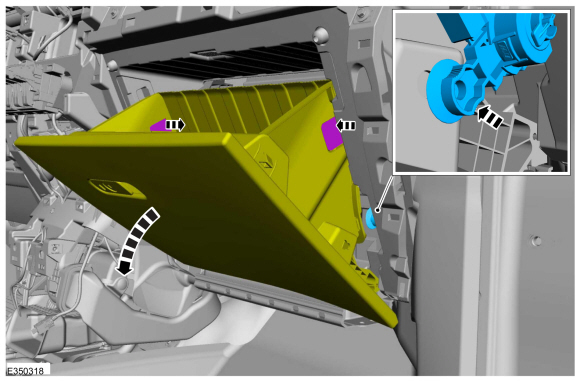
Release the tabs, remove the dampening strap and fully lower the glove compartment door.
-
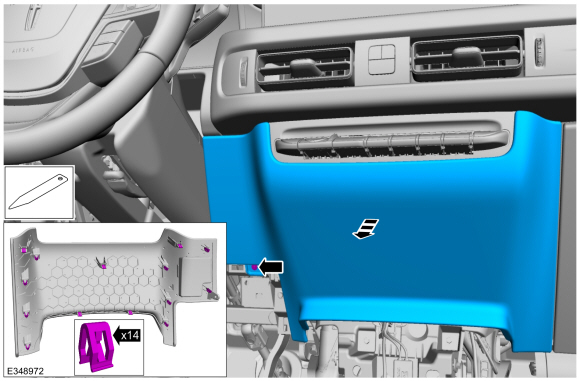
Remove the bolts, release the clips and remove the glove compartment close-out.
-
Disconnect the electrical connector.
-
Remove the bolts the instrument panel speaker mounting bracket.
-
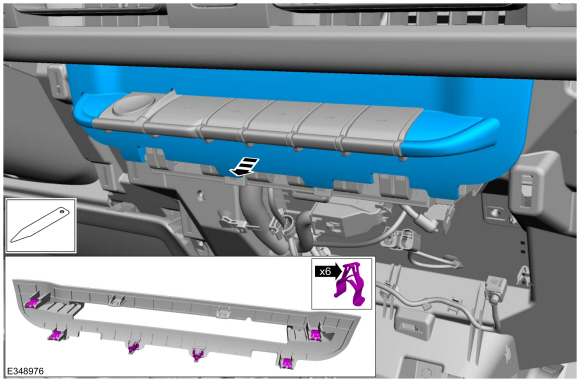
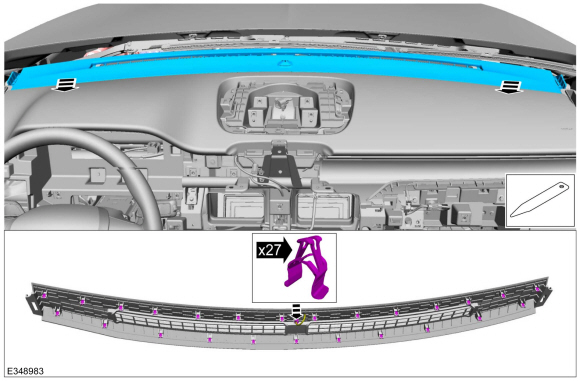
Release the clips and remove the defrost grille trim panel.
Use the General Equipment: Interior Trim Remover
-
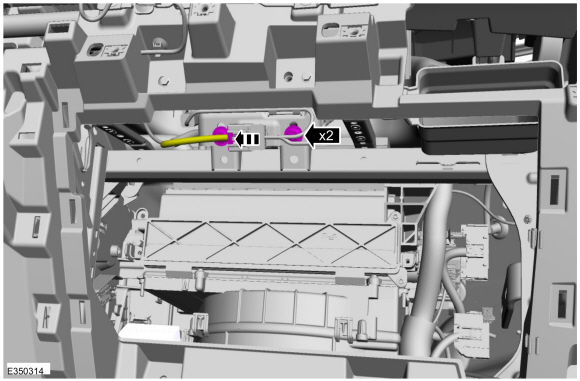
Remove the bolts.
-
Disconnect the electrical connector.
Torque:
89 lb.in (10 Nm)
-
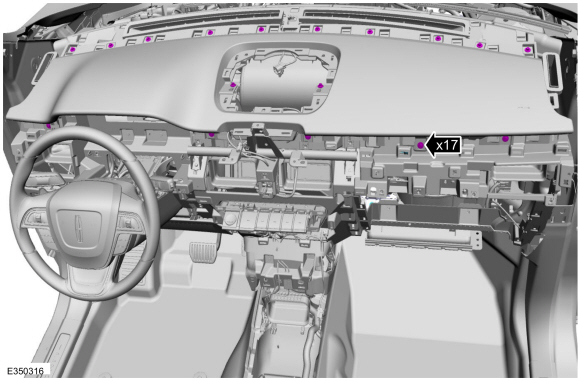
Remove the insturment panel upper section bolts.
Torque:
22 lb.in (2.5 Nm)
-
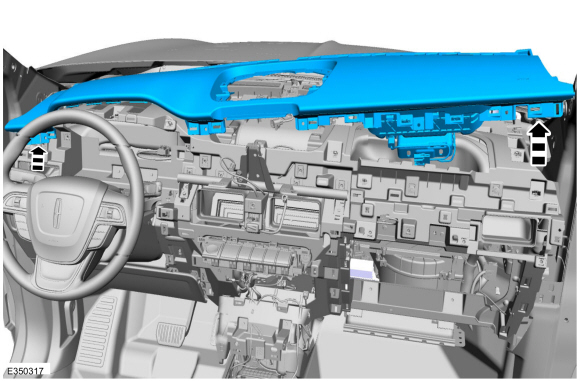
Lift insturment panel upper section enough to clear the passenger side air bag and remove.
Installation
-
To install, reverse the removal procedure.
-
Repower the SRS .
Refer to: Supplemental Restraint System (SRS) Repowering (501-20B Supplemental Restraint System, General Procedures).
Special Tool(s) /
General Equipment
Interior Trim Remover
Removal
All vehicles
NOTE:
Removal steps in this procedure may contain installation details...
Removal
NOTE:
Removal steps in this procedure may contain installation details.
Insert trim tool in location(s) shown.
Rotate the tool 90 degrees to release the overhead console rear retainers...
Other information:
System Diagram
Item
Description
1
PCM
2
BCM
3
Direct Current/Alternating Current (DC/AC) Inverter
4
A/C Power Outlet Socket
System Operation
Network Message Chart
Broadcast Message
Originating Module
Message Purpose
Power pack torque status
PCM
Used to dete..
Accessing Feature Drawers
Application Drawer
Press the button to open and
close
the application drawer. It contains
system and connected device
applications.
Note: The icon may change depending on
your personalization settings.
Vehicle Drawer
Press the button to open and
close
the vehicle drawer. It contains
vehicle feature settings.
Information On Demand Screen
Press the button to view..

.jpg)

.jpg)
.jpg)
.jpg)
.jpg)
.jpg)
 Instrument Panel. Removal and Installation
 Overhead Console. Removal and Installation